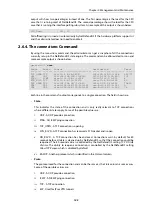
This terminates any traceroute that is in progress .
gw-world:/> traceroute -stop
•
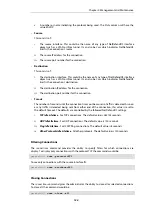
-timeout
This is the amount of time NetDefendOS will wait for a response from a router or the
destination before it increases the time-to-live and tries again.
gw-world:/> traceroute server.example.com -timeout=2000
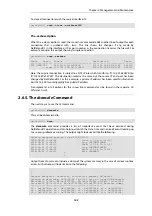
Any timeout conditions are indicated in the traceroute output. An example of this is shown
below:
gw-world:/> traceroute example.com
Tracing example.com [10.120.184.11], 30 hops max, 32 bytes of data
Hop#
RTT
RTT
RTT
Host
1
0 ms
0 ms
10 ms
10.4.16.1
2
10 ms
10 ms
10 ms
10.4.0.2
3
10 ms
10 ms
10 ms
10.131.48.2
4
*
*
*
Request timed out
A timeout could occur because any of the following:
i.
A router or the destination may not be set up to respond to ICMP ping messages.
ii.
The destination host may be offline.
Combining Options
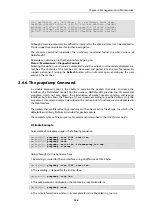
Any of the above options can be combined in a single command. For example:
gw-world:/> traceroute server.example.com -count=2 -starthop=3 -maxhops=4
Hop#
RTT
RTT
Host
3
10 ms
10 ms
10.131.48.2
4
10 ms
10 ms
ge1-1-0-617.cty-pe3.una.se.ip.tzc.net [10.88.215.44]
5
10 ms
10 ms
te2-1-80.zty-p2.sfl.se.ip.tzc.net [10.131.143.226]
6
120 ms
120 ms
10.82.35.201
Maximum hops reached.
A complete description of all the command options can be found in the separate
CLI Reference
Guide
.
2.6.8. The frags Command
IP datagram fragmentation results from the breaking down of larger packets into smaller
datagram fragments that can fit within the
Maximum Transmission Unit
(MTU) size of the network
equipment they must traverse. When such fragments are received by NetDefendOS,
packet
reassembly
takes place to reconstruct the entire packet before it is forwarded.
The CLI command
frags
allows the administrator to examine the current status of the reassembly
process. Using the
frags
command without any parameters lists the currently active reassemblies
as shown in the example output below.
gw-world:/> frags
RecvIf Num
State
Source
Destination
Protocol Next
Timeout
------ ---- ------- ------------ ------------- -------- ----- -------
If1
886
Unknown 192.168.1.6
192.168.2.1
ESP
0 593/593
Chapter 2: Management and Maintenance
131
Содержание NetDefendOS
Страница 30: ...Figure 1 3 Packet Flow Schematic Part III Chapter 1 NetDefendOS Overview 30 ...
Страница 32: ...Chapter 1 NetDefendOS Overview 32 ...
Страница 144: ...Chapter 2 Management and Maintenance 144 ...
Страница 220: ... Enable DHCP passthrough Enable L2 passthrough for non IP protocols 4 Click OK Chapter 3 Fundamentals 220 ...
Страница 267: ... SourceNetwork lannet DestinationInterface any DestinationNetwork all nets 4 Click OK Chapter 3 Fundamentals 267 ...
Страница 284: ...Chapter 3 Fundamentals 284 ...
Страница 360: ...The ospf command options are fully described in the separate NetDefendOS CLI Reference Guide Chapter 4 Routing 360 ...
Страница 392: ...Chapter 4 Routing 392 ...
Страница 396: ...Web Interface 1 Go to Network Ethernet If1 2 Select Enable DHCP 3 Click OK Chapter 5 DHCP Services 396 ...
Страница 419: ... Host 2001 DB8 1 MAC 00 90 12 13 14 15 5 Click OK Chapter 5 DHCP Services 419 ...
Страница 420: ...Chapter 5 DHCP Services 420 ...
Страница 424: ...2 Now enter Name lan_Access Action Expect Interface lan Network lannet 3 Click OK Chapter 6 Security Mechanisms 424 ...
Страница 573: ...Chapter 6 Security Mechanisms 573 ...
Страница 575: ...This section describes and provides examples of configuring NAT and SAT rules Chapter 7 Address Translation 575 ...
Страница 607: ...Chapter 7 Address Translation 607 ...
Страница 666: ...Chapter 8 User Authentication 666 ...
Страница 775: ...Chapter 9 VPN 775 ...
Страница 819: ...Chapter 10 Traffic Management 819 ...
Страница 842: ...Chapter 11 High Availability 842 ...
Страница 866: ...Default Enabled Chapter 13 Advanced Settings 866 ...
Страница 879: ...Chapter 13 Advanced Settings 879 ...

