


DWR-980
Quick Installation Guide
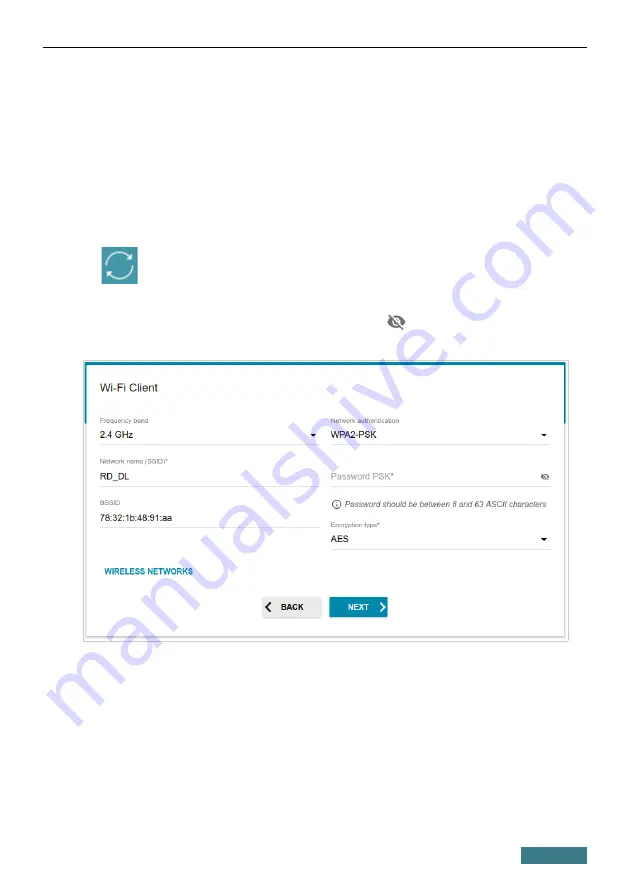
Wi-Fi Client
This configuration step is available for the
Wi-Fi
mode.
1. On the
Wi-Fi Сlient
page, click the
WIRELESS NETWORKS
button
and select the network to which you want to connect in the opened
window. When you select a network, the
Network name (SSID)
and
BSSID
fields are filled in automatically.
If you cannot find the needed network in the list, click the
UPDATE LIST
icon (
).
2. If a password is needed to connect to the selected network, fill in the
relevant field. Click the
Show
icon (
) to display the entered
password.
If you connect to a hidden network, select the band where the hidden network
operates from the
Frequency band
list and enter the network name in the
Network name (SSID)
field. Then select a needed value from the
Network
authentication
list and then, if needed, enter the password in the relevant
field.
3.
Click the
NEXT
button.
22