3
C .
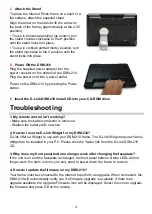
Attach the Stand
To place the Internet Photo frame on a shelf or a
flat surface, attach the supplied stand.
Align the arrow on the stand with the arrow on
the back of the frame (approximately at the 2:00
position).
• To use in horizontal position (as shown), turn
the stand counter-clockwise to the H position
until the stand locks into place.
• To use in vertical (portrait mode) position, turn
the stand clockwise to the V position until the
stand locks into place.
D .
Power ON the DSM-210
Plug the supplied power adapter into the
power receptor on the bottom of the DSM-210.
Plug the power cord into a power outlet.
Power on the DSM-210 by pressing the Power
button.
E .
Insert the D-Link DSM-210 install CD into your CD-ROM drive
Troubleshooting
1. My remote control isn’t working?
- Make sure the battery protector is removed
- Replace the battery with new one
2. How do I use the D-Link Widget for my DSM-210?
D-Link offers a Widget to use with your DSM-210 frame. The D-Link Widget requires Yahoo
Widgets to be installed in your PC. Please click the Yahoo link from the D-Link DSM-210
CD.
3. Why does my front panel button no longer work after changing the faceplate?
If the unit is on and the faceplate is changed, the front panel buttons & blue LEDs will not
longer work. No harm is done, you only need to power down the frame to recover.
4. How do I update the firmware on my DSM-210?
Your frame must be connected to the Internet to perform an upgrade. When connected, the
DSM-210 will automatically notify you if a firmware upgrade is available. If there is an
upgrade available, the Upgrade Firmware icon will be displayed. Select the icon to upgrade
the firmware and press OK on the remote.
Содержание DSM-210 - Wireless Internet Photo Frame
Страница 8: ...8 Notes ...
Страница 12: ...12 Notes ...
Страница 16: ...16 Notes ...
Страница 20: ...20 Notes ...

