


Connecting the Router to your
Computer cont…
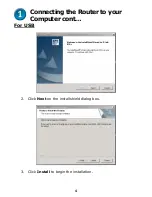
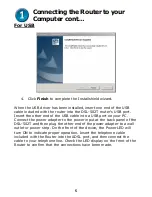
For USB
IMPORTANT: Do not connect the USB cable to the computer before
completing the below steps.
Insert DSL-502T CD-ROM into the CD-ROM drive. Within a few seconds
you should see the dialog box shown below. If you do not see the
auto-run dialog box shown below, explore the CD-ROM and double-
click the setup application file autorun.exe. The auto-run USB driver
setup must be completed before connecting the router to your PC with
the USB cable. To install the driver follow these instructions:
1.
Click the Install DSL-502T link to launch the USB driver
installation software.
3