


9
Step 6
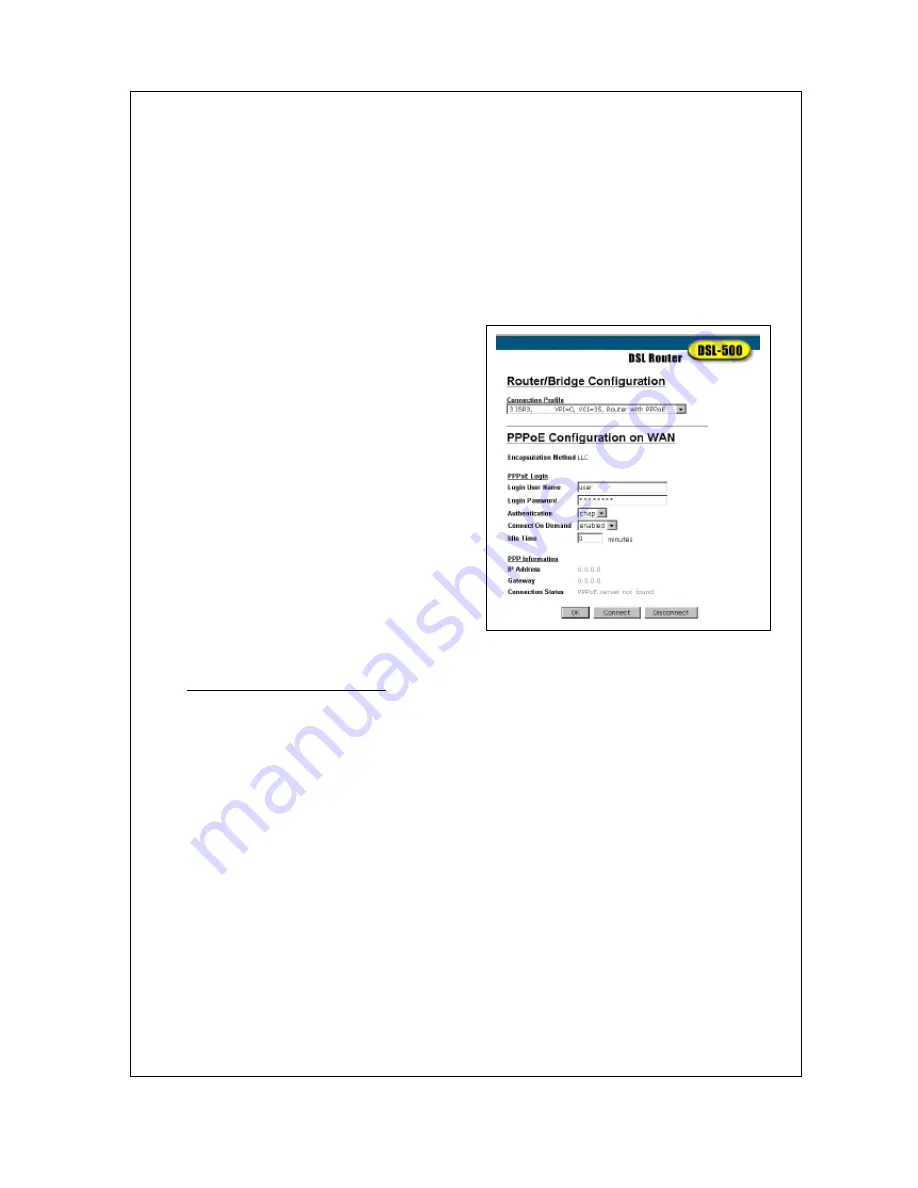
Connect to WAN
PPP Connections
Although the connection methods differ significantly, from the viewpoint of the ADSL subscriber, there
is little difference between the two variations of PPP connections. The information entered for PPPoE
connections is the same as that used for PPPoA connections.
Once you have changed the connection method to PPPoE, saved the configuration change and restarted
the device, you can proceed to enter authentication information used to connect to the WAN. Follow
these steps:
1.
Under
PPPoE Login
, enter the
Login User Name
used for your network account. The user name and
login password, are used to authenticate the identity of
the ADSL client and provide access to the service
provider’s network. The user name and login
password can be any combination of up to 64
characters.
2.
Enter the Login Password.
3.
Unless you are instructed to use a different
Authentication
method, leave the default
chap
protocol selected. The alternative method,
pap
, can be
selected from the pull-down menu if required by the
service provider.
5.
Leave the
Connect on Demand
option as
enabled
in
the pull-down menu. This will allow the Router to
establish a WAN connection upon restarting.
6.
Leave
Idle Time
set to the default value 0.
Click on the
OK
button on the bottom of the window.
The
Save changes and reboot system?
message
prompt appears.
7. Click
OK
to save a restart. The Router will connect to
the WAN automatically.
RFC 1483 Bridged Ethernet Connections
If you are using the “Bridged Ethernet” method for the WAN connection, the global IP settings must be
configured in another device. When using this connection method, the device functions as a bridge, so it is
does not perform any IP functions. The device will have a IP address on the LAN, but not on the WAN
interface. After changing the connection profile to
Bridge with RFC 1483
, you will need to configure the PC
or server connected to the DSL-500 so the WAN interface a way to obtain a global IP address. This can be
accomplished in different ways according to the circumstances of your network and the nature of your ADSL
subscriber account. Your network service provider will give you instructions or additional computer software
as needed to handle global IP settings for your account.
IPoA Connections
IPoA connections may require that global IP settings be configured for the device manually or be configured to
use DHCP to obtain these settings. If you are instructed to set the WAN IP address manually or use DHCP,
read the
IPoA Configuration
section of Chapter 5 of the User’s Guide. Otherwise, the connection will be
established upon restarting the device.
Содержание DSL-500
Страница 2: ......