background image

l

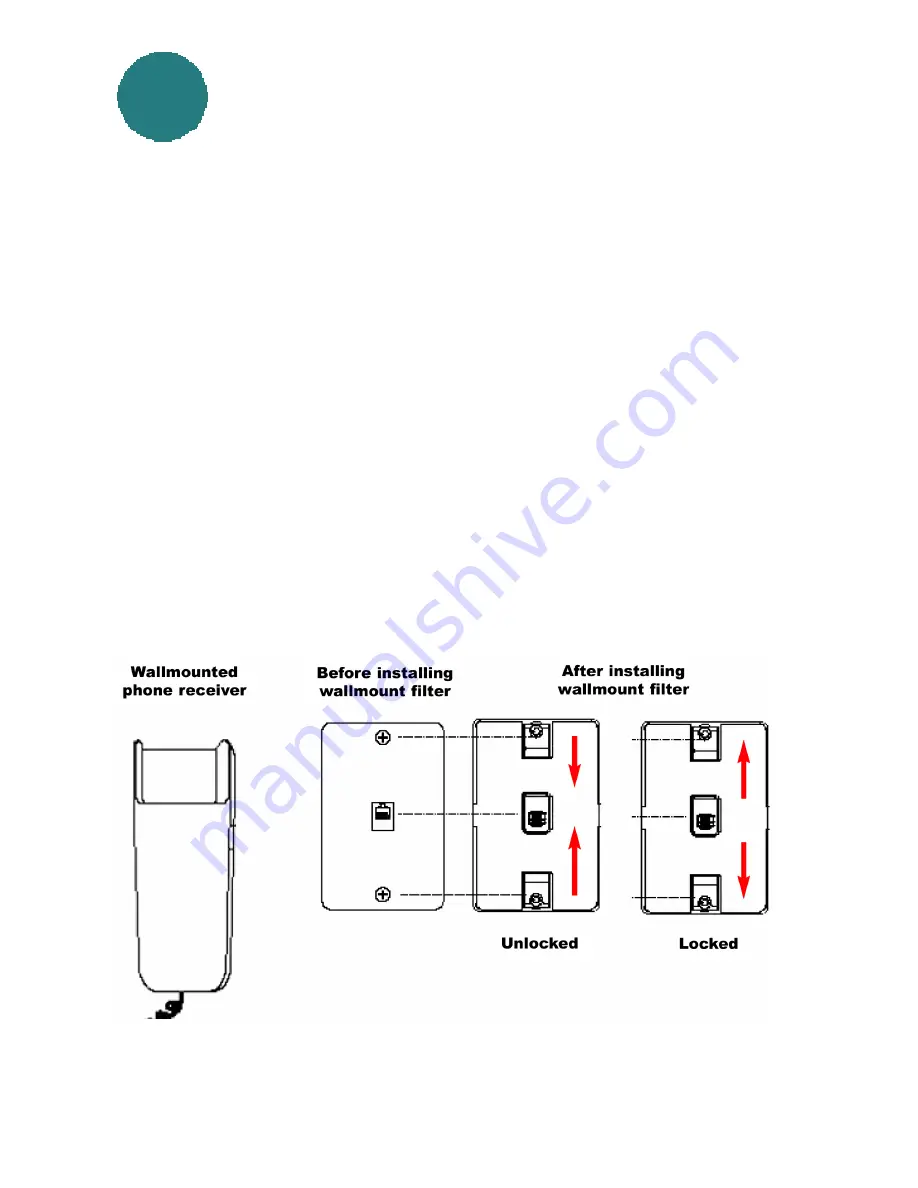
Remove the phone.  On some phones you must pull out a locking lever

before  removing the phone.  Then push up on the phone and pull it out from
the wall.

l

Slide the filter locking tabs (located at the top and bottom on the front of the

filter) to the UNLOCKED position.

l

Place the filter over the existing wall outlet, aligning the plug and mounting

slots with the socket and mounting tabs on the existing outlet, then push into
place.

l

Move the locking tabs to the LOCKED position as indicated in the drawing.

l

Mount the phone.  If your phone has a locking lever, be sure it is unlocked

before  you mount it.  Position the phone’s plug and mounting slots over the
filter jack and metal mounting pegs.  Press the phone in and pull down until
secure.

l

If desired, install your ADSL or Home Phoneline Network (HPN) device

cord into the jack on the left side of the adapter.  An answering machine may
also be attached to the jack on the right side of the filter.

Installing the “Z-Blocker” filter on a

Installing the “Z-Blocker” filter on a

wall-mounted telephone, using the

wall-mounted telephone, using the

wall-mount filter

wall-mount filter

3

3

Содержание DSL-500

Страница 1: ...DSL 500 CZ DSL 500 CZ ADSL Router ADSL Router Quick Install Guide Quick Install Guide...

Страница 2: ...to Step 4 Connecting the DSL 500 CZ If you are installing DSL yourself please follow all instructions Install a Z Blocker phone filter at Install a Z Blocker phone filter at EACH EACH telephone wall...

Страница 3: ...into the wall jack lPlug the RJ 11 cable into one adapter jack lPlug the LINE end of a Z Blocker filter into the other adapter jack lPlug your telephone devices into the PHONE jack on the Z Blocker fi...

Страница 4: ...OCKED position as indicated in the drawing lMount the phone If your phone has a locking lever be sure it is unlocked before you mount it Position the phone s plug and mounting slots over the filter ja...

Страница 5: ...r of filters in your home to the fewest practical Do this by 1 Using one filter to isolate several devices 2 Not installing filters on unused phone jacks l Do not use more than one filter for each tel...

Страница 6: ...of the DSL 500 CZ labeled Ethernet Link will glow steadily 4 4 To setup the DSL 500 CZ begin by connecting it to a power source Once the unit power is on insert one end of the included Ethernet cable...

Страница 7: ...our cable connections to make sure that they are correct and securely installed When you have completed all the connections your DSL 500 CZ will look like this 4 4 Power Cord Plug the other end of the...

Страница 8: ...hborhood Win 98 98SE or My Network Places Win ME 2000 icon on your desktop Click Properties Highlight the line that reads TCP IP and points to your installed Ethernet NIC Click Properties At this scre...

Страница 9: ...DSL 500 CZ s Web Based Accessing the DSL 500 CZ s Web Based Management Management The DSL 500 CZ requires Internet Explorer 4 0 or higher or Netscape Communicator 4 0 or higher Please open your Web B...

Страница 10: ...automatically If your current selection does not work select pap Please be certain that enabled is displayed in the Connect On Demand field Make sure PVC settings are entered correctly VPI 0 VCI 35 7...

Страница 11: ...ration Click on Save Changes in the left column of the screen Note Do not manually restart the modem It will automatically restart by itself Once you are finished with your installation you should be...

Страница 12: ...make the con nection For the phoneline we have included a small crossover box that will convert your cable This way if your DSL signal is coming from a dif ferent set of phone wires in your wall this...

Отзывы: