6
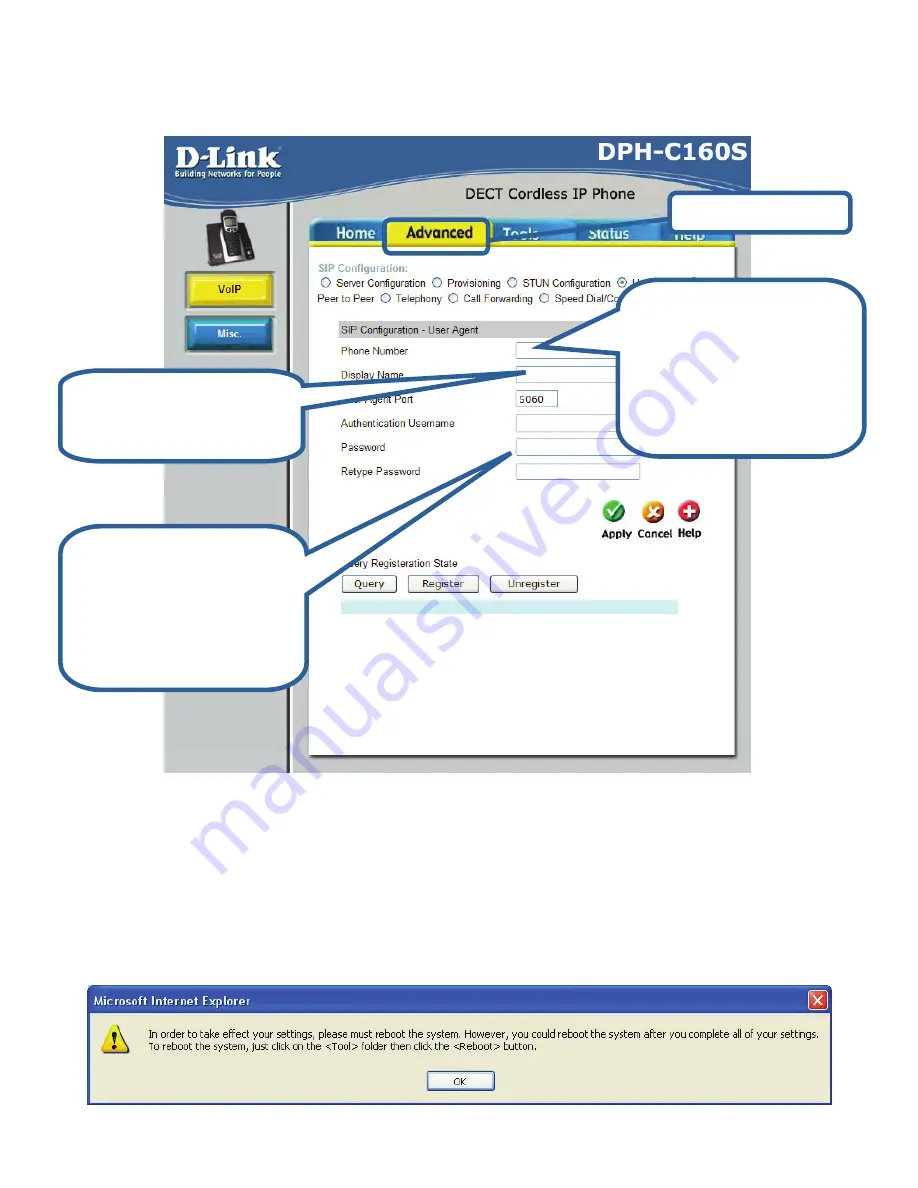
Now you need to configure the DPH-C160S to use the VoIP Service.
Click the
Advanced
tab and then click the
VoIP
button on the left side.
You should ignore all of the other default settings unless instructed to
change them by your
VoIP Service Provider. To save the changes click
the
Apply
button.
The following dialog box will prompt you to restart the DPH-C160S DECT
Cordless VoIP Phone to make your new settings take effect.
Click
Advanced
.
Step 1:
Enter your
username/phone
number from your VoIP
Account Details into the
Phone Number
and
Authentication
Username
fields.
Step 3:
Enter your
password from your
VoIP Account Details
into the
Password
and
Retype Password
fields.
Step 2:
Enter your full
name into the
Display
Name
field.


