INSTALLATION
~ 7 ~
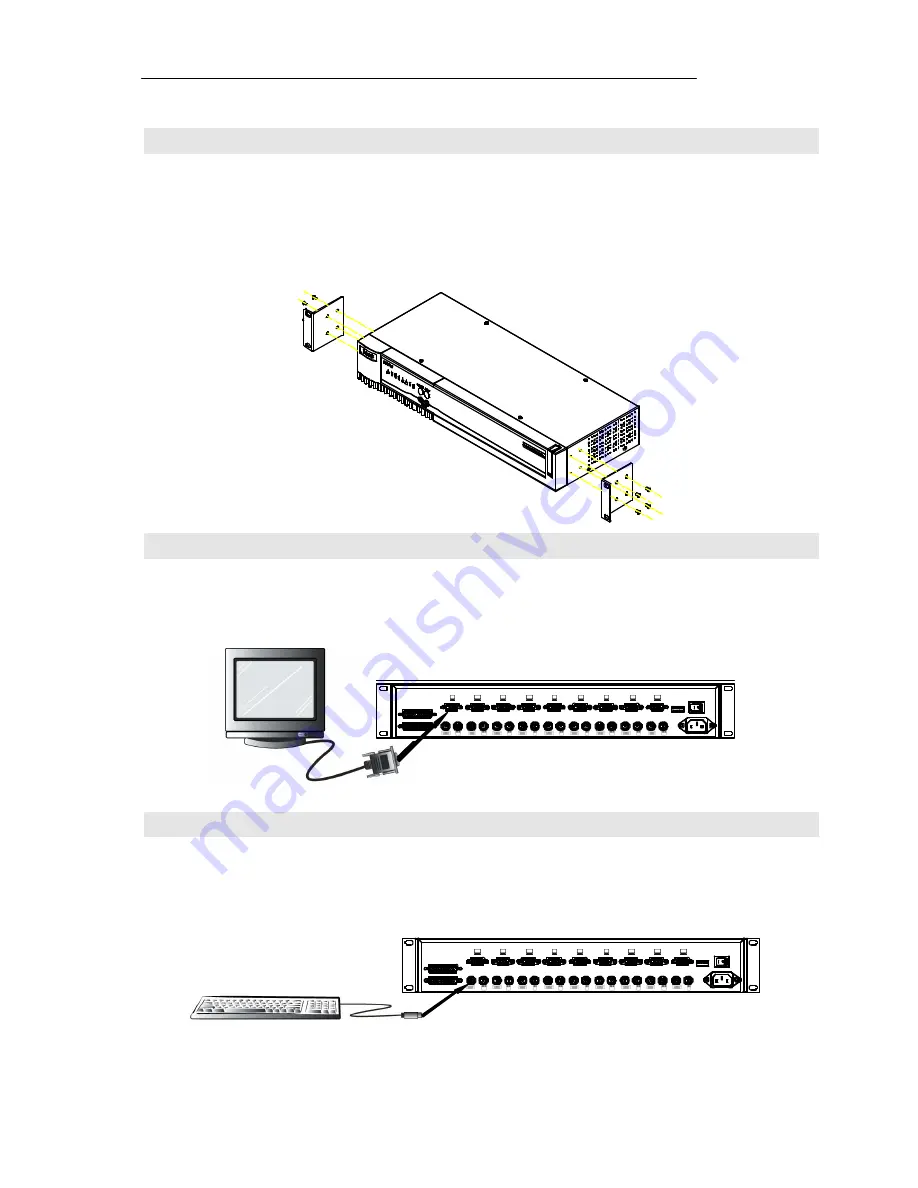
Step 2
Find a convenient place to put your DKVM-8. Its 19” rack mount form factor makes it
ideal mountable on 19” rack. When mounting to a rack, attach the included brackets to
the sides of the DKVM-8. Take note of the length of your cables so that your computers,
DKVM-8, keyboard, mouse and monitor are distanced properly.
Step 3
Connect the monitor to the DKVM-8. Using the attached cable, or the one included with
your monitor, connect it to the HD DB-15 female port on the back of the DKVM-8 labeled
with the monitor symbol at the CONSOLE connector.
Step 4
Connect the keyboard and mouse to the DKVM-8. If you have an AT type keyboard, you
will need an AT to PS/2 adapter.
Slave Input
Master Input
Slave Output
C o n s o l e
PC1
PC2
P C 3
P C 4
P C 5
PC6
PC7
P C 8
ON / OFF
AC LINE 90-240 VAC
SW
ON
1 2
3
4 5
6
Slave Input
Master Input
Slave Output
C o n s o l e
PC1
PC2
P C 3
P C 4
P C 5
PC6
PC7
P C 8
ON / OFF
AC LINE 90-240 VAC
SW
ON
1 2
3
4 5
6
Slave Input
Master Input
Slave Output
Console
P C 1
P C 2
PC3
PC4
PC5
P C 6
PC7
PC8
ON / OFF
AC LINE 90-240 VAC
SW
ON
1
2 3
4
5 6


