4
E
N
G
L
IS
H
Step 2
In order to login and configure the switch via an Ethernet
connection, the PC must have an IP address in the same
range as the switch. For example, if the switch has an
IP address of 10.90.90.90, the PC should have an IP
address of 10.x.y.z (where x/y is a number between 0 ~
254 and z is a number between 1 ~254), and a subnet
mask of 255.0.0.0.
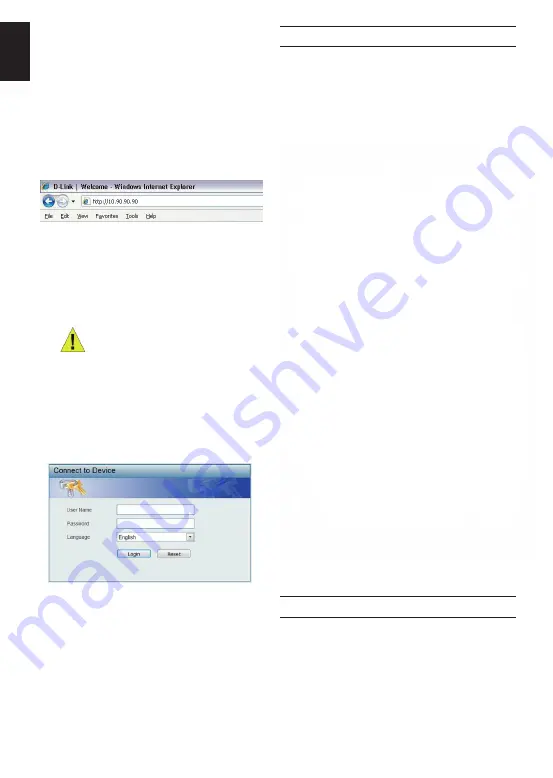
Open your web browser and enter http://10.90.90.90
(the factory-default IP address) in the address box. Then
press <Enter>.
Figure 7. Enter the IP address 10.90.90.90 in the web
browser
The web configuration can also be accessed through the
DNA. You can click the IP hyper link in the device list in
the DNA to open the web GUI of devices.
NOTE:
The switch’s factory default IP
address is 10.90.90.90 with a subnet
mask of 255.0.0.0 and a default
gateway of 0.0.0.0
Step 3
Figure 8. Enter Network Password window
Step 4
DNA (D-Link Network Assistant)
Option 1: Follow these steps to install the DNA
(D-Link Network Assistant) via the autorun
program on the installation CD.
1. Insert the CD into your CD-Rom Drive.
2. The autorun program will pop up automatically
3. Simply click on the ”
Install DNA (D-Link Network
Assistant)
” button and an installation wizard will guide
you through the process.
4. After successfully installing the DNA, you can find it
under Start > Programs > D-Link > DNA.
5. Just connect the Switch to the same L2 network
segment of your PC and use the
DNA (D-Link
Network Assistant)
to discover the Switches.
Option 2: Follow these steps to install the DNA
(D-Link Network Assistant) manually.
1. Insert the Utility CD into your CD-Rom Drive.
2. From the Start menu on the Windows desktop, choose
Computer.
3. Double click on your CD-Rom/DVD-Rom Drive to start
the autorun menu, or right click on the Drive to open
the folder. Select DNA (D-Link Network Assistant) and
double click on the setup.exe file.
4. Follow the on-screen instructions to install the utility.
5. Upon completion, go to
Start > Programs > D-Link >
DNA
and open the DNA (D-Link Network Assistant).
6. Just connect the Switch to the same L2 network
segment of your PC and use the
DNA (D-Link
Network Assistant)
to discover the Switch.
Connecting The Console Port
When the following logon dialog box appears, enter
“admin” for both the Username and Password and
choose the language of the Web-based Management
interface then click Login.
Before entering the
Web-based Management
, the
Smart Wizard
will guide you to quickly configure some
functions, such as
Ip Information, User Account and
SNMP Settings
. If you don’t plan to change anything,
click Exit to exit the Wizard and enter the Web-based
Management. For a detailed look at the Smart Wizard’s
functions, please refer to the Smart Wizard introduction
in the user manual.
To connect to the serial port, a special Console Cable
must be used. This cable is included with this product’s
packaging. The cable referred to as an RS-232 to RJ-45
connector cable specifically pinned to connect to this
switch’s serial port by using the correct pin configuration.
To connect to the console port of the Switch, use the
following steps:
The DNA (D-Link Network Assistant) is a program for
discovering Switches with the same L2 network segment
connected to your PC. This tool can support Windows
2000, XP, Vista, and Windows 7. There are two options
for the installation of DNA (D-Link Network Assistant),
one is through the autorun program on the installation CD
and the other is manual installation.
Option 1:
Follow these steps to install DNA via the
autorun program on the installation CD (in case the
installation CD is included):
1. Insert the CD into your CD-ROM Drive.
2. The autorun program will pop up automatically.
3. Simply click on the "
Install DNA (D-Link Network
Assistant)
" button and an installation wizard will guide
you through the process.
4.After successfully installing the DNA, you can find it
under Start > Programs > D-Link > DNA.
5. Just connect the Switch to the same L2 network
segment of your PC and use the
DNA (D-Link Network
Assistant)
to discover the Switches.
Option 2:
Follow these steps to install DNA manually (in
case the installation CD is included):
1. Insert the CD into your CD-ROM drive.
2. From the Start menu on the Windows desktop choose
Computer.
3. Double click on your CD-ROM/DVD-Rom Drive to
start the autorun menu, or right click on the Drive to
open the folder. Select DNA (D-Link Network Assistant)
and double click on the setup.exe file.
4. Follow the on-screen instructions to install the utility.
5. Upon completion, go to
Start > Programs > D-Link >
DNA
and open DNA (D-Link Network Assistant).
6. Just connect the Switch to the same L2 network
segment of your PC and use
DNA
to discover the
Switch.
Option 3:
(in case the installation CD is not included):
Download DNA (D-Link Network Assistant) from Google
Play at https://play.google.com/store/apps/ and follow
the on-screen instructions to install the utility.
For detailed information of DNA, please refer the user
manual.


