D-Link Technical
Support – How to connect the DCS-932L wirelessly.
Page
2
of
7
It is assumed that you have followed the setup guide "How to install the DCS-932L" and during the
installation you selected the "Wired" configuration. It's therefore assumed that your DCS-932L is connected
using an Ethernet cable. Continue reading to change this configuration to be connecting wirelessly instead.
1. You will need to know the IP Address of your DCS-932L. There are two ways in which this can be done.
Setup Utility:
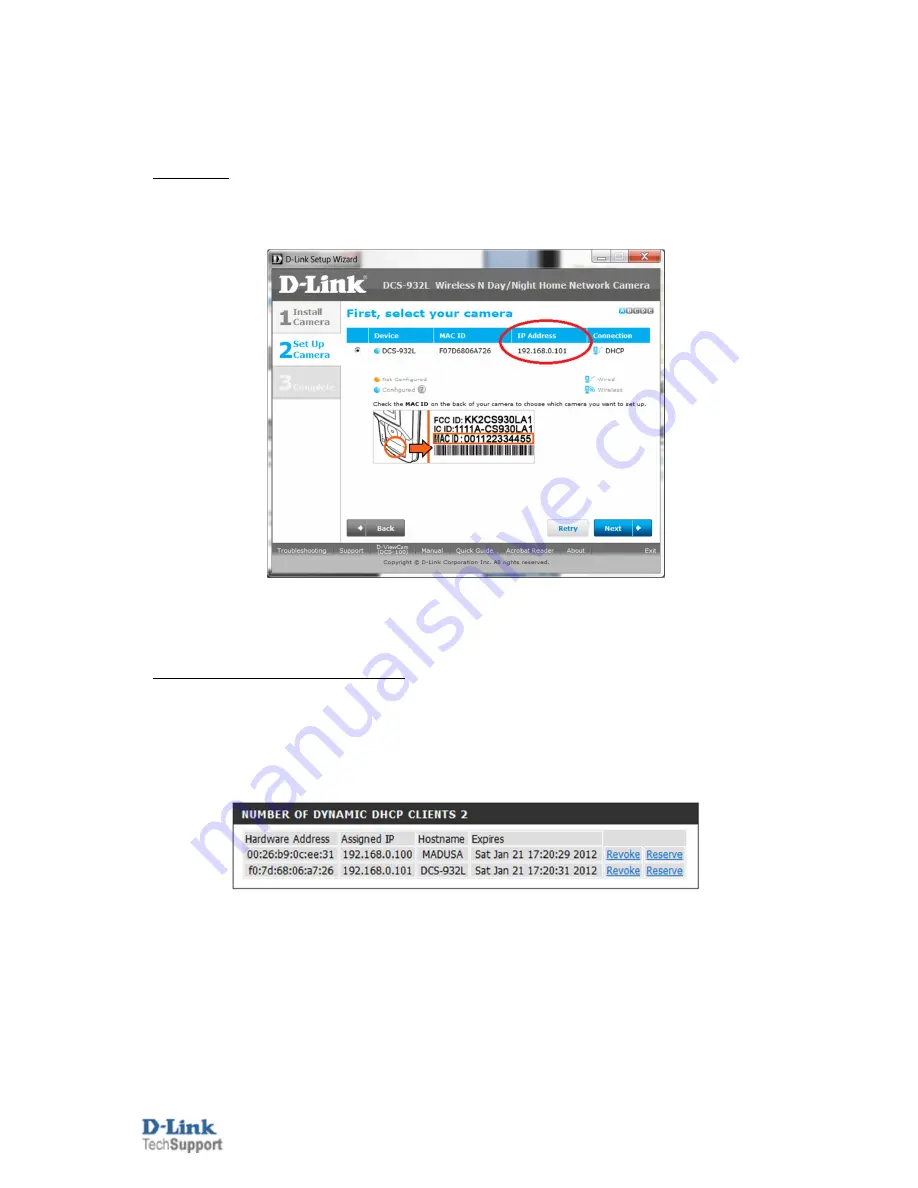
Run through the Setup Utility selecting the default options until you get to a heading "First, select your
camera":
We now have the IP Address which is assigned to the DCS-932L. Please remember the current IP Address
assigned as we will require it shortly. Your assigned IP Address may also be different to my example. You
may close the Setup Utility now.
Checking your Router's Web Configuration:
Login to your Router's Web Configuration and refer to its DHCP Client List. Please check your with Router's
Documentation and or Manufacturer as DHCP Client List may be called another name:
The below illustration is from a D-Link DIR-825 and its DHCP Client List is referred as the 'Dynamic DHCP
Clients':
We now have the IP Address which is assigned to the DCS-932L. Please remember the current IP Address
assigned as we will require it shortly. Your assigned IP Address may also be different to my example.


