©2009 D-Link Corporation/D-Link Systems, Inc. All rights reserved. D-Link and MediaBridge are trademarks or registered trademarks of D-Link Corporation or its subsidiaries in the United States and/or other countries. Windows Vista is either a registered trademark or trademark of Microsoft Corporation in the United States and/or other countries. Other trademarks or registered
trademarks are the property of their respective owners.
QIG Version 1.1 (November 3, 2009)
2
START hERE:
ThERE ARE ThREE opERATing SySTEmS liSTEd bElow To Show inTRucTionS
on how To configuRE youR compuTER And bEgin ThE SETup pRocESS.
OptiOn 1: WindOWs
®
Xp
OptiOn 2: WindOWs Vista
®
OptiOn 3: WindOWs 7
OptiOn 1 - Xp
OptiOn 2 - Vista
OptiOn 3 - Windows 7
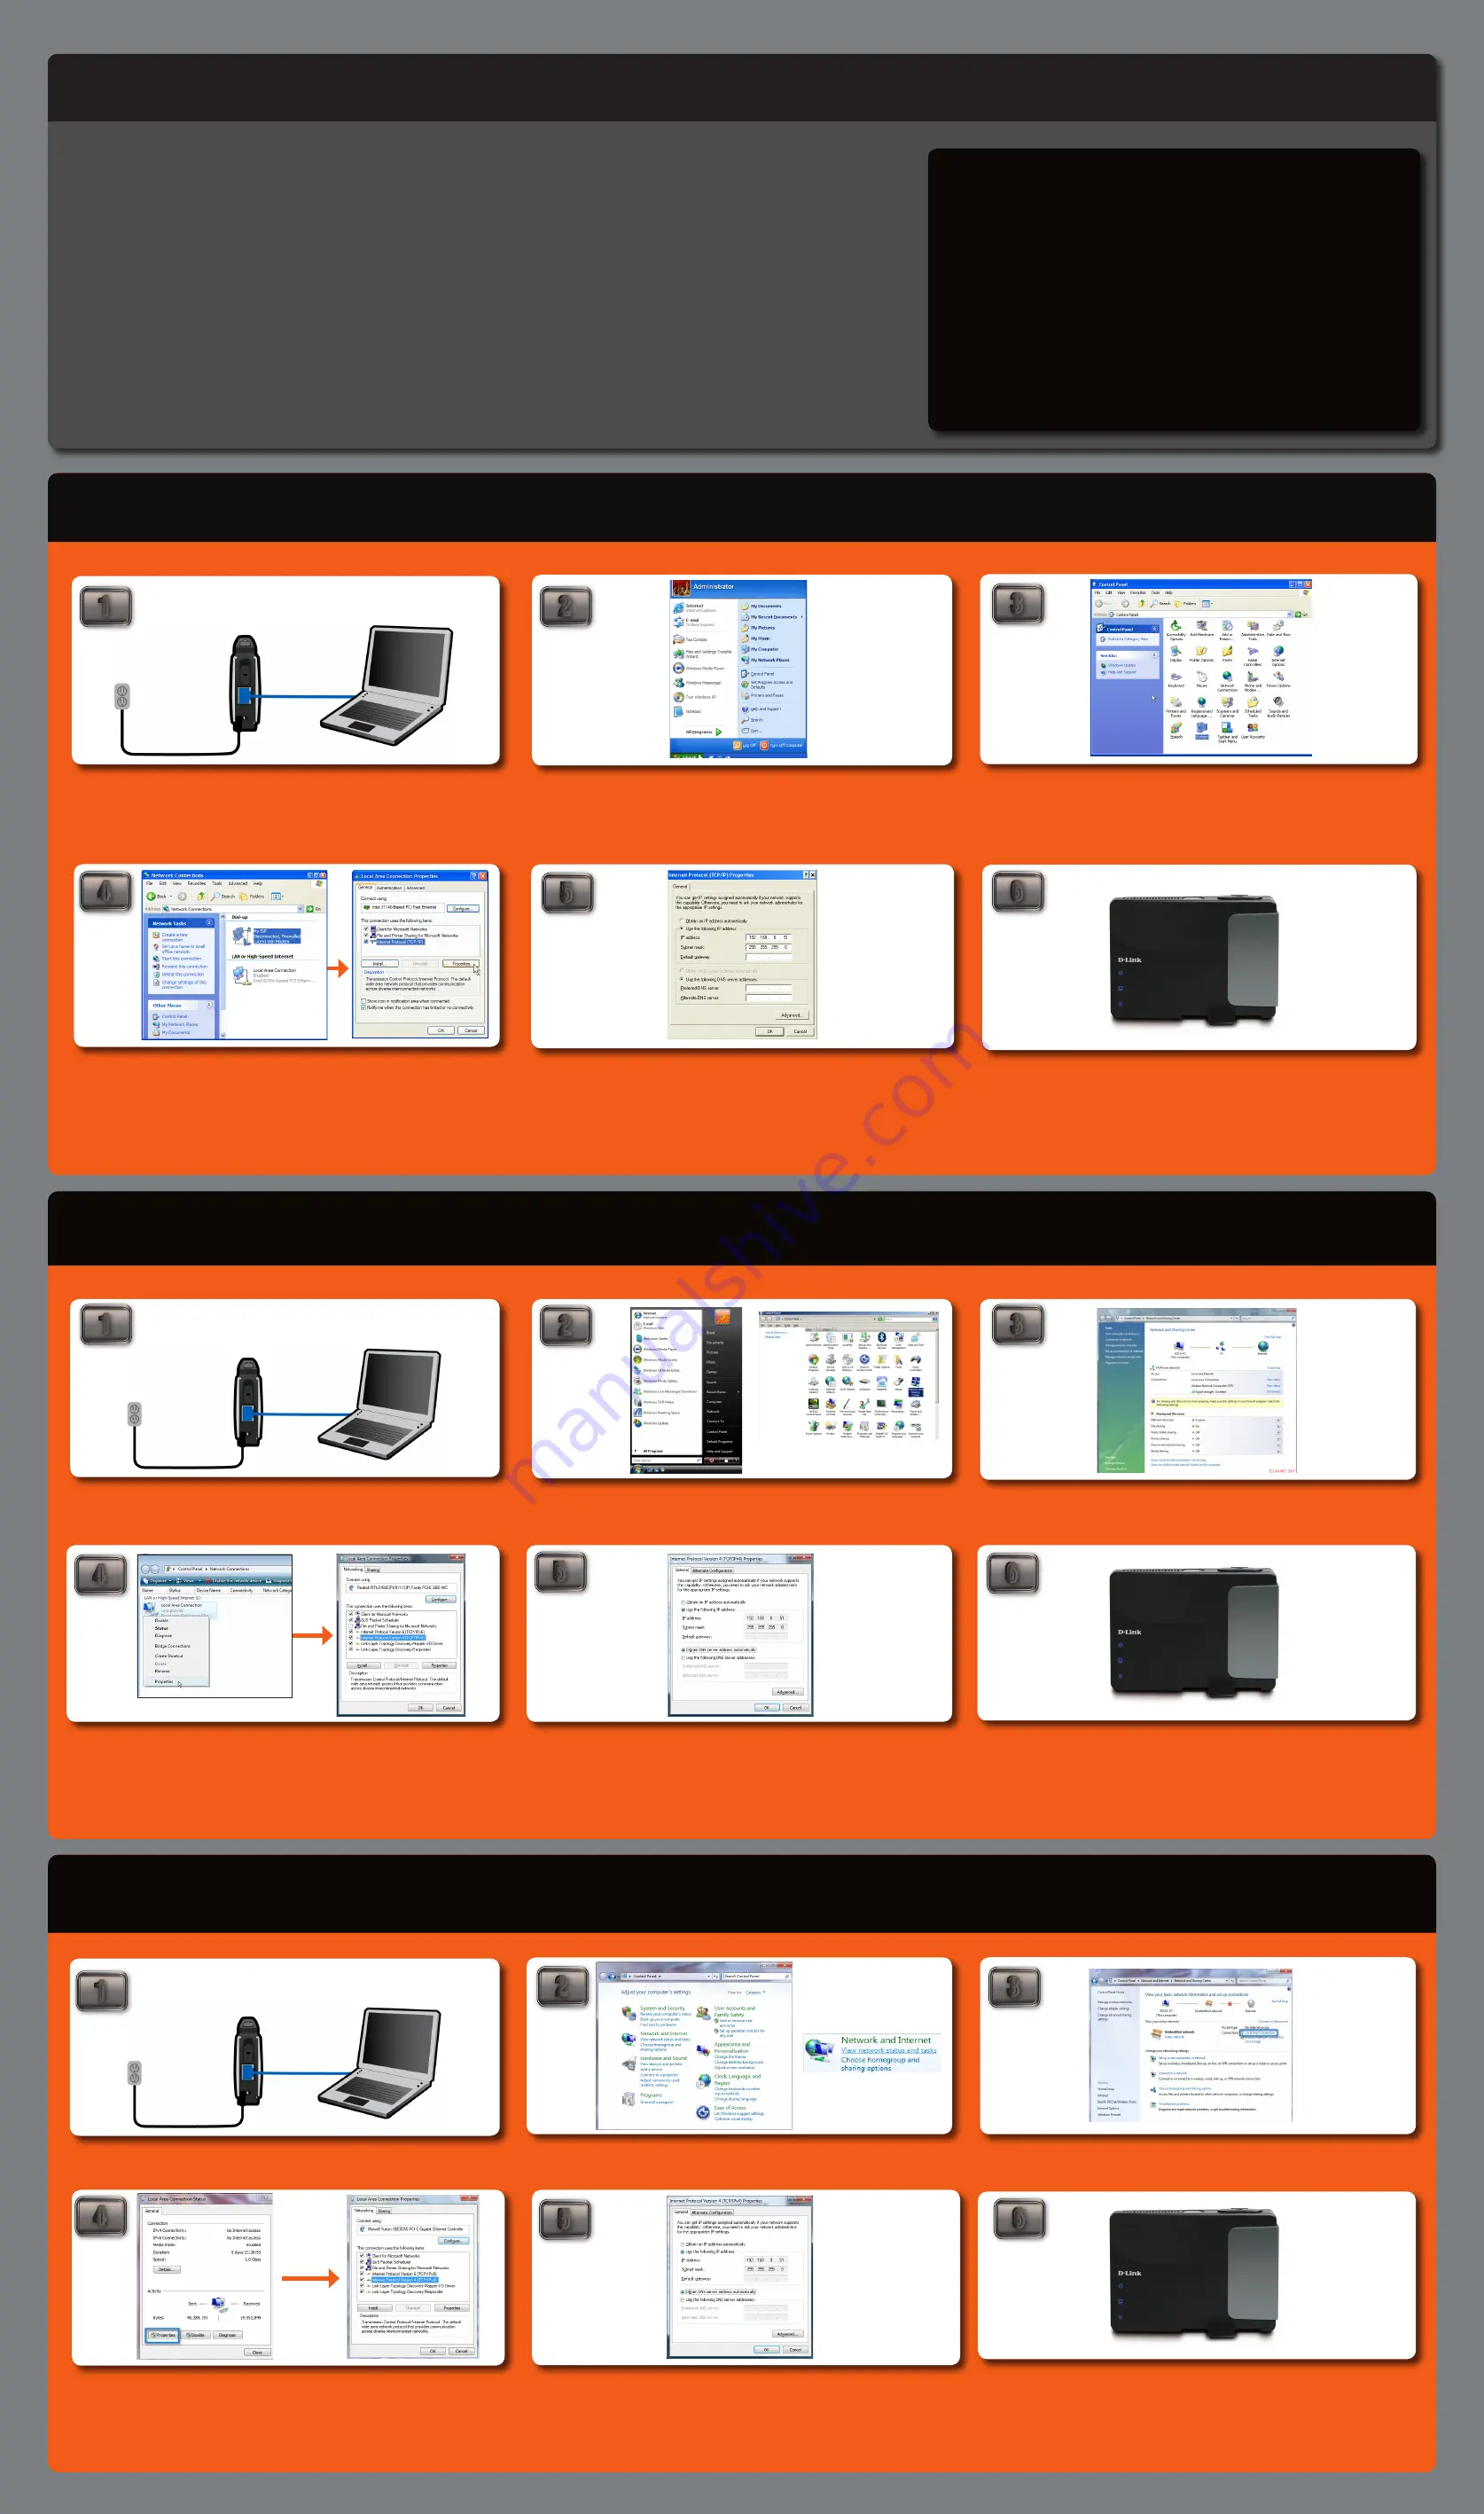
Begin by connecting the power cable to the DAP-1350. Then, connect your ethernet
cable to the device’s Ethernet (LAN/WAN) port on the back.
Once your PC is connected to the device, go to the computer’s taskbar and click
on START, then select Control Panel.
In Control Panel, double-click “Network Connections”.
When you have opened the “Network Connections” window, right-click (or double
click) the “Local Area Connection” icon and select Properties. After the window has
been opened, click “Internet Protocol” (TCP/IP) and click Properties.
Once you have opened the properties window, select the “Use the following IP
address” option. The text boxes below will allow you to type the manual IP address.
In the “IP address” text box, type “192.168.0.51”. Click the “Subnet Mask:” text box
and the address “255.255.255.0” will appear. You may leave the “Default Gateway,”
“Preferred DNS Server” and “Alternate DNS Server” blank. Then click “OK”.
You have successfully configured your computer to access the device’s web-based
configuration. Please proceed to the DAP-1350 guide on the reverse side of this
guide.
Connect the power cable to the router. Then connect your ethernet cable to the
DAP-1350’s Ethernet (LAN/WAN) port on the back.
Once connected, go to the computer’s taskbar and click START. Open Control Panel
and then click on Network and Sharing Center.
In the “Network Connections” window, right-click (or double-click) the “Local Area
Connection” icon and click Properties. When the window opens, select “Internet
Protocol Version 4 (TCP/IPv4)” and click Properties.
2
3
4
5
6
2
3
4
6
Connect the power cable to the router. Then connect your ethernet cable to the
DAP-1350’s Ethernet (LAN/WAN) port on the back.
In the “ Local Area Connection “ window, click Properties. When the window opens,
select “ Internet Protocol Version 4 (TCP/IPv4)” and click Properties.
You have successfully configured your computer to access the device’s web-based
configuration. Please proceed to the DAP-1350 guide on the reverse side of this
guide.
2
3
5
6
4
Once you have opened the properties window, select the “Use the following IP
address” option. The text boxes below will allow you to type the manual IP address.
In the “IP address” text box, type “192.168.0.51”. Click the “Subnet Mask:” text box
and the address “255.255.255.0” will appear. You may leave the “Default Gateway,”
“Preferred DNS Server” and “Alternate DNS Server” blank. Then click “OK”.
You have successfully configured your computer to access the device’s web-based
configuration. Please proceed to the DAP-1350 guide on the reverse side of this
guide.
Once connected, go to the computer’s taskbar and select Start -> Control Panel
-> Network and Internet, then click View network status and task.
In “Network and Sharing Center,” click on “Manage Network Connections” on the
left side.
In “ View your basic network information and set up connections,” click on “ Local
Area Connection “ on the right side
Once you have opened the properties window, select the “Use the following
IP address” option. The text boxes below will allow you to type the manual IP
address. In the “IP address” text box, type “192.168.0.51”. Click the “Subnet
Mask:” text box and the address “255.255.255.0” will appear. You may leave the
“Default Gateway,” “Preferred DNS Server” and “Alternate DNS Server” blank.
Then click “OK”.
initiaL sEtUp GUidE
noTE:
Before you begin, make sure you have administrative
permission to modify the computer’s network settings.
When using Router mode, you must configure the pocket
router using your wireless adapter. the Ethernet port will not
allow you to connect to the web-based configuration utility.
5
1
1
1


