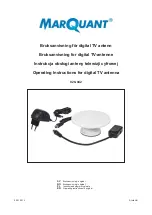
Connecting the Antenna
The ANT24-0600 attaches to the RP-SMA connector that is standard on most
D-Link
®
products. Simply disconnect your existing antenna and connect the cable
from the ANT24-0600 to the RP-SMA connector on your D-Link
®
product.
Installing the ANT24-0600
The ANT24-0600 also includes an RP-SMA to
RP-TNC adapter for attaching the ANT24-0600
to products with a RP-TNC connector.
Mounting the Antenna (optional)
A. Simply remove the default antenna from device such as AP or Router and
replace it with ANT24-0600.
B. Identify an optimal location for the antenna. The antenna can be placed on a
fl at surface such as desk, mounted on the wall or use magnetic mounting method
to places such as partition.
Note : Allow the cable to bend naturally.
It’s recommended that you place the
antenna near wireless devices to avoid
excessive strain on the cable and
connector.
C. Adjust the angle of the antenna to a
right angle, which can attain better signal
transmission and a larger coverage area.
A
.
Wall Mounting :
Step 1 : Identify a mounting location and place the sticker on.
Step 2 : Use a 4/16”drill bit to drill holes at 2 marked places on sticker.
Step 3 : Tap the plastic anchors gently into the hole by using a rubber
mallet or hammer.
Step 4 : Use a screwdriver to secure the screws
into the plastic anchors.
Be sure to leave enough space so the
antenna base will slide over the head of
the screw.
Step 5 : Place the antenna base over the screw
and slide it into the locking position.
B.
Magnetic Mounting :
Step 1 : Identify a mounting location which is
available for magnetic using. For example
: Offi ce partition, white board, etc.
Be sure not to place antenna onto monitor,
hard disk, notebook, etc.


