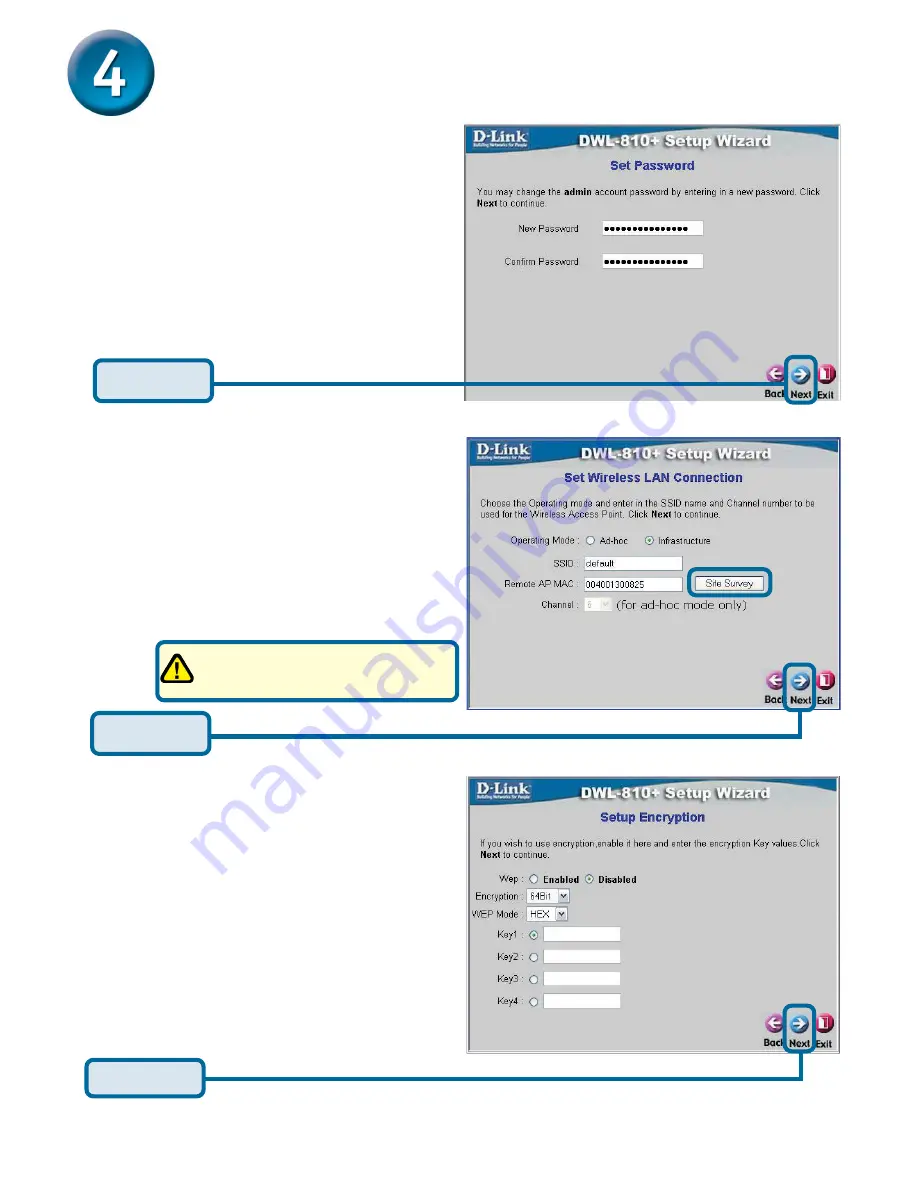
manualshive.com logo in svg
background image

6

Continued...

Step 1

 - 

Set up your new

password

. You have the option

to establish a password.

Step 2

 -


Wireless Setup

The default wireless settings are:
SSID = 

default

Channel = 

6

Operating Mode = 

Infrastructure

Click 

Site Survey

 to select a wireless

network or you can change the settings
manually to match an existing wireless
network.

Step 3

 -


Encryption

The DWL-810+ is capable of three
levels of wireless encryption - 64-bit,
128-bit, and 256-bit.

 By default the

encryption is disabled.

 You can

change the encryption settings for more
secure wireless communication.

Click


Next

Click


Next

Click


Next

For Set Up #2 select Ad-hoc
as the operating mode.

Содержание AirPlus DWL-810+

Страница 1: ... to Wireless Bridge Check Your Package Contents DWL 810 D Link AirPlus Ethernet to Wireless Bridge You must have at least the following An Ethernet enabled device such as a game console laptop or desktop computer network printer or set top box that will connect to the DWL 810 Ethernet CAT5 UTP Cable 5V DC 2 5A Power Adapter Using a power supply with a different voltage rating will damage this prod...

Страница 2: ...r end to the Ethernet port located on the device e g a Set Top Box Gaming Console laptop or desktop com puter or network printer The LED light will blink when there is data tranfer through the wireless connection Note The Ethernet port on the DWL 810 is Auto MDI MDIX Meaning you can use a straight through or crossover cable to the Ethernet Port C The antenna is used by the DWL 810 to connect to ot...

Страница 3: ...3 Connecting the DWL 810 in Infrastructure Mode Setup 1 Connect an Ethernet cable from the DWL 810 to your Ethernet enabled Desktop PC Laptop PC Set Top Box or Gaming Console ...

Страница 4: ...hat will be used for configuration The default IP address for the DWL 810 is 192 168 0 30 with a Subnet Mask of 255 255 255 0 You will need to assign your computer a Static IP address within the same range as the DWL 810 s IP address for the purpose of configuring the DWL 810 See the Manual on the CD ROM if you need assistance in assigning a Static IP address for your network adapter Open your Web...

Страница 5: ...logon pop up screen will appear Type admin for the username and leave the password field blank Click OK Once you have logged in the Home screen will appear Click Run Wizard You will see the following screens Click Next ...

Страница 6: ...ey to select a wireless network or you can change the settings manually to match an existing wireless network Step 3 Encryption The DWL 810 is capable of three levels of wireless encryption 64 bit 128 bit and 256 bit By default the encryption is disabled You can change the encryption settings for more secure wireless communication Click Next Click Next Click Next For Set Up 2 select Ad hoc as the ...

Страница 7: ...7 You have completed the Configuration of the DWL 810 Click Close Click Restart ...

Страница 8: ...he DWL 810 to the Ethernet port on the back of your Xbox Step 1 Please refer to Step 4 for configuring and modifying the wireless settings of the DWL 810 In order to connect to the XBox Live service you will need to have the proper XBox Live equipment and account ...

Страница 9: ...Station 2 Setup Step 1 Please refer to Step 4 for configuring and modifying the wireless settings of the DWL 810 Step 2 Connect an Ethernet cable from the DWL 810 to the Ethernet port on the back of your PlayStation 2 ...

Страница 10: ...ies Select Use the following IP address in the Internet Protocol TCP IP Properties window Click OK Note The following screens are taken using Windows XP Your screens may look similar Input your IP address and subnet mask The IP Address must be within the same range as the DWL 810 The IPAddress of the DWL 810 is 192 168 0 30 You can assign 192 168 0 51 for your computer No two computers can have th...

Страница 11: ...ct System Preferences The IP address information the Subnet Mask the Router s IP address and the Ethernet adapter address will appear Click on Network Select Built in Ethernet in the Show pull down menu Select Using DHCP in the Configuration pull down menu Click on Apply Now ...

Страница 12: ...ical support through our website or by phone Tech Support for customers within the United States D Link Technical Support over the Telephone 877 453 5465 24 hours a day seven days a week D Link Technical Support over the Internet http support dlink com email support dlink com Tech Support for customers within Canada D Link Technical Support over the Telephone 800 361 5265 Monday to Friday 8 30am t...

Отзывы: