Kit Operation
CY4502 EZ-
PD™ CCG2 Development Kit Guide, Doc. No. 001-96601 Rev. *B
23
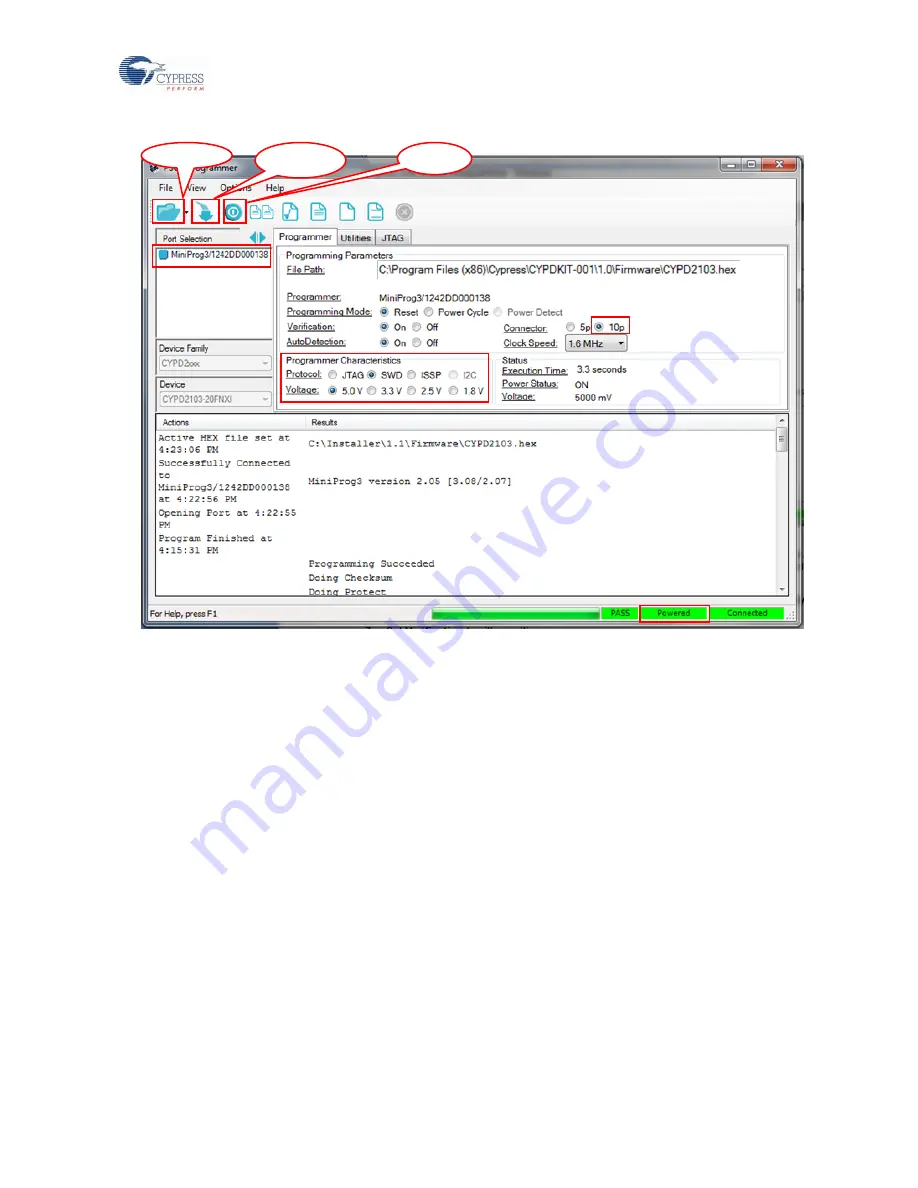
Figure 3-14. PSoC Programmer Window
5. Ensure that the settings on the PSoC Programmer are as highlighted in
6. Click the
File Load
button and point to the appropriate hex file to load it.
Note:
Firmware images are not included as part of CY4502 DVK installer. Contact
firmware images.
7. The status message in the right bottom of the PSoC Programmer window will indicate if the board is powered or
not.
8. If the board is not powered yet, click on the
Power
button
and verify the status message as in step 7.
9. Use the
Program
button to program the hex file onto the chip.
10. When the file is successfully programmed,
“Programming Succeeded” appears in the
Actions
window.
3.7.2 Programming the CCG2 Device Using a CCG1 Host Demo Kit over the CC Line
A firmware upgrade application,
cc_flash.exe
, is distributed with the CY4502 DVK and can be found in the location
<Install Directory>\CY4502 CCG2 DVK\<Version>\Util.
This Windows application can be used to program
either CCG2 device in the USB Type-C cable directly over the CC line with the help of the CCG1 Host Demo Kit, as
illustrated in
. This method can be deployed by cable manufacturers to provide upgrades to the user or to
program the firmware after the cable assembly is manufactured. The CCG2 device allows the firmware of the assembled
cable to be upgraded over the CC line through a built-in bootloader.
File Load
b
Program
Power


