


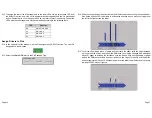


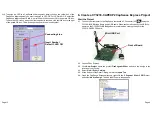


6.7. Name the driver
Slider
and click
OK
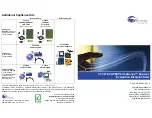
. The CapSense Express 5 Segment / Slider 5 GPIO :
Slider window opens.
In PSoC Express, each CapSense slider, LED, and mechanical button requires a separate
driver. The 5 Segment Slider 5 GPIO driver is a special driver that allows you to configure
the slider, LED, and mechanical button in one interface. Each driver is listed in the Config-
ure Local Parameters pane.
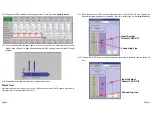
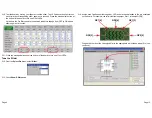
Configure the Drivers
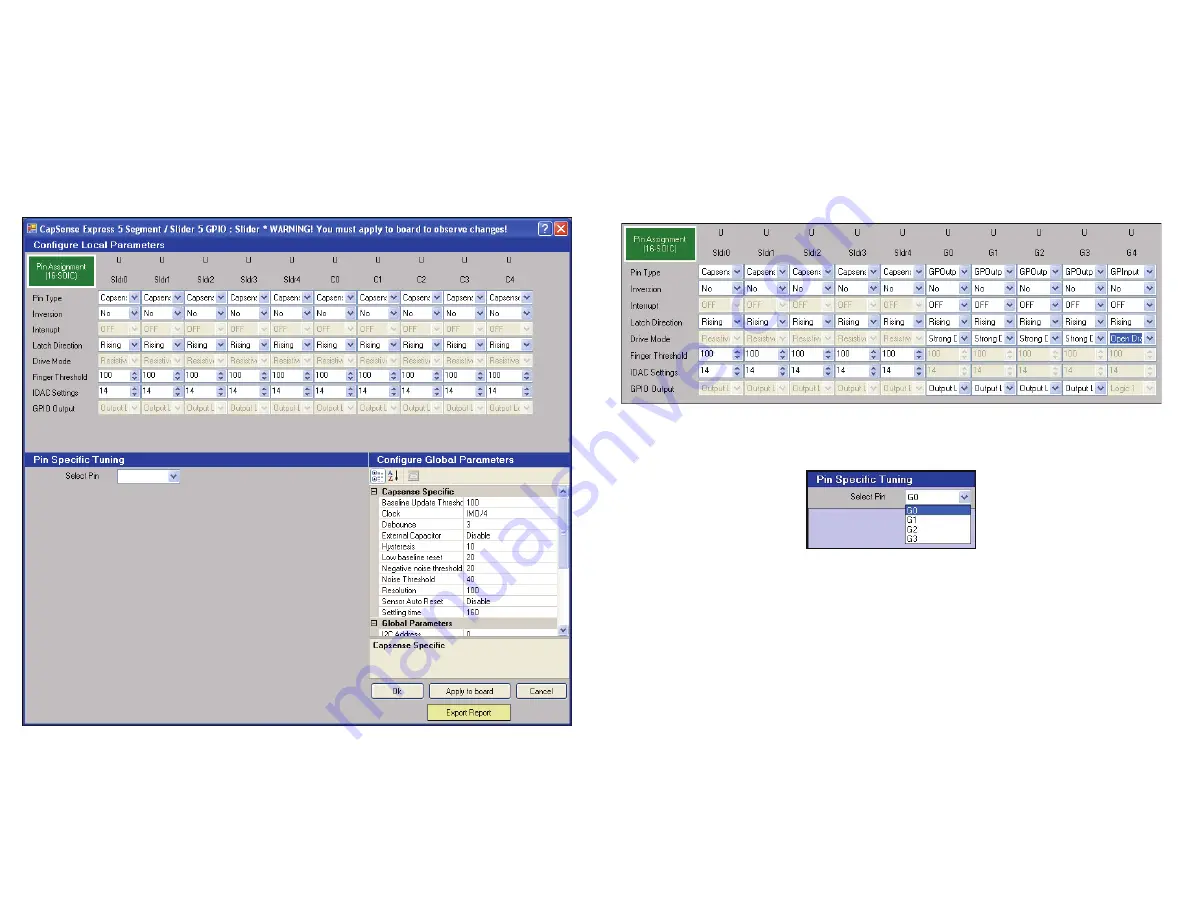
6.8. By default, all driver types in the Configure Local Parameters pane are set to CapSense
Slider Sensor. To setup the LEDs, set the Pin Type for drivers C0 through C3 to
GPOutput
and the Drive Mode for each of those drivers to
Strong Drive
.
To setup the mechanical button, set the Pin Type for driver G4 to
GPInput
. Set the Drive
Mode to
Open Drain Low
.
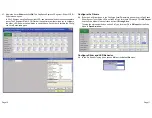
Configure Slider and LED Behavior
6.9. In the Pin Specific Tuning pane, choose
G0
from the
Select Pin
menu.
Page 10
Page 11


