background image

6

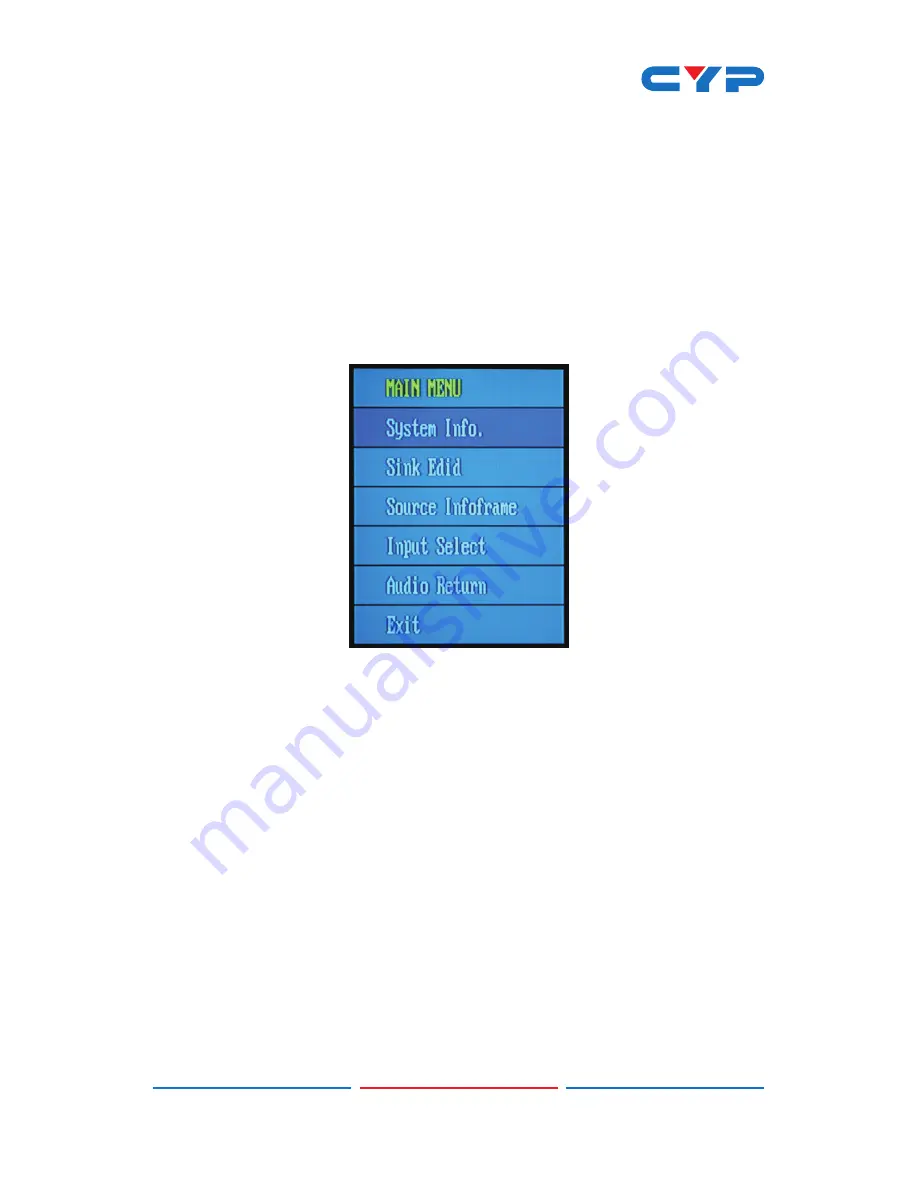
7. OSD MENU

7.1 Entering the Menu

 - Press the OSD button on the device or the MENU key on the 

remote control to bring up the OSD on the display.

 - Press the Up or Down [

p

/

q

] keys to highlight an option.

 - Press the Left or Right [

t

/

u

] keys to select the option.

 -

Press the 'Enter' key to confirm/exit the selection.

7.2 System Info

 - Press the Up or Down [

p

/

q

] keys to highlight the 'System Info' 

option.

 - Press the 'Enter' key to check the input/output device information 

and software version.

 -

Press the 'MENU' key to exit the menu.

 -

Press the 'Enter' key to confirm/exit the selection.

Содержание CPRO-3D41GAME

Страница 1: ...CPRO 3D41GAME 4 1 HDMI Switcher Operation Manual Operation Manual ...

Страница 2: ......

Страница 3: ...serves the right to make improvements to this document and or product at any time and without notice COPYRIGHT NOTICE No part of this document may be reproduced transmitted transcribed stored in a retrieval system or any of its part translated into any language or computer file in any form or by any means electronic mechanical magnetic optical chemical manual or otherwise without express written p...

Страница 4: ...h an object of any kind into this product through any openings or empty slots in the unit as you may damage parts inside the unit Do not attach the power supply cabling to building surfaces Use only the supplied power supply unit PSU Do not use the PSU if it is damaged Do not allow anything to rest on the power cabling or allow any weight to be placed upon it or any person walk on it To protect th...

Страница 5: ...and Functions 3 6 1 Top Panel 3 6 2 Front Panel 3 6 3 Left Panel 4 6 4 Right Panel 4 6 5 Rear Panel 5 6 6 Remote Control 5 7 OSD Menu 6 7 1 Entering the Menu 6 7 2 System Info 6 7 3 Sink EDID 7 7 4 Source Infoframe 7 7 5 Input Select 7 7 6 Audio Return 8 7 7 Exit 8 8 Connection Diagram 9 9 Specifications 10 10 Acronyms 10 ...

Страница 6: ...ntrol gives users complete control over the selection of sources and makes the device incredibly user friendly 2 APPLICATIONS Share a single TV Monitor input between up to 4 source devices Add additional HDMI inputs to an AV Receiver Lecture room presentation Public display Showroom presentation 3 PACKAGE CONTENTS 4 1 HDMI Switcher Remote Control 5V 1A Power Adaptor Operation Manual 4 SYSTEM REQUI...

Страница 7: ...info frame HDMI input Audio Audio Return selection HDCP repeater support Deep Color support 36 30 24 bit 1080p 60Hz Supports high resolution input and output PC VGA to WUXGA HDTV 480i to 1080p 50 60 Hz 1080p 24 Hz Supports HDMI input cable lengths of up to 10 meters 8 12 bit and HDMI output cable lengths of up to 15 meters 8 12 bit Audio support HDMI compatible audio interface Dedicated flexible a...

Страница 8: ... 1 2 3 4 Indicators These LEDs will light to indicate the currently selected input 6 2 Front Panel INPUT 2 1 1 IR Remote Control Sensor Receives IR signals from the supplied remote control 2 INPUT Press this button repeatedly to cycle through the input sources the LED will illuminate to indicate the active input ...

Страница 9: ... 2 Connect to HDMI source devices such as a games console with HDMI cables or a DVI source device such as a PC with DVI to HDMI cables 6 4 Right Panel 4 OSD 3 HDMI IN 1 2 1 HDMI IN 3 4 Connect to the HDMI source devices such as a Blu ray player or a Set top Box with HDMI cables 2 OSD Press this button to bring up the OSD on the display and press it again to turn it off ...

Страница 10: ... HDMI source signal 3 DC 5V Connect the 5V DC power supply to the unit and plug the adaptor into an AC outlet The LED will light when connected to power Note 1 This device only supports 2 Channel PCM only 2 The display must support the ARC function and must be active for this feature to function 3 The display s ARC enabled HDMI connection must be connected to the device 6 6 Remote Control 1 MENU P...

Страница 11: ...highlight an option Press the Left or Right t u keys to select the option Press the Enter key to confirm exit the selection 7 2 System Info Press the Up or Down p q keys to highlight the System Info option Press the Enter key to check the input output device information and software version Press the MENU key to exit the menu Press the Enter key to confirm exit the selection ...

Страница 12: ...e Up or Down p q keys to highlight the Source Infoframe option Press the Left or Right t u keys to select the option Press the Enter key to confirm exit the selection Press the MENU key to exit the menu OPTION DESCRIPTION AVI AVI infoframe data To check the source video infoFrame Packet AUD Audio infoframe data To check the source audio infoFrame Packet 7 5 Input Select Press the Up or Down p q ke...

Страница 13: ...on Press the Left or Right t u keys to select the option Press the Enter key to confirm exit the selection Press the MENU key to exit the menu OPTION DESCRIPTION Audio Return On Off 7 7 Exit Press the Up or Down p q keys to highlight the Exit option Press the MENU key to exit the menu ...

Страница 14: ...EDID InfoFrame OSD DVD or Blu ray Player Set top Box HDMI Input HDMI Input HDMI Input HDMI Input HDMI Output Audio Return Channel ARC Power Supply HDTV AV Receiver Coaxial Digital Audio Output Games Console PC or Laptop ARC Equipped HDMI Connection Only ...

Страница 15: ... Audio Output PCM 2 CH Power Supply 5V 1A DC US EU standards CE FCC UL certified ESD Protection Human Body Model 8kV air gap discharge 4kV contact discharge Dimensions 100mm W 70mm D 20mm H Weight 90g Chassis Material Plastic Color White Power Consumption 4W Operating Temperature 0 C 40 C 32 F 104 F Storage Temperature 20 C 60 C 4 F 140 F Relative Humidity 20 60 RH non condensing 10 ACRONYMS ACRON...

Страница 16: ......

Страница 17: ......

Страница 18: ...Home page http www cypress com tw CYPRESS TECHNOLOGY CO LTD ...

Отзывы: