3
6. OPERATION CONTROLS AND FUNCTIONS
6.1 Front Panel
POWER
POWER
WINDOW
1
FAV
2
3
4
A
B
C
D
E
F
G
H
CH 1
CHANNEL IN
CH 2
CH 3
CH 4
FAV SELECT
ENTER
MENU
AUDIO
+
-
INFO
720P/60Hz
A
WINDOW
C
D
E
F
G
H
B
1
2
3
5
6
9 10
4
8
7
4
5
1
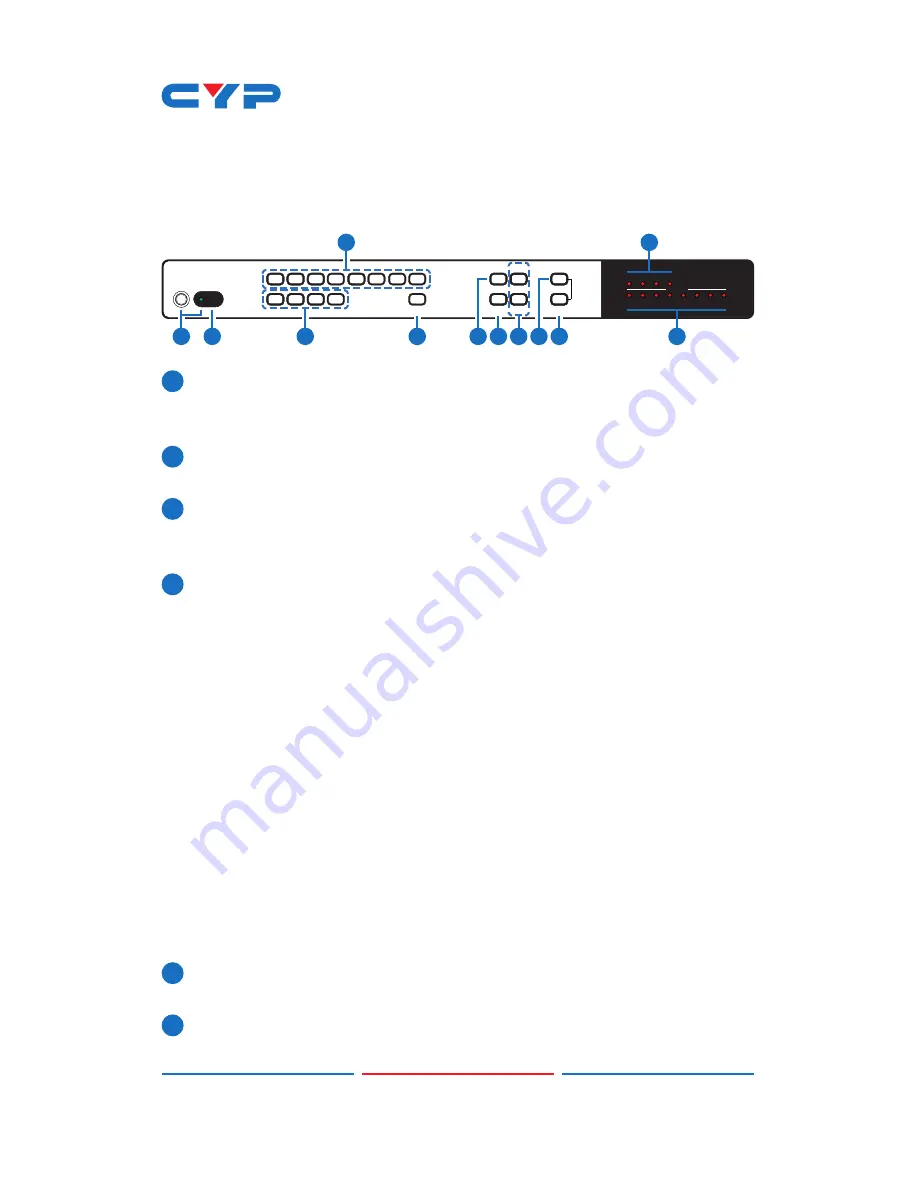
POWER Button & LED:
Press this button to power on the device and
the LED will illuminate in green or set it to standby mode and the
LED will illuminate in Red.
2
IR Window:
Accept IR signal from the device’s remote control
included in the package only.
3
CHANNEL IN 1~4:
Press these buttons to rotate SDI 1~4 input source
on each channel to be display on screens. All channels can select
the same input or each channel a different input.
4
WINDOW A~H & LEDs:
Press these hot keys to select the screen
setting where A~D are display a full screen of each channel and
E~H are a different combination of a full screen setting with all 4
channels.
Windows A~D's channel input selection is corresponding to
channel input no. 1~4. That is, to change window A's input channel
must press channel input 1's button. Channel input 2~4's button
will not activate under window A's selection. Windows E~H's size
are adjustable through the OSD menu setting and only window
G & H is PIP(Picture in Picture) where E & F are POP (Picture out Of
picture) settings.
Under window E~H when the size setting is overlapping one
another, channel display sequence is CH4>CH3>CH2 >CH1. That is,
CH4 will cover CH3 and CH3 will cover CH2 and so on. Under some
display the borderline may have interference, adjusting display's
motion setting may resolve the interference issue.
5
FAV SELECT & LEDs:
Press this button to recall the favor setting from
1~4 and the LED will illuminate accordingly.
6
MENU:
Press this button to bring up the OSD menu on screen.


