CPS725SL
Guaranteed Uninterruptible Power System
3
matically shutdown to conserve battery power. Files with auto-assigned names will be saved under
C:\PCTemp
,
where
C
is the name of your main hard drive.
Files that have previously been saved will be saved in their original location.
PowerPanel™ is equipped with a
Scheduled Shutdown
feature which can automatically save and close open files
and then shutdown the computer and UPS at a user specified date and time. Use of this feature is optional and is not
required for the power failure shutdown to occur.
The use of the PowerPanel™ software is optional. The UPS unit will provide full surge suppression and battery
backup without the software. You must use the software if you wish to have the automatic shutdown feature.
INSTALLATION GUIDE
(Cyber Power UPS can provide surge suppression and battery backup without the software. However, if you need to
schedule for UPS Auto-shutdown, then it is necessary to install the software.)
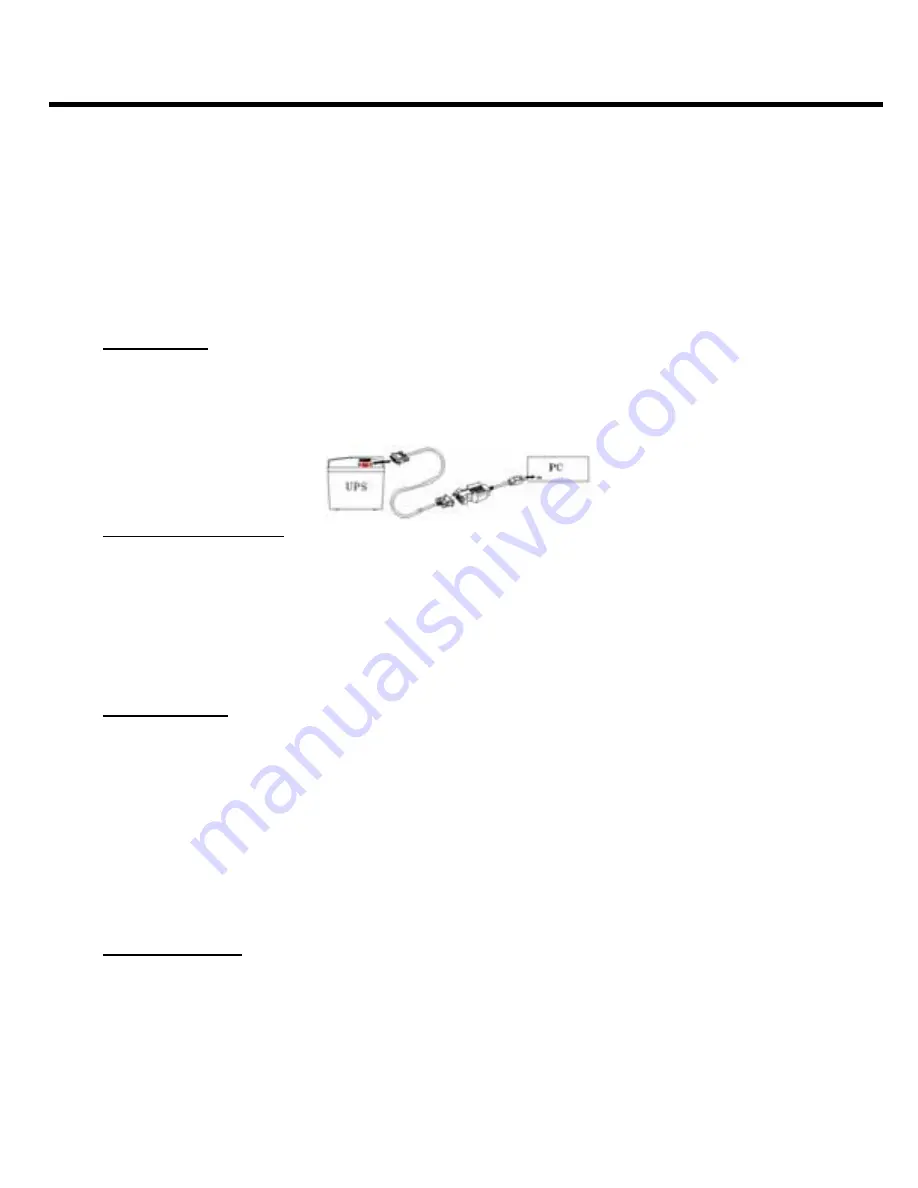
USB Function (Optional)
1. Turn off your UPS
2. Connect the serial interface cable to your UPS and the open serial port on the rear panel of the computer. If you
would like to use USB interface, please connect the USB adapter with the Serial Cable then connect the USB to
your computer. (See the figure)
3. Plug the UPS into an AC outlet, turn the UPS on and start your computer.
4.
.
Follow the
instructions
on the User’s Manual to complete the installation.
For Windows 95 /98 /ME
1. Turn the UPS off and unplug it.
2. Connect the serial interface cable
to serial port
on the UPS and an open serial port on the back of the computer.
(Note: You must use the serial cable that was supplied with the unit).
3. Plug the UPS into an AC outlet, turn the UPS on and start your computer.
4. Once the computer was finished booting, insert the PowerPanel
™
disk into the floppy drive.
5. Click on
Start
, point to
Settings
, and then click
Control Panel
.
6. Double-click on
Add / Remove Programs
.
7. Click the
Install Button
, and
follow the on-screen instructions.
8.
When the installation is completed
, remove the floppy disk.
For Windows NT
1. Click on
Start
, point to
Settings
, then click
Control Panel
.
2. Double-click the
UPS Icon
.
3. Remove the checkmark from the box labeled
UPS is installed on
, and Click
OK
.
4. Acknowledge the message that the UPS is in an unknown state and exit to the desktop.
5. Shutdown your computer.
6. Turn off the UPS and unplug it.
7.
Connect the serial interface cable
to serial port
on the UPS and an open serial port on the back of the computer.
(Note: You must use the serial cable that was supplied with the unit).
8. Plug the UPS into an AC outlet, turn the UPS on and then start your computer.
9. Click on
Start
, point to
Settings
, then click
Control Panel
.
10. Double-click on
Add / Remove Programs
.
11. Click the
Install Button
and follow the on-screen instructions.
12. When the installation is complete, remove the floppy disk.
For Windows 2000
1. Click on
Start
, point to
Settings
, then click
Control Panel
.
2. Double-click on
Power Options
.
3. On the
UPS Tab
, click
Select
.
4. In the UPS selection dialog box, under Manufacturers, select
None
.
5. Exit to the desktop.
6. Shutdown the computer, then turn the UPS off and unplug it.
7. Connect the serial
interface
cable to serial port on the UPS and an open serial port on the computer.
(Note: You
must use the serial cable that was supplied with the unit).
8. Plug the UPS into an AC outlet, turn the UPS on, and then start your computer.
9. Insert the PowerPanel
™
software disk into the floppy drive.


