background image

GENERAL SETTINGS

IP address of the Default Gateway
A default gateway is required for
Cyberoam to route connections to the Internet.

DNS IP Address

___.___.___.___

System Time Zone

______________

System Date and Time

Email ID of the administrator where Cyberoam
will send System Alerts

______________

___.___.___.___

______________

5

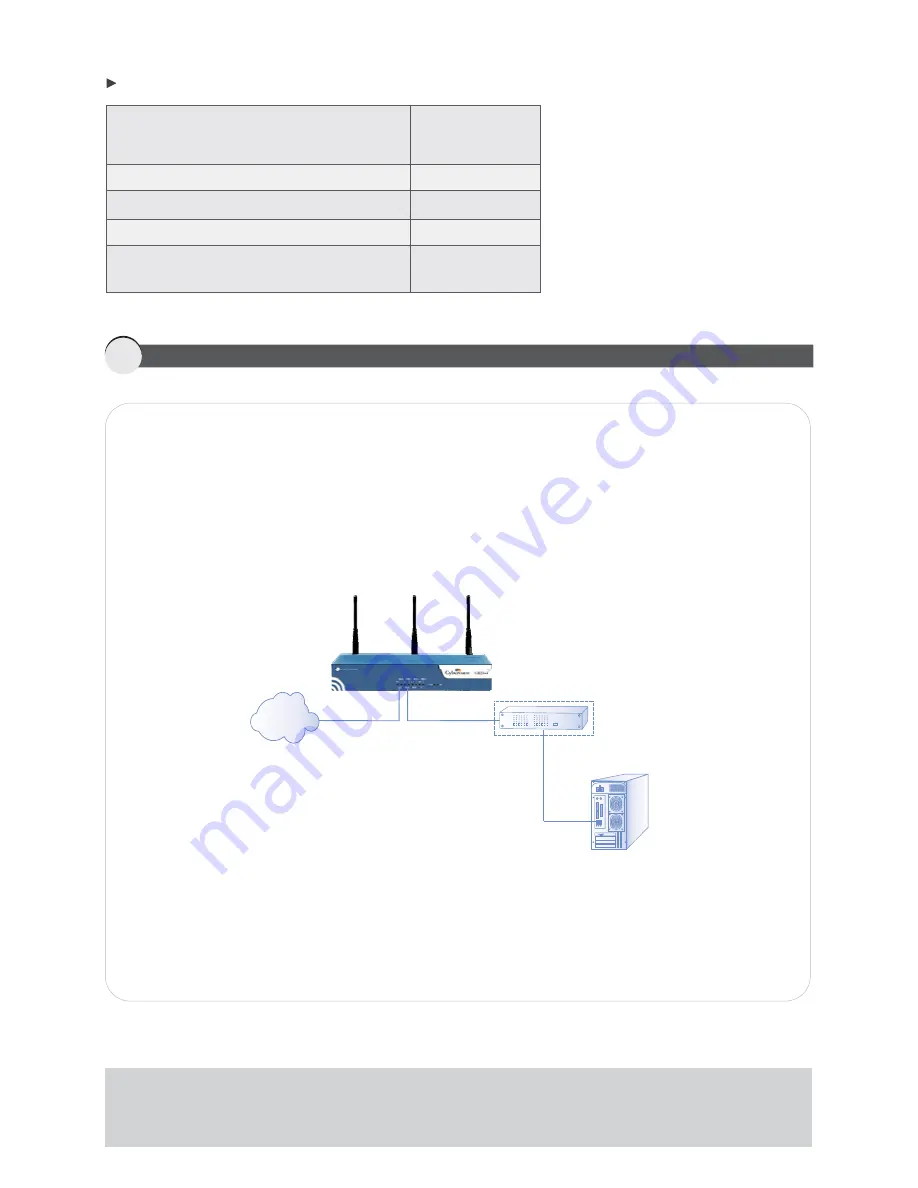
CONNECTING CYBEROAM

Ethernet connection

1.

Connect one end of the

cable into Port A on the Back panel of the Appliance and

other end into the Ethernet Adapter port of Management computer. Change the IP address of the
management computer to 172.16.16.2 and the subnet mask to 255.255.255.0.

2.

Connect one end of an Ethernet cable into Port B on the Back panel of the Appliance and other
end to your Internet connection e.g. DSL modem or cable modem. It is possible that cable might
already be connected between your computer and your modem. If so, disconnect it from your
computer and connect into Port B.

3.

Connect the AC Power connector into the Back panel of the Appliance and the other end into a
standard AC receptacle & turn on the power.

4.

Start your management computer. Following Appliance LEDs light up:
Power - Green indicating that Appliance is ON
HDD - Red indicating that hard disk is Active
Port A, Port B (Front panel) - Green indicating an active connection

straight-through

Note:

If you change the LAN IP address (Gateway mode) or Bridge IP address (Bridge mode), you must use this

address to reconnect to the Web Admin Console. You might also have to change the IP address of the management
computer to be on the same subnet as the new IP address.

Internet

Switch
(Optional)

Management

Computer

Содержание CR 15i

Страница 1: ...Unified Threat Management QUICK START GUIDE CR25wi CR35wi Appliances Document Version AN QSG25wi 35wi 10 00 0309 20100813 ...

Страница 2: ...entation CD One Cyberoam Quick Start Guide Blue Straight through Ethernet Cable Documentation CD Serial Cable Quick Start Guide AC Adapter Cable Ethernet Port IP Address one A 172 16 16 16 255 255 255 0 LAN B 192 168 2 1 255 255 240 0 WAN Z 2 UNDERSTANDING THE APPLIANCE As Cyberoam does not pre configure any ports for LAN WAN DMZ networks it is not necessary to use any particular port for them Usa...

Страница 3: ...trolling traffic between LAN and WAN networks Gateway mode policies controlling traffic between LAN DMZ networks Cyberoam in Gateway mode DMZ Network Mail Server 10 10 10 2 10 10 10 3 Web Server 192 168 1 254 10 10 10 1 Internet LAN Network 192 168 1 5 192 168 1 9 61 10 15 17 61 10 15 18 Bridge Mode Configure as Bridge if 1 You have a private network behind an existing firewall or behind a router ...

Страница 4: ..._ Subnet Mask ___ ___ ___ ___ Zone Type LAN WAN DMZ Bridge Mode Bridge IP address Subnet Mask ___ ___ ___ ___ IP address ___ ___ ___ ___ You are probably using DHCP PPPoE Static Get information Username Password IP address Subnet mask Gateway IP address Primary DNS Secondary DNS How to get the information From the PC connected to the Internet open a command prompt window type the command ipconfig ...

Страница 5: ...ce and other end to your Internet connection e g DSL modem or cable modem It is possible that cable might already be connected between your computer and your modem If so disconnect it from your computer and connect into Port B 3 Connect the AC Power connector into the Back panel of the Appliance and the other end into a standardAC receptacle turn on the power 4 Start your management computer Follo...

Страница 6: ...in Console State Green Off Flashing Red Off Flashing Amber Left Amber Left Green Right Off Description Cyberoam appliance in ON Cyberoam appliance in OFF Activity going on No activity Network Activity at the Port Correct cable is used and power is on port Port is connected at the 100Mbps No link LED Front Panel Power HDD Ports A B C D Appliance LED Behavior Refer to the documentation CD ROM for in...

Страница 7: ...ton 1 Configure Bridge IPaddress and subnet mask 2 Provide Gateway and DNS IPaddress Gateway mode To configure Cyberoam in Gateway mode select Gateway Mode option and click button Follow the on screen steps to configure 1 Configure DNS server address Click Obtain an IP from DHCP to override appliance DNS and use DNS received from the external DHCPserver 2 Configure Interface To enable interface fo...

Страница 8: ... authenticated LAN to WAN traffic 1 2 1 2 Click button to configure the mail settings Please select policy for LAN WAN traffic Monitor Only General Internet Policy Strict Internet Policy Allows access without Authentication Does not block any traffic Blocks unhealthy web and Internet traffic Scan HTTP Traffic for Viruses Does not allow access without authentication 1 2 Until Intrusion Prevention S...

Страница 9: ...cation if required and specify username and password Click button for Date and Time zone configuration CONFIGURE DATE AND TIME ZONE Set time zone and current date Enable clock synchronization with NTP server to tune Cyberoam s clock using global time servers Click button to view the configured details Copy the configured details for future use Click It will take few minutes to save the configurati...

Страница 10: ...t for some time before clicking the to access the Web Admin Console Click button to close the Network Configuration Wizard window URL Close On successful configuration following page will be displayed Configuring Gateway Mode Please wait https 172 16 16 16 click to access Web Admin Console ...

Страница 11: ...d edit default firewall rules to enable virus scanning 6 For the below given steps refer to Getting Started Guide From Documentation CD supplied along with Appliance Verify Configuration Configure Mail Web server access 7 Set authentication parameters Go to Identity Authentication Authentication Server to define the authentication parameters 8 Access Help For accessing online help click the Help b...

Страница 12: ...ee or that the customer will be able to operate the software without problems or interruptions Elitecore hereby declares that the anti virus and anti spam modules are powered by Kaspersky Labs and Commtouch respectively and the performance thereof is under warranty provided by Kaspersky Labs and Commtouch respectively It is specified that Kaspersky Lab does not warrant that the Software identifies...

Отзывы: