

© 2006 CyberData Corporation ALL RIGHTS RESERVED
930097B
Quick Reference
Quick Reference
930097B
© 2006 CyberData Corporation ALL RIGHTS RESERVED
Verifying operations and settings
Contacting CyberData
Front View with LEDs
Back View with Test/ Reset Switch
To announce the Paging Gateway’s current IP
address, press the end of a paper clip into the
Test/Reset
switch on the back of the unit. When
the unit beeps after pressing the switch for one
second, release the switch to hear the IP address
announcement.
To restore the Paging Gateway’s factory default
settings, press and hold the
Test/Reset
switch
while all the indicator lights turn off. Continue to
press the switch until after the indicator lights
turn back on, and then release the switch. All
Paging Gateway settings are restored to the
factory defaults, the unit announces its restored
default IP address, and then announces that it is
rebooting.
●
Green
Link
light indicates network connectivity
●
Orange
Link
light indicates 100Mbps baud rate
●
Yellow
Link
light indicates 10Mbps baud rate
●
Blinking yellow
Act
light indicates network
activity
●
Blinking blue
Status
light indicates the unit is
running
●
Green
Paging
light indicates the unit is paging
Corporate Headquarters
CyberData Corporation
2555 Garden Road
Monterey, CA 93940, USA
Voicemail: 831-373-2601
Fax: 831-373-4193
www.CyberData.net
Sales: (831) 373-2601 ext. 334
Support: 831-373-2601 ext. 333
[email protected]
RMA Dept: (831) 373-2601 ext. 136
RMA@
CyberData.net
Warranty
CyberData warrants its product against defects in material and
workmanship for a period of two years from the date of purchase. Should
the product fail within the warranty period, CyberData will repair or
replace the product free of charge. This warranty includes all parts and
labor. Should the product fail out-of-warranty, a flat rate repair charge of
one half the purchase price will be assessed. Repair costs for products
that are in warranty, but damaged by improper modifications or abuse,
are charged at the out-of-warranty rate. Products returned to CyberData,
both in and out-of-warranty, are shipped to CyberData at the customer’s
expense. Charges for shipping repaired products to the customer are
paid by CyberData.
For product service, contact the Returned Materials Authorization (RMA)
department. A product will not be accepted for return without an approved
RMA number. Send the product, in its original package, to: CyberData
Corporation, 2555 Garden Road, Monterey, CA 93940, Attention: RMA
“your RMA number”
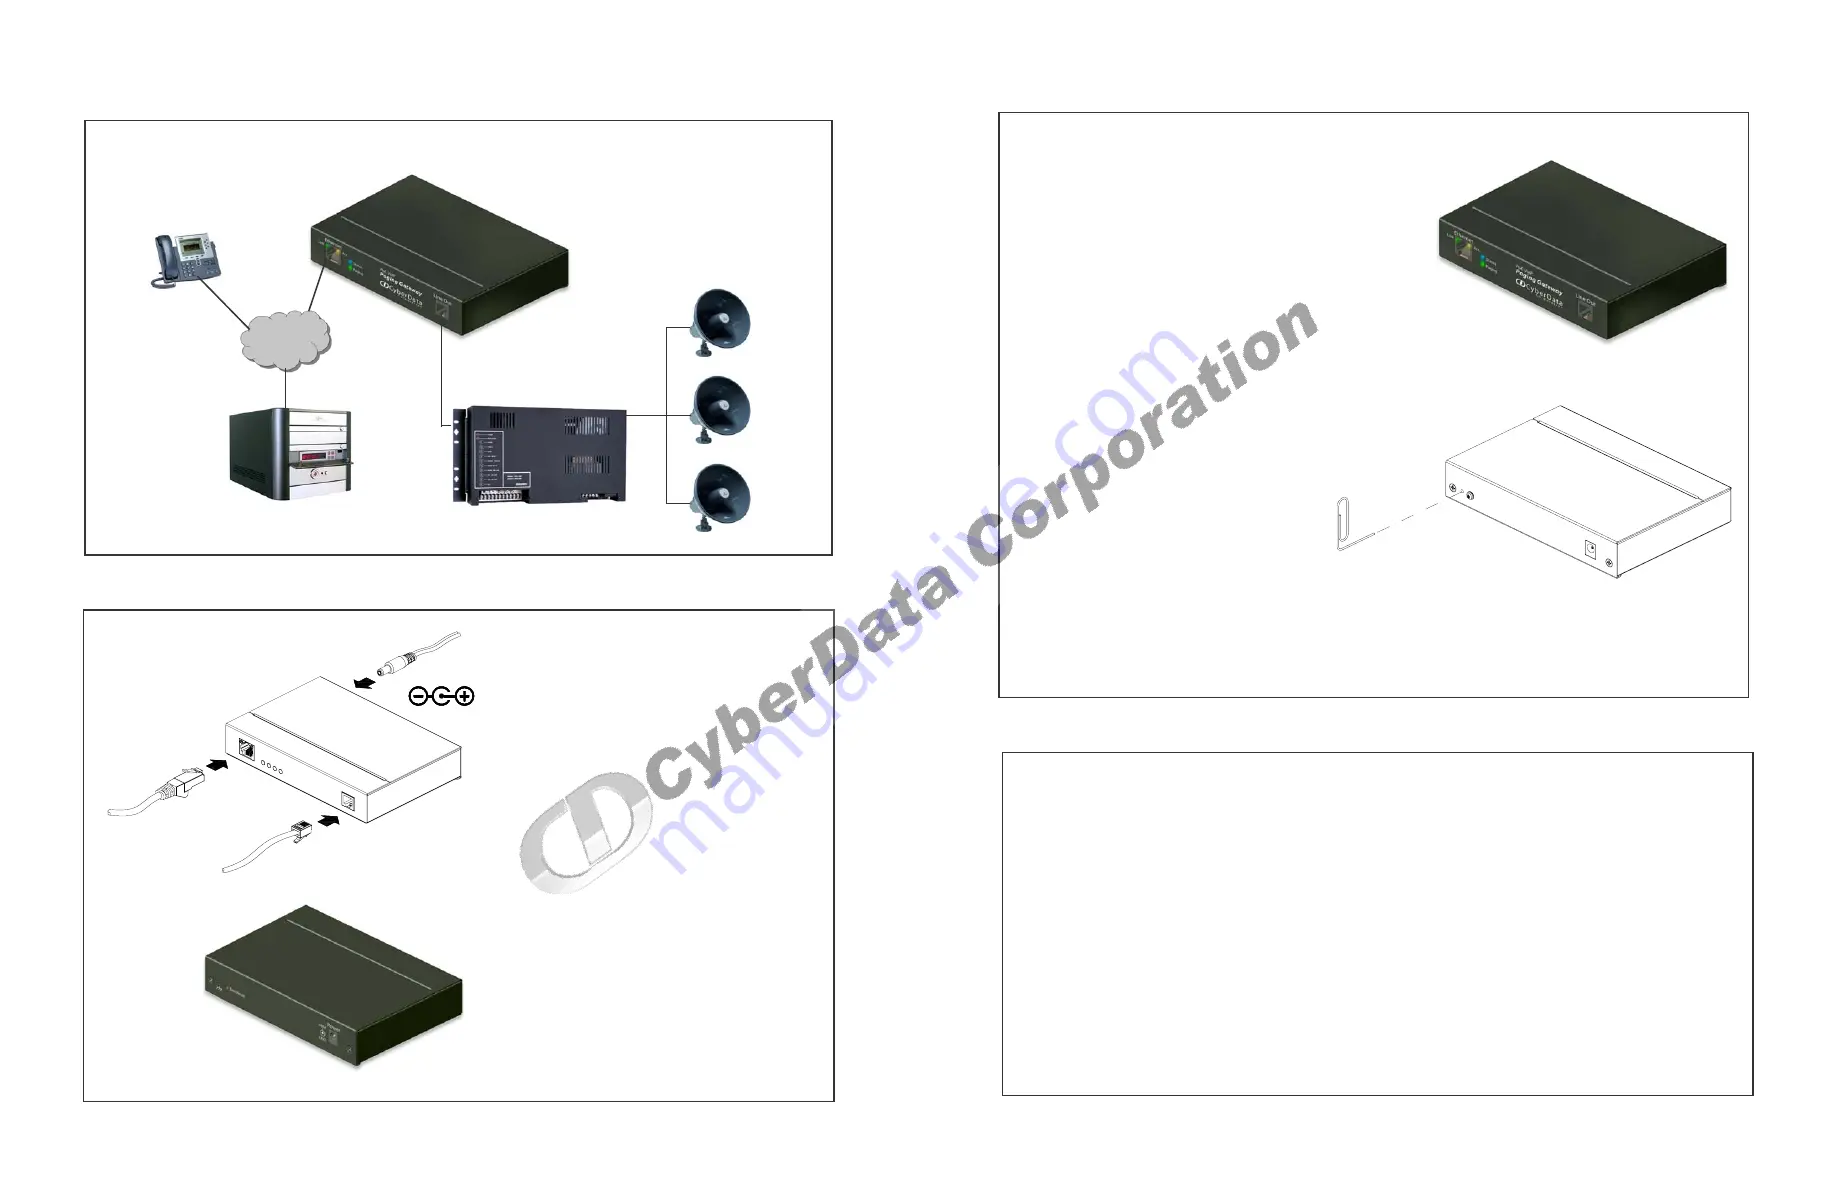
Typical paging system setup using the Paging Gateway
Mounting (optional) and setting up the PoE VoIP Paging Gateway
Paging Amplifier
VoIP Phone
IP PBX
CyberData PoE VoIP Paging Gateway
Paging Speakers
48VDC
You have the option to use the mounting template
on the last page of this document to mark, and then
drill two 5/32” (0.1875”) holes for the mounting
anchors. Then, install the mounting anchors in the
holes, and position the Paging Gateway mounting
holes over the anchors. Use the two #6 sheet metal
screws to secure the Paging Gateway onto the
mounting surface.
To set up the Paging Gateway:
1. Connect it to your network. To use PoE, plug
one end of an
802.3af
Ethernet cable into the
Paging Gateway
Ethernet
port. Plug the other
end into your network. Or, use a standard
Ethernet cable, and a 48VDC power supply as
directed in Step 3.
2. Connect the Paging Gateway to your paging
amplifier. Plug one end of a modular telephone
cord into the Paging Gateway
Line Out
port.
Plug the other end into your paging amplifier.
3. When not using PoE, also connect the Paging
Gateway to a
48VDC
power supply
.
4. Connect the earth grounding wire to the
chassis ground.
Step 1
Step 2
Step 3 (Optional)
Step 4
VoIPon www.voipon.co.uk [email protected] Tel: +44 (0)1245 808195 Fax: +44 (0)1245 808299


