background image

11 

1.

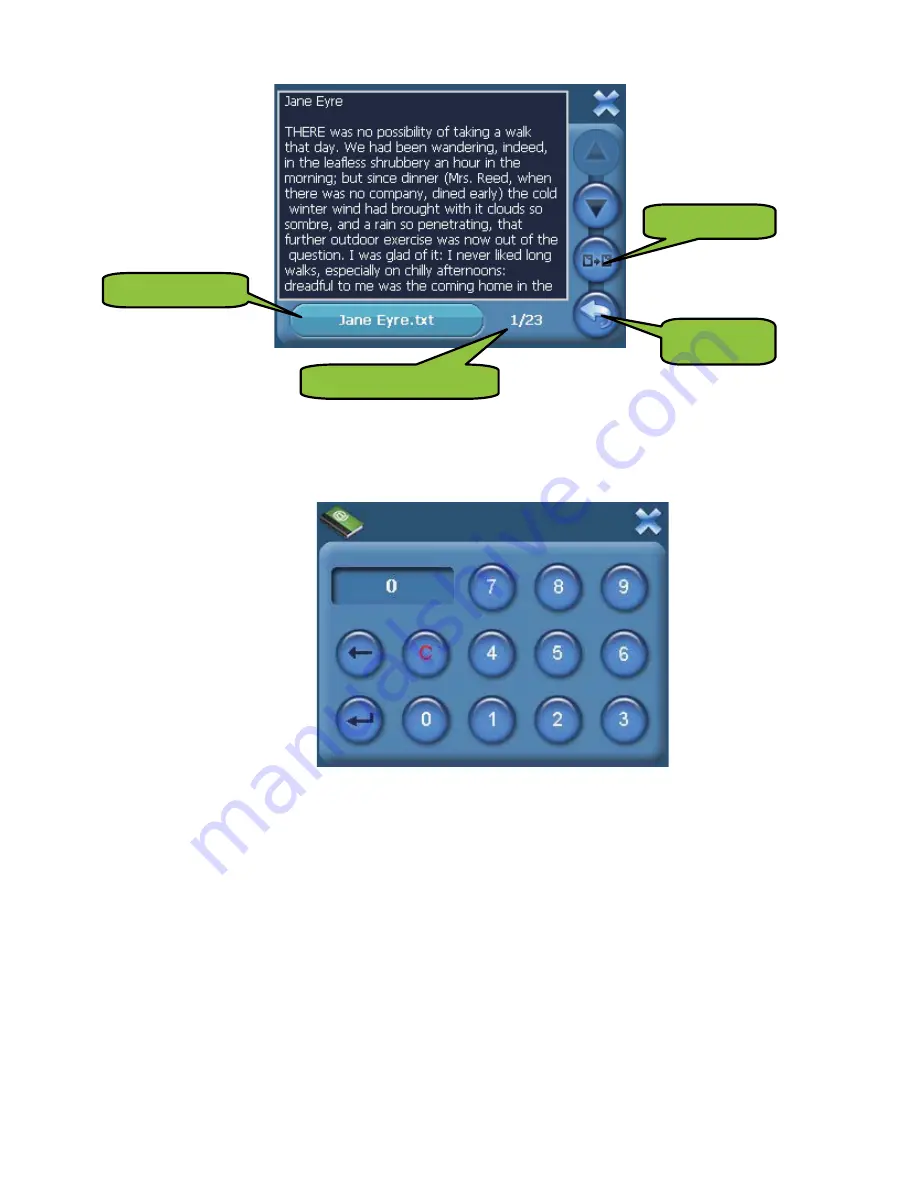
Tap “Previous Page” button to turn to the previous page and tap “Next Page” to turn to the 

next page.   

2.

Tap “Page select” button to choose the page which you want. 

3.

Tap the “X” to return to the E-Book list interface. 

2.5 Video 

1.

Tap “Video” icon on the main interf ace to enter into the Video interface: 

Document shift 

Current Page/ Total Page 

Document Name 

Page select   

Содержание GPD359B

Страница 1: ...GPD359B User Manual...

Страница 2: ......

Страница 3: ...nts 4 1 5 Right side components 4 1 6 Bottom components 5 2 Accessory Operations 5 2 1 Charging by Car Charger 5 2 2 Install the Cradle and Car Mount 6 2 3 USB Cable usage 6 2 4 GPS Initial Cold Start...

Страница 4: ...eded to determine the current location Signal reception can be affected by situations such as bad weather or dense overhead obstacles e g tall buildings Other wireless devices in the vehicle might int...

Страница 5: ...3 A Basic Operation 1 Understanding of the Product Components 1 1 Front components 1 2 Back components Touch Screen Speaker Light Sensor Reset...

Страница 6: ...components 1 4 Left side components 1 5 Right side components Charging Indication T flash Card Slot Mini USB Port Power MIC Insert with a menory card please do not remove the memory card when using t...

Страница 7: ...ard please switch off the unit first And then push the card in and it will eject from the slot 2 Accessory Operations 2 1 Charging by Car Charger When use your PND in the car it is better to use the c...

Страница 8: ...puter and make these two synchronize For upgrading and more information about Micros oft Active Sync please visit Microsoft web 2 4 GPS Initial Cold Start Up The first starting up should be in an open...

Страница 9: ...ll guide you when driving B Functions Operation 1 Powering Main Menu Long time press the Power button to power the equipment on and you will see the power on interface Long time press the Power button...

Страница 10: ...file Tap the RANDOM icon to randomly play the files loaded on the card Tap Next to play the next file and Tap Previous to play the previous piece of music Tap the X to return to the file list interfac...

Страница 11: ...he following interface 1 Tap Previous button to display the previous picture tap Next button to display the next picture 2 Tap Full Screen button to display the picture in full screen as follows Previ...

Страница 12: ...ed automatically at full screen mode and tap the screen to return to the following interface 4 Tap the X to return to the picture list interface 2 4 Ebook 1 Tap the E book icon on the main interface t...

Страница 13: ...turn to the next page 2 Tap Page select button to choose the page which you want 3 Tap the X to return to the E Book list interface 2 5 Video 1 Tap Video icon on the main interface to enter into the V...

Страница 14: ...t to choose with the touch panel to start play the movie 3 Tap Full Screen button to play the movie in full screen 4 During play in full screen double tap the screen to return to the interface above F...

Страница 15: ...the interface as follows 2 Tap the Volume button to enter into sound setting interface as follows 3 Tap the Power button to enter power setting interface as follows 4 Tap the Backlight button to ente...

Страница 16: ...htness If you choose Auto brightness the system will automatically adjust the brightness of the display screen along with the light intensity of its surrouning At this time the buttons on the left and...

Страница 17: ...15 6 Tap the Language button to enter into the language and skin setting interface as follows 7 Tap the System button to enter into the System Info settings as follows...

Страница 18: ...Calibration button on the System info Screen b Tap to the calibration indicated on the screen c Tap and hold at the center of the target d When the target moves to another position tap and hold at th...

Страница 19: ......

Страница 20: ......

Страница 21: ...GPD359B Guide utilisateur...

Страница 22: ......

Страница 23: ...roits 4 1 6 Composants de la partie centrale 5 2 Utilisation des accessoires 5 2 1 Recharger le chargeur de carte 5 2 2 Installer la base et le support 6 2 3 Utilisation C ble USB 6 2 4 Premier d marr...

Страница 24: ...cessaires pour d terminer l emplacement actuel La r ception des signaux peut tre influence par diff rentes situations par exemple un mauvais temps ou des obstacles denses devant soi ex de hauts immeu...

Страница 25: ...3 A Utilisation de base 1 D couvrir les fonctions du syst me 1 1 Composants avant 1 2 Composants arri re Ecran tactile Haut parleur Capteur de lumi re Red marre...

Страница 26: ...1 4 Composants lat raux 1 5 Composants lat raux droits Indicateur de charge Fente pour carte T Flash Ins rez une carte m moire ne retirez pas la carte lorsque le syst me est en cours de fonctionnemen...

Страница 27: ...ord teindre le syst me Effectuez ensuite une l g re pression sur la carte elle sera automatiquement ject e de la fente 2 Utilisation des accessoires 2 1 Recharger le chargeur de carte Lorsque vous uti...

Страница 28: ...vigateur l ordinateur et leur permettre de se synchroniser Pour plus de d tails propos de la fonction de synchronisation Microsoft Active Sync et d am lioration du syst me visitez la page Internet de...

Страница 29: ...her un emplacement sur la carte ou de programmer votre itin raire Consultez le Manuel utilisateur ce dernier vous guidera dans votre navigation B Utilisation des fonctions 1 D marrage et menu principa...

Страница 30: ...ez sur l ic ne ALEATOIRE pour lire de mani re al atoire tous les morceaux enregistr s sur la carte Cliquez sur l ic ne Suivant pour lire le fichier suivant et sur Pr c dent pour jouer le morceau de mu...

Страница 31: ...nte 1 Cliquez sur la touche Pr c dent pour afficher la photographie pr c dente et sur Suivant pour afficher la photographie suivante 2 Cliquez sur Plein cran pour afficher l image en taille pleine com...

Страница 32: ...ein cran et vous n aurez qu cliquer n importe o sur l cran pour retourner l interface suivante 4 Cliquez sur X pour retourner la liste des photographies 2 4 E book 1 Cliquez sur l ic ne E book de l in...

Страница 33: ...Cliquez sur S lection de la page pour s lectionner une page en particulier 3 Cliquez sur X pour retourner la liste de l interface E Book 2 5 Vid o 1 Cliquez sur l ic ne Vid o de l interface principal...

Страница 34: ...ur l cran pour lancer la lecture du fichier 3 Cliquez sur la touche Plein cran pour lire le fichier en plein cran 4 Pendant la lecture du fichier en plein cran double cliquez sur l cran pour retourner...

Страница 35: ...ce suivante 2 Cliquez sur la touche Volume pour acc der l interface suivante de r glage du volume 3 Cliquez sur la touche Power pour acc der l interface de configuration suivante 4 Cliquez sur la touc...

Страница 36: ...menter l intensit de fa on graduelle Si vous s lectionnez Auto clairage le syst me ajustera automatiquement l intensit et l clairage l cran Les touches situ s la gauche et la droite de la barre Config...

Страница 37: ...15 6 Cliquez sur la touche Langue pour acc der l interface de param trage de la langue et de l arri re plan 7 Cliquez sur la touche Syst me pour acc der l interface de param trage du syst me suivante...

Страница 38: ...l cran Informations du syst me b Cliquez sur la touche Calibrage situ e l cran c Cliquez sur une zone et maintenez votre stylet enfonc d Lorsque la cible pass une autre position cliquez au centre de...

Страница 39: ......

Страница 40: ......

Отзывы: