CLEANING
Use a small brush to clean off the outside of the unit. Do not use strong detergents. Household cleaners that contain
aromatic oils such as pine and lemon, and solvents such as kerosene, can damage the plastic housing or handle. Wipe
off any moisture with a soft cloth.
STORAGE
• Never store a fueled unit where fumes may reach an open flame or spark.
• Allow the engine to cool before storing.
• Store the unit locked up to prevent unauthorized use or damage.
• Store the unit in a dry, well-ventilated area.
• Store the unit out of the reach of children.
LONG TERM STORAGE
If planning on storing the unit for an extended time, use the following storage procedure:
1. Drain all fuel from the fuel tank into a container with the same 2-cycle fuel mixture. Do not use fuel that has been
stored for more than 30 days. Dispose of the old fuel/oil mix in accordance with federal, state and local regulations.
2. Start the engine and allow it to run until it stalls. This ensures that all fuel has been drained from the carburetor.
3. Allow the engine to cool. Remove the spark plug and put 5 drops of any high quality motor oil or 2-cycle oil into the
cylinder. Pull the starter rope slowly to distribute the oil. Reinstall the spark plug.
NOTE:
Remove the spark plug and drain all of the oil from the cylinder before attempting to start the unit after storage.
4. Thoroughly clean the unit and inspect it for any loose or damaged parts. Repair or replace damaged parts and
tighten loose screws, nuts or bolts. The unit is ready for storage.
TRANSPORTING
• Allow the engine to cool before transporting
• Drain the fuel from the unit
• Tighten the fuel cap before transporting
• Secure the unit while transporting
CAUSE
SOLUTION
The fuel is old and/or improperly mixed
Drain the fuel tank and add fresh, properly mixed fuel
The air filter is plugged
Clean or replace the air filter
The spark plug is fouled
Clean, gap or replace the spark plug
CAUSE
SOLUTION
The fuel is old and/or improperly mixed
Drain the fuel tank and add fresh, properly mixed fuel
The air filter is plugged
Clean or replace the air filter
CAUSE
SOLUTION
The fuel tank is empty
Fill the fuel tank with properly mixed fuel
The primer bulb was not pressed enough
Press the primer bulb fully and slowly 10 times
The engine is flooded
Move the choke lever to Position 3, hold down the
trigger and pull the starter rope
The fuel is old and/or improperly mixed
Drain the fuel tank and add fresh, properly mixed fuel
The spark plug is fouled
Clean, gap or replace the spark plug
CAUSE
SOLUTION
The air filter is plugged
Clean or replace the air filter
The fuel is old and/or improperly mixed
Drain the fuel tank and add fresh, properly mixed fuel
TROUBLESHOOTING
THE ENGINE WILL NOT START
THE ENGINE WILL NOT IDLE
THE ENGINE WILL NOT ACCELERATE
NOTE:
For repairs beyond the minor adjustments listed above, locate your nearest authorized service center by
calling the Customer Support Department at
1-877-282-8684
(U.S.) or
1-800-668-1238
(Canada).
THE ENGINE LACKS POWER OR STALLS
ENGINE*
Engine Type. . . . . . . . . . . . . . . . . . . . . . . . . . . . . . . . . . . . . . . . . . . . . . . . . . . . . . . . . . . . . . . . . . . . . Air-Cooled, 2-Cycle
Displacement . . . . . . . . . . . . . . . . . . . . . . . . . . . . . . . . . . . . . . . . . . . . . . . . . . . . . . . . . . . . . . . . . . . . . . . . . . . . . . . 27 cc
Idle Speed RPM . . . . . . . . . . . . . . . . . . . . . . . . . . . . . . . . . . . . . . . . . . . . . . . . . . . . . . . . . . . . . . . . . . . 3,600–4,200 rpm
Operating RPM . . . . . . . . . . . . . . . . . . . . . . . . . . . . . . . . . . . . . . . . . . . . . . . . . . . . . . . . . . . . . . . . . . . . 6,800–8,500 rpm
Blower Velocity . . . . . . . . . . . . . . . . . . . . . . . . . . . . . . . . . . . . . . . . . . . . . . . . . . . . . . . . . . . . . . . . . . 150 mph (241 kmh)
Blower Air Output . . . . . . . . . . . . . . . . . . . . . . . . . . . . . . . . . . . . . . . . . . . . . . . . . . . . . . . . . . . . . . . 500 cfm (14.15 cmm)
Ignition Type . . . . . . . . . . . . . . . . . . . . . . . . . . . . . . . . . . . . . . . . . . . . . . . . . . . . . . . . . . . . . . . . . . . . . . . . . . . . Electronic
Ignition Switch . . . . . . . . . . . . . . . . . . . . . . . . . . . . . . . . . . . . . . . . . . . . . . . . . . . . . . . . . . . . . Momentary On/Off Switch
Spark Plug Gap . . . . . . . . . . . . . . . . . . . . . . . . . . . . . . . . . . . . . . . . . . . . . . . . . . . . . . . . . . . . . . . . . 0.025 in. (0.635 mm)
Lubrication. . . . . . . . . . . . . . . . . . . . . . . . . . . . . . . . . . . . . . . . . . . . . . . . . . . . . . . . . . . . . . . . . . . . . . . . . Fuel/Oil Mixture
Fuel/Oil Ratio . . . . . . . . . . . . . . . . . . . . . . . . . . . . . . . . . . . . . . . . . . . . . . . . . . . . . . . . . . . . . . . . . . . . . . . . . . . . . . . . 40:1
Carburetor. . . . . . . . . . . . . . . . . . . . . . . . . . . . . . . . . . . . . . . . . . . . . . . . . . . . . . . . . . . . . . . . . . . Diaphragm, All-Position
Starter. . . . . . . . . . . . . . . . . . . . . . . . . . . . . . . . . . . . . . . . . . . . . . . . . . . . . . . . . . . . . . . . . . . . . . . . . . . AST Auto Rewind
Muffler. . . . . . . . . . . . . . . . . . . . . . . . . . . . . . . . . . . . . . . . . . . . . . . . . . . . . . . . . . . . . . . . . . . . . . . . . . Baffled with Guard
Throttle . . . . . . . . . . . . . . . . . . . . . . . . . . . . . . . . . . . . . . . . . . . . . . . . . . . . . . . . . . . . . . . . . . . . . . . . . . . . Variable Speed
Fuel Tank Capacity . . . . . . . . . . . . . . . . . . . . . . . . . . . . . . . . . . . . . . . . . . . . . . . . . . . . . . . . . . . . . . . . . . . 14 oz. (414 ml)
Approximate Weight (no fuel) . . . . . . . . . . . . . . . . . . . . . . . . . . . . . . . . . . . . . . . . . . . . . . . . . . . . . . . . . . 12 lbs. (5.44 kg)
SPECIFICATIONS
*
All specifications are based on the latest product information available at the time of printing. We reserve the right
to make changes at any time without notice.
WARNING:
To avoid serious personal injury, always turn your unit off and allow it to cool before you
clean or do any maintenance on it.
CLEANING AND STORAGE
REPLACING THE SPARK PLUG
Use a replacement part number
753-05784
. The correct spark gap is
0.025 in. (0.635 mm)
.
Remove the plug after every 25 hours of operation and check its condition.
1. Stop the engine and allow it to cool.
2. Grasp the plug boot firmly and pull the cap from the spark plug.
3. Clean dirt from around the spark plug. Remove the spark plug from the cylinder
head by turning a 5/8 in. socket counterclockwise.
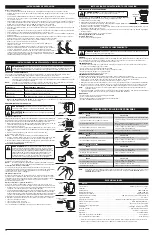
4. Replace cracked, fouled or dirty spark plug. Set the spark gap at 0.025 in. (0.635 mm) using a feeler gauge (Fig. 19).
5. Install a correctly-gapped spark plug in the cylinder head. Turn the 5/8 in. socket clockwise until snug.
If using a torque wrench, torque to:
110-120 in.•lb. (12.3-13.5 N•m)
Do not over tighten.
6. Reinstall the spark plug boot.
4
MAINTENANCE AND REPAIR INSTRUCTIONS
MAINTENANCE AND REPAIR INSTRUCTIONS
MAINTENANCE SCHEDULE
Perform these required maintenance procedures at the frequency stated in the table. These procedures should also be
a part of any seasonal tune-up.
NOTE:
Some maintenance procedures may require special tools or skills. If you are unsure about these procedures,
take the unit to a Cub Cadet or other qualified service dealer.
NOTE:
Maintenance, replacement, or repair of the emission control devices and system may be performed by a
Cub Cadet or other qualified service dealer.
WARNING:
To prevent serious injury, never perform maintenance or repairs with unit running. Always
service and repair a cool unit. Disconnect the spark plug wire to ensure that the unit cannot start.
FREQUENCY
MAINTENANCE REQUIRED
SEE
Before starting the engine
Fill the fuel tank with fresh fuel mixture*
p. 3
Every 10 hours
Clean and re-oil the air filter
p. 4
Every 25 hours
Check the spark plug condition and gap
p. 4
* DO NOT
use E85 fuel in this unit. It has been proven that fuel containing greater than 15% ethanol will likely
damage this engine and void the warranty.
OPERATING INSTRUCTIONS
Other Tips
• Assure the unit is not directed at anybody or any loose debris before starting the unit.
• Verify that the unit is in good working condition. Make sure the tubes are in place and secure.
• Always hold the unit securely when operating. Keep a firm grip on the handle.
• To reduce the risk of hearing loss associated with sound level(s), hearing protection is required.
• Operate power equipment only at reasonable hours— not early in the morning or late at night when people might
be disturbed. Comply with times listed in local ordinances. Usual recommendations are 9:00 am to 5:00 pm,
Monday through Saturday.
• To reduce noise levels, limit the number of pieces of equipment used at any one time.
• To reduce noise levels, operate power blowers at the lowest possible speed to do the job.
• Check your equipment before operation, especially the muffler, air intakes and air filters.
• Use rakes and brooms to loosen debris before blowing.
• In dusty conditions, slightly dampen surfaces or use a mister attachment when water is available.
• Conserve water by using power blowers instead of hoses for many lawn and garden applications, including areas
such as screens, patios, grills, porches, and gardens.
• Watch out for children, pets, open windows or freshly washed cars, and blow
debris safely away.
• Clean up after using blowers and other equipment. Dispose of debris appropriately.
• Use the blower for trees, shrubs, flower beds and hard-to-clean areas. Also use
the unit around buildings, walls, overhangs, fences and screens, and for other
normal cleaning procedures.
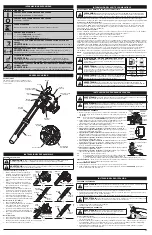
• Hold the blower with the right hand. Do not stand on the right side of the blower
when operating the unit (Fig. 11). If you do, you will be blocking the air intake and
this will affect the unit’s performance. Instead, be sure to stand on the left side of
the unit to maximize the unit’s efficiency (Fig. 11).
Fig. 11
INCORRECT
POSITION
CORRECT
POSITION
AIR FILTER MAINTENANCE
Cleaning the Air Filter
Clean and re-oil the air filter every 10 hours of operation. It is an important item to
maintain. Failure to maintain your air filter properly can result in poor performance or
can cause permanent damage to your engine.
1. Open the air filter cover. Push the locking tab on the top of the cover inward, then
pull the air filter cover out and down. (Fig. 12).
2. Remove the air filter (Fig. 13).
3. Wash the filter in detergent and water (Fig. 14). Rinse the filter thoroughly and
allow it to dry.
4. Apply enough clean SAE 30 motor oil to lightly coat the filter (Fig. 15).
5. Squeeze the filter to spread and remove excess oil (Fig. 16).
6. Replace the filter (Fig. 13).
NOTE:
If the unit is operated without the air filter, you will VOID the warranty.
7. Reinstall the air filter cover. Position the slots on the bottom of the air filter cover
onto the tabs at the bottom of the back plate (Fig. 13).
8. Swing the cover up until the tab on the air filter backplate snaps into place in the
slot on the air filter cover (Fig. 17).
CARBURETOR ADJUSTMENT
The idle speed of the engine is adjustable. An idle adjustment screw is between the
air filter cover and the engine starter housing (Fig. 18).
NOTE:
Careless adjustments can seriously damage your unit. An authorized
service dealer should make carburetor adjustments.
Check Fuel Mixture
Old fuel is usually the reason for improper unit performance. Drain and refill the tank with
fresh fuel mixture prior to making any adjustments. Refer to
Oil and Fuel Information
.
Clean Air Filter
The condition of the air filter is important to the operation of the unit. A dirty air filter
will restrict air flow. This is often mistaken for an out of adjustment carburetor. Check
the condition of the air filter before adjusting the idle speed screw. Refer to
Air Filter
Maintenance
.
Adjust Idle Speed Screw
If, after checking the fuel and cleaning the air filter, the engine still will not idle, adjust
the idle speed screw as follows:
1. Start the engine and let it run at a high idle for a minute to warm up. Refer to
Starting/Stopping Instructions
.
2. Release the throttle trigger and let the engine idle. If the engine stops, insert a
small Phillips in between the air filter cover and the engine cover (Fig. 18). Turn the
idle speed screw in, clockwise, 1/8 of a turn at a time (as needed) until the engine
idles smoothly.
Checking the fuel, cleaning the air filter, and adjusting the idle speed should solve
most engine problems. If not and all of the following are true:
• the engine will not idle
• the engine hesitates or stalls on acceleration
• there is a loss of engine power
Have the carburetor adjusted by an authorized service dealer.
WARNING:
To avoid serious personal injury, always turn your
trimmer off and allow it to cool before you clean or service it.
WARNING:
Wear gloves to prevent injury when handling unit.
WARNING:
This unit will need to be running during idle speed
adjustment. Wear protective clothing and observe all safety
instructions to prevent serious personal injury.
Also, DO NOT set unit on any surface except a clean, hard area while
starting or performing any adjustments. Debris, such as gravel, sand,
dust, grass, etc., could be thrown by the blower tube and damage
property or cause serious injury to bystanders or operator.
CAUTION:
Do not sand blast, scrape, or clean electrodes. Grit in
the engine could damage the cylinder.
Fig. 12
Locking Tab
Air Filter Cover
Fig. 13
Locking Tab
Tabs
Fig. 14
Fig. 15
Fig. 17
Locking Tab
Air Filter Cover
Fig. 18
Idle Adjustment
Screw
Air Filter
Back
Plate
Fig. 19
0.025 in.
(0.635 mm)
Fig. 16


