


84
4. WEB MANAGEMENT
You can manage the Managed Switch via a Web browser. However, you must first assign a
unique IP address to the Managed Switch before doing so. Use the RS-232 DB-9 console port or
use a RJ45 LAN cable and any of the 10/100/1000Base-T RJ-45 ports of the Managed Switch (as
the temporary RJ-45 Management console port) to login to the Managed Switch and set up the IP
address for the first time. (The default IP of the Managed Switch can be reached at
“http://192.168.0.1”
. You can change the Managed Switch‟s IP to the needed one later in its
Network Management
menu.)
Follow these steps to manage the Managed Switch through a Web browser:
Use the RS-232 DB-9 console port or one of the 10/100/1000Base-TX RJ-45 ports (as the
temporary RJ-45 Management console port) to set up the assigned IP parameters of the Managed
Switch, including IP address, Subnet Mask, and Default Gateway of the Managed Switch (if
required)
Run a Web browser and specify the Managed Switch
‟s IP address to reach it. (The Managed
Switch
‟s default IP can be reached at
“http://192.168.0.1”
before any change.)
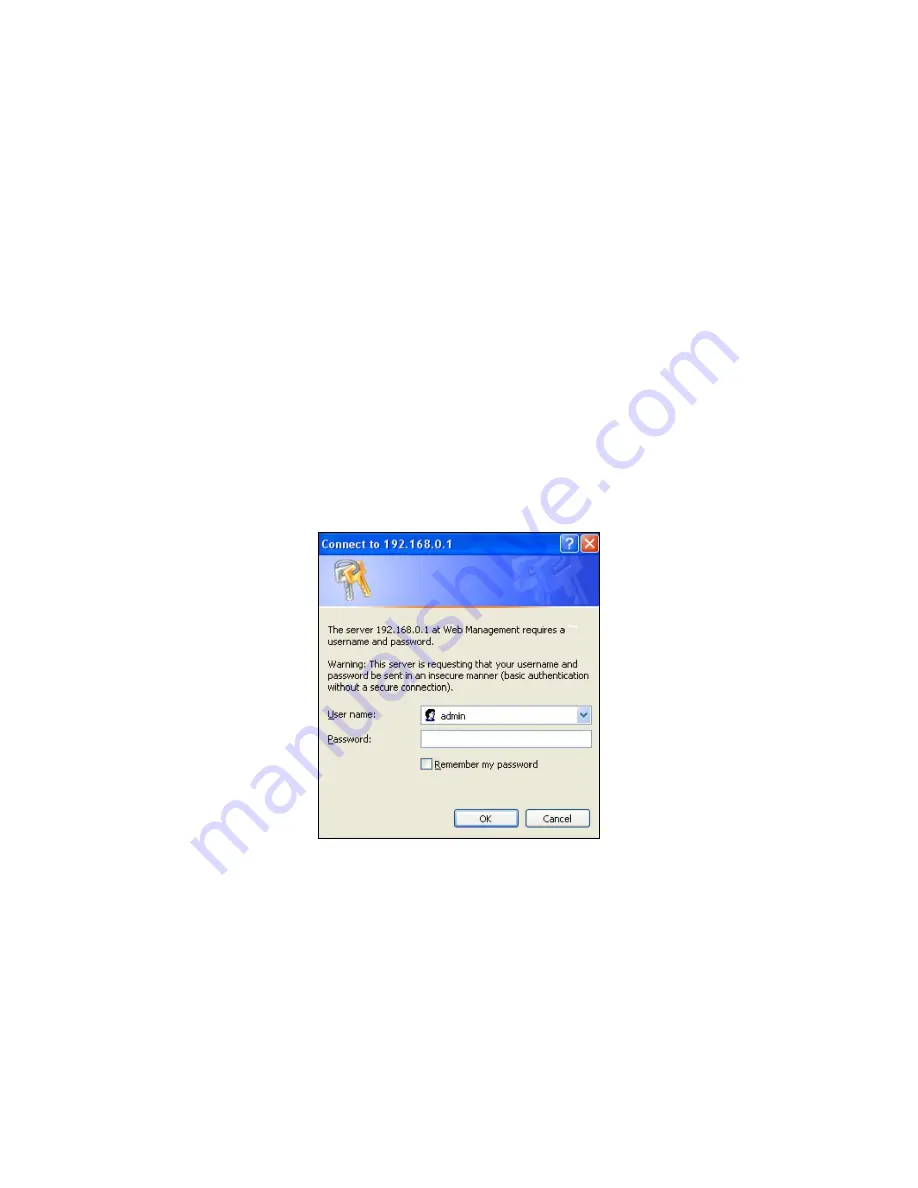
Login to the Managed Switch to reach the Main Menu.
Once you gain the access, a Login window appears like this:
Enter the default username (admin) and password (by default, no password is required) to login to
the main screen page.
After a successful login, the Main Menu screen shows up. The rest of the menu functions in the
Web Management are similar to those described at the Console Management and are also
described below.
Содержание FOS-3126-PLUS SERIES
Страница 186: ...186 Restart DHCP service...


