888-733-4448
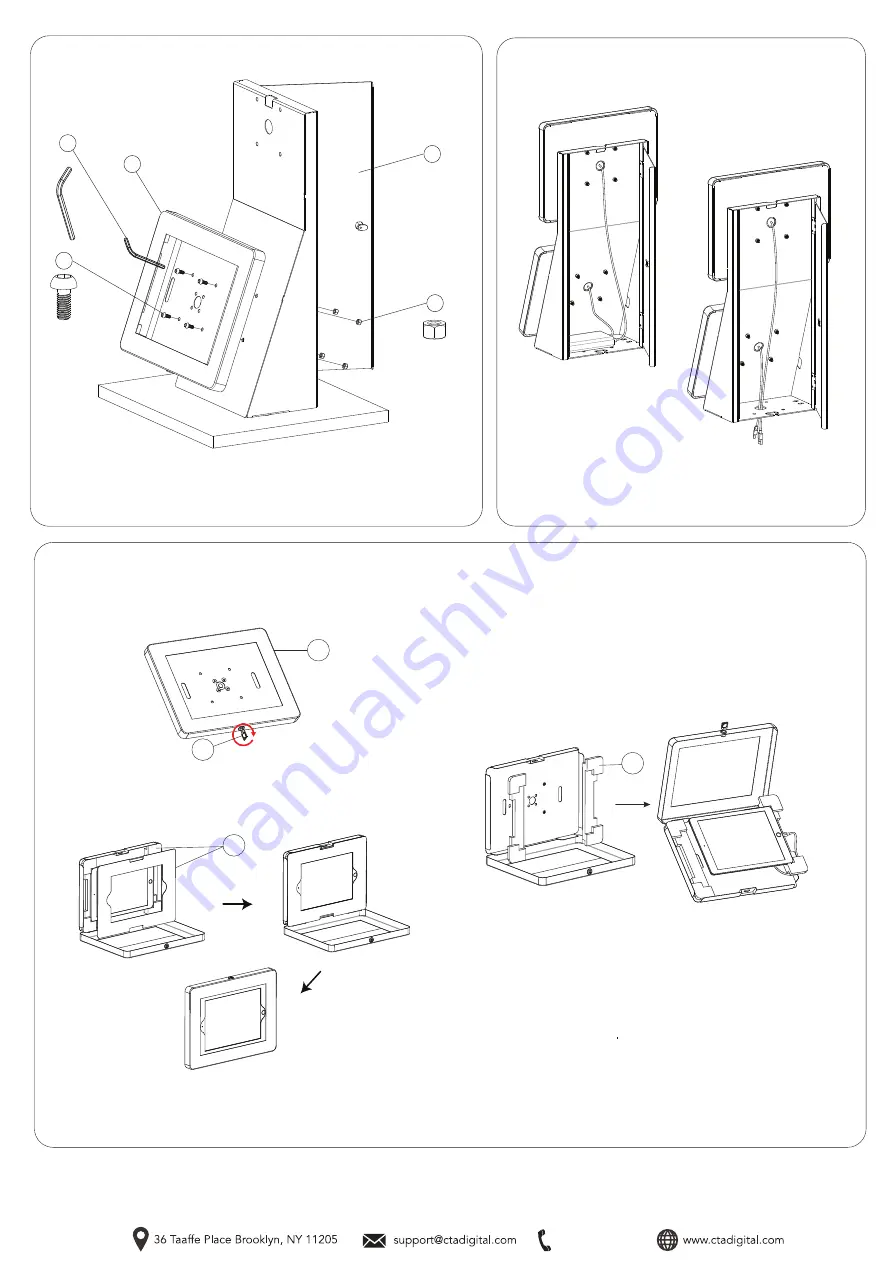
2A. Align VESA holes of CTA’s enclosure (K) with one set of the
desk mount (A) VESA holes in landscape orientation. Using the
included allen key tool (F), rotate in screws (C) while holding hex
nut (D) on the back side until securely tightened. Repeat the
process for the other set of VESA holes and other enclosure.
3. Setting up Cable Routing and Access
to Back Storage Area
3A. Unlock back storage area using the keys (G). Fish through the
holes your cable as shown into the back storage area. Either ish
though the holes at the bottom if required or even connect to any small
charging items, device or accessories as needed that can fit into the
space.
F
M5 x 12
C
x4
x1
x4
D
M5 Nut
A
2. Setting Up Enclosures
K
4A. Lock or unlock your tablet enclosure (K) with
security key (G) as shown. Make sure to do a full 360 degree rotation
before removing.
4B
. Find the appropriate size foam padding / sheet (L) for the device you
wish to use. Make sure the device is compatible for the enclosure before
starting. Lay in device and connect any cables/cords as needed. There
are sticker notes at the corners to identify which device is compatible
4C. If needed, lay-in correct included masking insert. The foam insert is
to block and excess space and make a seamless fit for smaller tablets
Close and lock enclosure afterwards and you’re set.
**Tablet shown for
illustration and
NOT INCLUDED.
**Tablet shown for
illustration and
NOT INCLUDED.
K
G
L
L
4. Setting up Tablet Enclosure Interior Foam Adapters, Sheet Adapter and Security


