PMS 711
2 cyan
85 magenta
76 yellow
10.25.12
CRU Mark
1 Installation Steps
1.1 Hard Drive Installation
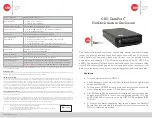
a. Remove the carrier from the HotDock Secure enclosure.
b. Use a Phillips-head screwdriver to remove the screw securing the carrier
cover to the back of the carrier, then slide the cover off.
c.
Insert a SATA hard drive into the unified power and data connector inside
the carrier.
d. Secure the hard drive to the carrier by using the mounting screws provided.
e. Attach the Temperature Control Cooling Sensor to the top of the hard drive
with a piece of tape. The Temperature Control Cooling Sensor is the double-
wired cord with a sensor thermistor at the end that extends out from the
carrier PCB board.
f. Replace the cover and secure it into the rear of the carrier with the screw you
removed in Step B.
g. Reinsert the carrier into the dock.
1.2 Operating Your DataPort HotDock Secure Enclosure
a. Connect the DataPort HotDock Secure enclosure to a computer using either
the included eSATA or USB 3.0/2.0 cables.
b. Connect the DataPort HotDock Secure to a power outlet with the included
AC Adapter.
c. If you have not already done so, slide the carrier into the DataPort HotDock
Secure.
d. Insert the Security Key into the Mini-USB Security Key Port on the face of
the receiving frame.
e. Insert a DataPort Key into the keylock and turn it 90 degrees clockwise to
power on the unit.
f. When both green LEDs are lit, showing that the drive is ready and encryption
is activated, remove the Security Key and store it in a safe location.
When any hard drive is first used with the DataPort HotDock Secure enclosure
it will show up as a blank, unallocated drive and you’ll need to format the drive
inside the enclosure before you can use it. Note that formatting a drive will
erase all data on the drive, so be sure to back up your data before beginning this
operation.
3 Encryption
•
The DataPort Hotdock Secure enclosure uses full disk hardware encryption to
encrypt the entire contents of the drive—including the boot sector, operating
system and all files—without performance degradation.
•
The Security Key must be installed prior to powering on the DataPort HotDock
Secure enclosure for the data to be decrypted on the drive. If the key is
externally connected to the Mini-USB Security Key Port and is not internally
installed, then once it has been accepted, it may be removed and stored in a
safe location. Always store Security Keys apart from the data so that in the
event that the drive is lost or stolen, the data is protected.
•
When a drive is formatted using an encryption key, the same or a duplicate key
must be used in order to access the data. There is no “back door” to access the
data; lost keys make data recovery virtually impossible.
3 Warnings and Notices
•
Though the Security Key port is mechanically identical to the standard Mini-
USB port, inserting Security Keys into any other Mini-USB port may damage
the keys and render them useless. Please only use Security Keys in DataPort
HotDock Secure products.
Likewise, inserting a Mini-USB cable or other device into the DataPort
enclosure’s Security Key port on the carrier may cause internal damage and
potentially lead to loss of data.
•
Any time power is cycled on the DataPort HotDock Secure enclosure, the
Security Key should be installed prior to recycling the power in order to access
the data on the drive.
NOTE: To connect the DataPort HotDock enclosure to a USB 2.0 host,
you must use a USB 2.0 cable. Both USB 2.0 and USB 3.0 cables are
included with your RTX unit.


