background image

The system support deleting previous recorded
MP3 or existing files.

1

In USB or SD card playback mode, press and
hold 

REC/ERASE / 

 for 2 seconds, current 

playback track is stopped and will be deleted.

2

Message “ delete “ is displayed

Delete MP3 tracks

From CD TO USB/SD

The system is capable to convert whole CD disc to
MP3 format and copy to USB mass storage device
or SD card. And also have the ability to copy one
single MP3 track to and from on USB/SD card.

1

In CD playback mode, press 

REC / 


 to start

ripping to USB/SD card (default USB if both 
device are detected), playback will be stopped
and skipped back to the beginning of current 
track, system will scan the contents of USB/SD
card and create folder to store MP3 track. 
Resume CD playback and start ripping from the
moment. The corresponding target device icon
“ USB ” / “ CARD “ start flashing.

2

Press 

STOP/BAND /


 to exit CD ripping.

From AUX To USB/SD

1

10

Getting Started

Unpacking

Power Source

USB/SD Operation

  Remove packing materials from unit.

Note: Save all packing materials

2

AC Adaptor and Remote Control are located on
the outside of the Styrofoam packaging.

3

Remove plastic bag covering radio and remote
control.

4

Untie antenna wire on back of radio.

5

Open lid and remove Styrofoam shipping 
material from turntable.

6

Remove black tie-wrap from under the TONE 
ARM

7

Remove white protective needle cover by gently
pulling towards the front of the unit.

SET UP

1

  Plug the small end of the AC adaptor into the

DC jack on the back of unit and plug the adaptor
into an appropriate outlet.

2

  Untie the FM antenna and allow it to hang 

down in a straight line for optimum FM 
reception. If you have trouble tuning in an 
FM station, move the external FM antenna for
best reception. Do not connect FM antenna to
outside antenna.

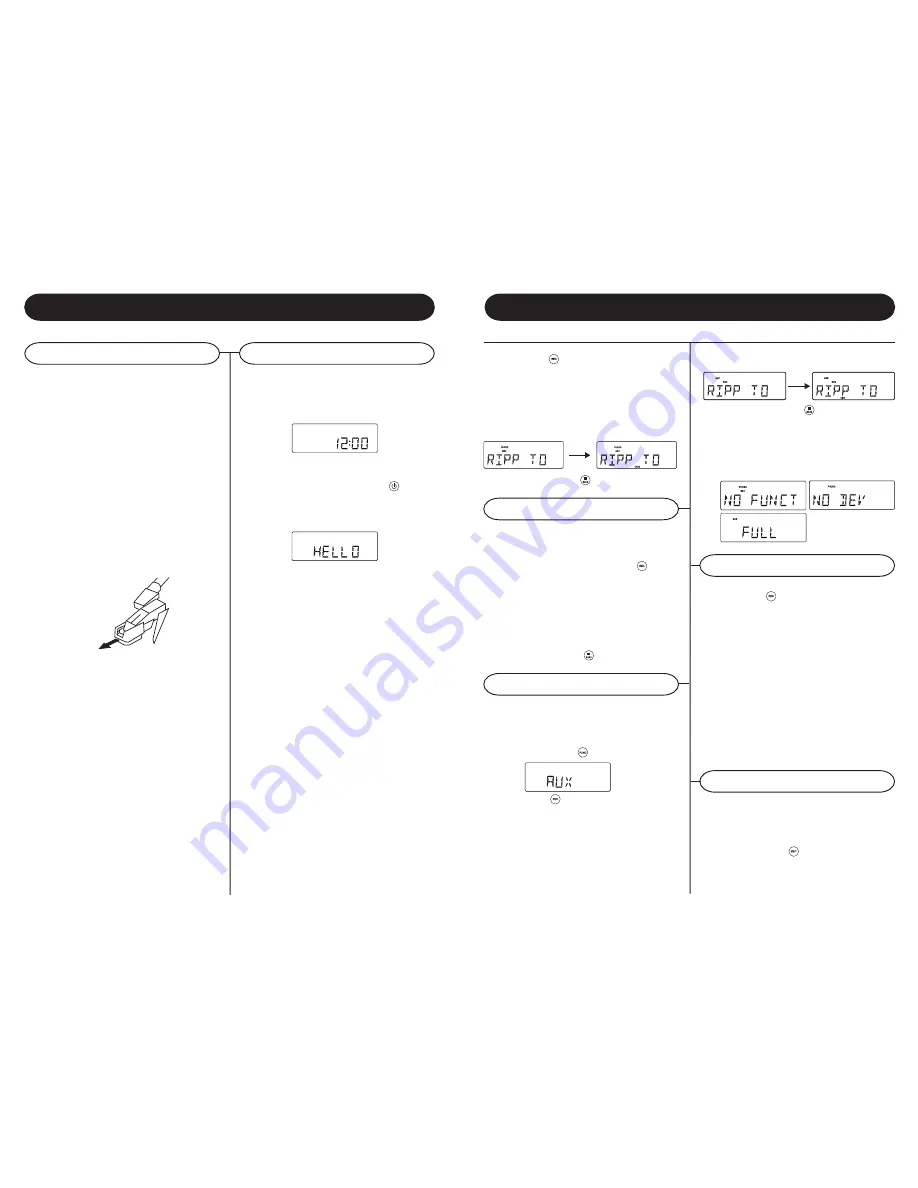
Connect the AC Adaptor to the wall socket. This
system switches to Standby mode automatically
and LCD would shown as below

To switch the unit on, press 

POWER /


  LCD

backlight will be turned on.
STANDBY LED is turned off and displayed as below.

The system is capable to convert audio signal from
AUX input to MP3 format and store in USB mass
storage device or SD card (default USB if both
devices are detected).

1

    Press 

FUNCTION

 / 

 once or more to select

AUX

2

Press 

REC

 / 

 to start ripping, the system will

scan the contents of USB / SD card and create
folder to store MP3 track.

3

Icon “REC” and message “ RIPP TO “ are 
displayed, icon “ AUX “ start flashing.

2

Press 

REC

 / 

 to start ripping, the system will

scan the contents of USB/SD card and create
folder to store MP3 tracks.

3

Icon “ REC ” and message “ RIPP TO” are 
displayed, icon “ PHONO “ start flashing.

4

The target device icon “ USB ” or  “ CARD ” 
start flashing as ripping begins.

5

Press 

STOP/BAND

 / 

 to exit PHONO ripping

4

The target device icon “ USB “ or “ CARD “ 
start flashing as ripping begins.

5

Press 

STOP/BAND /


 to exit AUX ripping

Note:

 The message “ NO FUNCT “ will be displayed

if any key pressed during AUX ripping process.
The message “ NO DEV “ will be shown if neither
USB or SD card not detected. The message
“FULL “ will be displayed if not enough memory in
target device.

1

In CD-MP3, USB or SD card playback mode, 
press 

REC 

 to start MP3 copying from CD

to USB/SD card, or USB to SD card or vice 
versa. Playback will be stopped and system will
scan the contents of USB/SD card and create
folder to store MP3 track.

2

icon “ REC displayed

3

Message COPY 01 will be displayed, the 
proportional copied percentage will be shown 
on the decimal number.

4

The target device icon “USB” or “CARD” start
flashing, the decimal number will be increment
from 01 as MP3 copying starts, the process will
stop as it reach 100

5

Current MP3 will be playback from beginning

MP3 Copying

Содержание CR7002A

Страница 1: ...Troubadour CR7002A 910 283300 0010 200 www crosleyradio com Instruction Manual ...

Страница 2: ...result in damage and will often require extensive work by a qualified technician to restore the product to its normal operation e If the product has been dropped or damaged in any way f When the product exhibits a distinct change in performance this indicates a need for service 19 Replacement Parts When replacement parts are required be sure the service technician has used replacement parts specif...

Страница 3: ...protective needle cover has not been removed 2 The Volume is not turned up The Tone Arm will not move 1 The black tie wrap has not been removed from underneath Tone Arm 2 Tone Arm hold down clip has not been released Trademarks MPEG Layer 3 audio coding technology licensed from Fraunhofer IIS and Thomson There is no power 1 Make sure radio is plugged in correctly 2 Look at the STAND BY INDICATOR a...

Страница 4: ...switch labeled Int Ext When using external speakers this switch must be switched to the EXT position Doing this turns off the internal speakers in the radio and redirects the power to the external speakers 3 If you decide not to use the external speakers be sure switch to INT External Speaker Outputs 11 Headphones Jack Operation 1 Connect headphones to the Headphone Jack 2 Adjust volume to the des...

Страница 5: ...ception Do not connect FM antenna to outside antenna Connect the AC Adaptor to the wall socket This system switches to Standby mode automatically and LCD would shown as below To switch the unit on press POWER LCD backlight will be turned on STANDBY LED is turned off and displayed as below The system is capable to convert audio signal from AUX input to MP3 format and store in USB mass storage devic...

Страница 6: ...USB mode as this may damage the external device or its files Please power off first or press another Mode before safely disconnecting the USB device The system is capable to convert audio signal from Cassette input to MP3 format and store in USB mass storage device or SD card default USB if both devices are detected 1 Press the FUNCTION to set the unit to PHONO mode CUE LEVER TONE ARM SPEED CONTRO...

Страница 7: ...D OPEN CLOSE again to close the compartment READ is displayed as the CD player scans the contents of a disc 2 Track no 1 of root folder Folder 1 will be playback automatically after finish reading CD MP3 disc contents 3 Press FF or FB once or repeatedly until the desired track number appears in display 4 Press PRESET or PRESET to select desired album 5 Press STOP BAND to stop playback Erasing the ...

Страница 8: ...e record can then be placed on the turntable 1 Press FUNCTION to select among 2 When the unit is on press POWER to switch the unit off LCD backlight will be turned off and shown message GOOD BYE for 2 seconds then the STANDBY LED is turned on Note In the standby mode EQ setting sound settings tuner presets and the volume level up to a maximum volume level of 30 will be stored in the unit s memory ...

Страница 9: ...u can press MUTE again adjust the volume controls change source Press EQ on the remote control to select desired EQ mode 5 modes preset EQ 1 Press the FUNCTION to set the unit to TUNER mode 2 Press STOP BAND repeatedly to select your desired waveband FM or AM 3 Auto Tuning Press and hold FF or FB until stations begin to scan The unit will automatically tune to the first available station with suff...

Отзывы: