background image

8

RSF100-0002

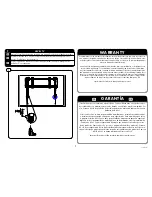
Slide locking brackets (E) to hanger brackets until notches fit flush with hanger brack-

ets.  Turn top screws on locking brackets to secure in place.  
Deslice los soportes de bloqueo (E) a los soportes de suspensión hasta que las 

muescas encajen con los soportes de suspensión. Gire los tornillos superiores de los 

soportes de fijación para fijarlos en su lugar.

Faites glisser les supports de verrouillage (E) sur les supports de suspension jusqu’à 

ce que les encoches soient alignées avec les supports de suspension. Tournez les vis 

supérieures sur les supports de verrouillage pour les fixer en place.

LOCK HANGER BRACKETS INTO PLACE

6

5

6

Hook top of bracket over the top of wall mount then lower down and tilt toward wall.  

You will hear a click when the mechanism locks in place. 
Parte superior del gancho de soporte sobre la parte superior del soporte de pared 

a continuación, más abajo y la inclinación hacia la pared.  Oirá un clic cuando el 

mecanismo de cierre es en su lugar.
Accrocher le haut du support sur le support mural, puis plus bas et l’inclinaison vers 

le mur. Vous entendrez un déclic lorsque le mécanisme de verrouillage en place.

5

HANG TV

Содержание RSF100

Страница 1: ...l installation veuillez contacter le service client le de Crimson AV ou un installateur qualifi Crimson AV n est pas re sponsable des dommages ou des pr judices caus s par un montage un assemblage ou...

Страница 2: ...2 M4 M5 Spacer R 4 M6 M8 Spacer S 4 M8 x 40mm P 4 M8 x 16mm N 4 M8 x 20mm O 4 M8 Washer U 12 8mm x 65mm A 4 B 4 M4 x 12mm F 4 M5 x 30mm I 4 M6 x 12mm J 4 M6 x 20mm K 4 M6 x 30mm L 4 M5 x 12mm H 4 M4 x...

Страница 3: ...localisateur de montants pour localiser les centres de deux piliers structurels WOOD STUD INSTALLATION 1a 1 1a 1 1a 2 Using level draw a vertical line at stud center Con un nivel trace una l nea verti...

Страница 4: ...a 3 Install only to wood studs or wood joists that are a minimum of 2 x4 the wall or ceiling where the mount is being attached may have a maximum drywall thickness of 5 8 Instale solamente a los poste...

Страница 5: ...90 specifica tions Do not drill into mortar joints Do not install to a concrete wall or cinder block that has any type drywall or other finishing Se monta est n dise ados para ser instalados en un mu...

Страница 6: ...verrouillage attach verrouillage sup port E pour montage mural plaque C Tourner la vis sup rieure pour verrouiller en place 3 2 Fasten wall plate to wall using screw A and washer U Fije la placa de pa...

Страница 7: ...l fourni avec un tournevis Outils main seulement 4 1 ATTACH MOUNT BRACKETS If screws bottom out use washers not included to eliminate slack Si los tornillos toc fondo a continuaci n utilizar arandelas...

Страница 8: ...t align es avec les supports de suspension Tournez les vis sup rieures sur les supports de verrouillage pour les fixer en place LOCK HANGER BRACKETS INTO PLACE 6 5 6 Hook top of bracket over the top o...

Страница 9: ...for incidental or consequential damages This includes but is not limited to any labor charges for the repair of Crimson AV LLC products performed by anyone other than Crimson AV LLC Specifications ar...

Страница 10: ...paration de produits Crimson AV LLC par une personne ne travaillant pas pour Crimson AV LLC Les sp cifications sont sujettes changement sans pr avis GARANTIE NOTICE TO CUSTOMERS OUTSIDE THE UNITED ST...

Отзывы: