TSR-310-BTP
Battery Pack for TSR-310
Installation Guide
Description
The Crestron
®
TSR-310-BTP is a rechargeable lithium polymer battery pack that is
designed to replace the battery pack in a Crestron TSR-310 handheld touch screen
remote (not included).
NOTE:
To view an instructional video showing the procedures documented in this
guide, visit
https://vimeo.com/252558509
, or use a QR reader application on your
mobile device to scan the “Instructional Video” QR image located in “Additional
Resources” below.
Additional Resources
Visit the product page on the Crestron website
(
www.crestron.com
) for additional information and
the latest firmware updates. An instructional video
showing installation procedures can also be
viewed. Use a QR reader application on your
mobile device to scan the QR images, or click the
QR images to load the web pages.
Product Page
Instructional Video
Supplied Hardware
Refer to the following table for a complete list of parts that are included with the
TSR-310-BTP:
Supplied Hardware for TSR-310-BTP
QUANTITY
ITEM
PART NUMBER
1
Tool, Battery Removal
2050938
1
Tool, T-Pin
2050937
Remove the Existing Battery Pack
To remove the existing battery from the TSR-310:
1. Place the TSR-310 on a clean, soft surface with the screen side facing down. Use
care to avoid scratching the front surface of the TSR-310.
2. Align the included t-pin tool with the small hole on the rear of the TSR-310.
3. Slide the battery cover away from the TSR-310 while pressing the t-pin down and
into the hole.
Removing the Battery Cover
7. Hold on to the silver flap attached to the battery pack, and insert the flat end of the
battery removal tool underneath the battery pack with the other hand.
8. Place the flat end of the battery removal tool under the battery, and then carefully
pry the battery pack up while pulling on the flap until the adhesive backing on the
battery pack separates from the inside of the battery compartment.
CAUTION:
Do not press the battery removal tool against the circuit board
components when removing the battery pack.
Removing the Battery Pack
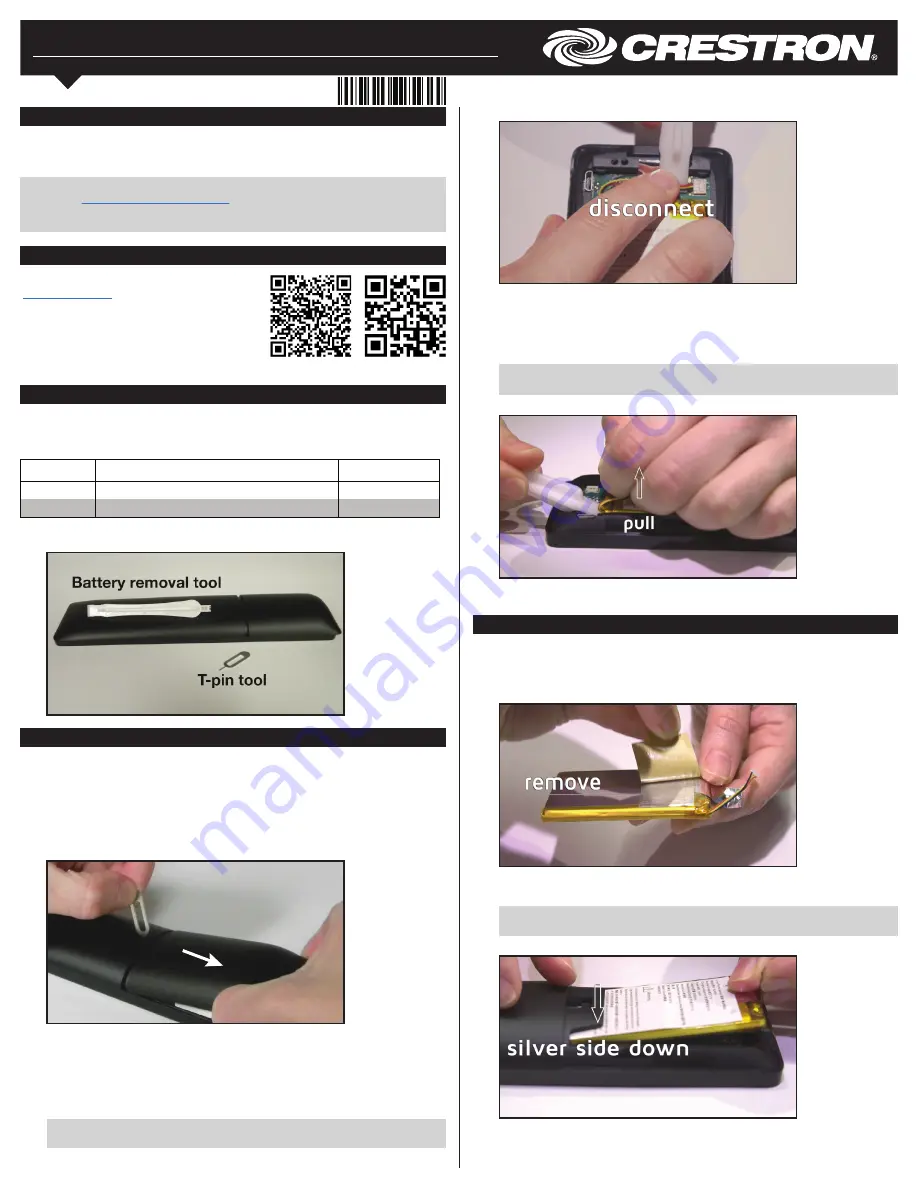
9. Pull the battery pack out the compartment using the flap.
Install the New Battery Pack
Use the following procedure to install the new battery pack into the TSR-310:
1. Peel the adhesive backing off of the bottom of the replacement battery pack to
expose the adhesive surface.
Removing the Adhesive Backing
2. Hold on to the silver flap attached to the battery pack with two fingers, and slide the
battery pack at an angle down and into the TSR-310 battery compartment.
NOTE:
The silver side of the battery pack (with the adhesive surface) must be
facing downward.
Inserting the Battery into the TSR-310
3. Press down on the battery pack to adhere the battery pack to the inside of the
battery compartment.
4. Lift the battery cover up and off the remote, and remove the insulating shroud that
covers the battery.
5. Place the flat end of the battery removal tool underneath the wires extending from
the battery connector.
6. Pull up gently on the wires using the battery removal tool until the battery connector
disengages from the TSR-310 battery compartment.
CAUTION:
Do not press the battery removal tool against the circuit board
components when disengaging the battery connector.
Removing the Battery Cover
Battery Removal Tool and T-Pin Tool


