background image


Product Manual – DOC. 8879C          

DM-NVX-36x(C) Encoders/Decoders  

  17 

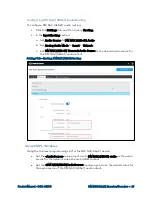
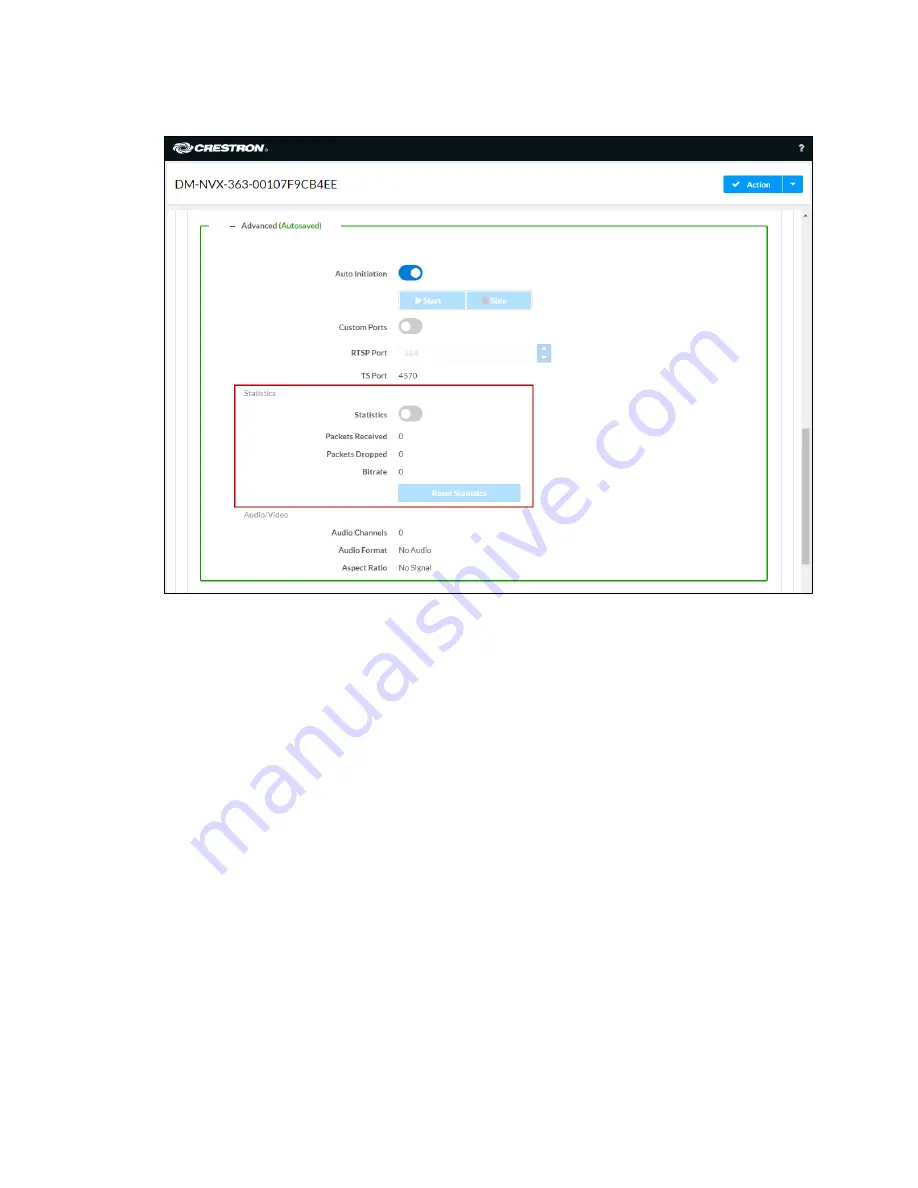
Settings Tab – Stream, Advanced, Statistics 


Using SIMPL Windows 

Configure stream statistics in Slot-01: Stream Transmit or Slot-02: Stream Receive. 

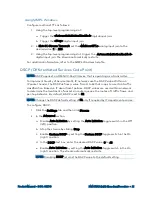
Trigger the <StatisticsEnabled> digital input join to enable the reporting of statistics.  

To disable statistics, trigger the <StatisticsDisabled> digital input join. To clear the 

statistics, trigger the <ResetStatistics> digital input join. The corresponding serial joins 

are updated when the digital input joins are triggered. For additional information, refer 

to the SIMPL Windows help file. 

Image Preview 

Image preview provides still images (thumbnails) that show the current video being 

received by an input of a DM NVX transmitter or displayed by an output of a DM NVX 

receiver. Still images are shown at one frame per second. Image preview supports the 

maximum resolution of the source and scales the image, while maintaining the aspect 

ratio. Images can be previewed in the DM NVX web interface and accessed remotely 

using a web browser. The images can also be previewed on a Crestron touch screen or 

third-party interface.  

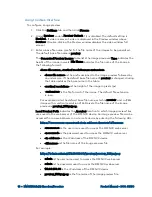
To configure image preview, use the web interface or SIMPL Windows as discussed in the 

following sections. 


Содержание DM NVX Series

Страница 1: ...DM NVX Network AV Encoders Decoders DM NVX 363 DM NVX 360 DM NVX 363C DM NVX 360C Product Manual Crestron Electronics Inc ...

Страница 2: ...istered trademarks of Dolby Laboratories in the United States and or other countries DTS HD and DTS X are either trademarks or registered trademarks of DTS Inc in the United States and or other countries HDMI and the HDMI logo are either trademarks or registered trademarks of HDMI Licensing LLC in the United States and or other countries Active Directory is either a trademark or registered tradema...

Страница 3: ...ctivity 15 Using the Web Interface 15 Using SIMPL Windows 16 Stream Statistics 16 Using the Web Interface 16 Using SIMPL Windows 17 Image Preview 17 Using the Web Interface 18 Using SIMPL Windows 19 Multicast TTL Time to Live 19 Using the Web Interface 20 Using SIMPL Windows 21 DSCP Differentiated Services Code Point 21 Adaptive Bit Rate 23 Using the Web Interface 24 Using SIMPL Windows 24 DM NAX ...

Страница 4: ...ing the Web Interface 49 Using SIMPL Windows 50 User Selectable Output Resolution 51 Using the Web Interface 51 Using SIMPL Windows 52 Maximum Color Depth and Color Space Mode 53 Using the Web Interface 53 Using SIMPL Windows 55 Background Image 55 Using the Web Interface 55 Using SIMPL Windows 60 Still Image Detection 60 USB 2 0 Routing 61 Using the Web Interface 62 Using SIMPL Windows 64 USB HID...

Страница 5: ...s the DM NVX 360 and DM NVX 360C with the addition of Dante audio networking and surround sound to stereo downmixing All DM NVX 36x C devices offer encoding and decoding capabilities in a single unit NOTE DM NVX 36x C encoders decoders are compatible with DM NVX 35x C encoders decoders DM NVX E30 C encoders DM NVX D30 C decoders and DM NVX D80 IOAV decoders Scaling is supported by DM NVX 36x C and...

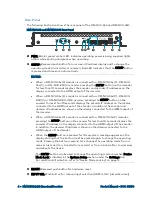
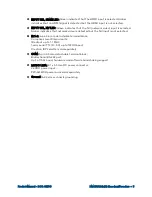
Страница 6: ... in transmitter encoder mode Green RX LED indicates that the device is in receiver decoder mode USB DEVICE USB 2 0 Type C connector female USB 2 0 device port USB signal extender port for connection to a computer or other USB 2 0 host1 Ethernet 1 8 pin RJ 45 connector female 100BASE TX 1000BASE T Ethernet port PoE PD powered device port IEEE 802 3at Type 2 PoE Class 4 25 5 W compliant2 Green LED i...

Страница 7: ...r 500 mA at 5 VDC2 HDMI OUTPUT HDMI Type A connector female HDMI digital video audio output DVI compatible 3 Green LED indicates video signal transmission at the HDMI output HDMI INPUT 19 pin HDMI Type A connector female HDMI digital video audio inputs DVI and Dual Mode DisplayPort compatible 3 Green LED indicates sync detection at the HDMI input AUDIO I O 5 pin 3 5 mm detachable terminal block Ba...

Страница 8: ...address on the display connected to the HDMI output of the encoder In addition the encoder and decoder IP addresses are shown on the display connected to the HDMI output of the decoder When a DM NVX 36x C encoder is connected to a DM NVX 35x C decoder pressing the SETUP button on the encoder for less than 10 seconds displays the encoder IP address on the display connected to the HDMI output of the...

Страница 9: ...at network video is detected but the NV input is not selected IR 1 2 4 pin 3 5 mm detachable terminal block Comprises two IR serial ports IR output up to 1 1 MHz 1 way serial TTL 0 5 V up to 19200 baud Crestron IRP2 emitter sold separately COM 5 pin 3 5 mm detachable terminal block Bidirectional RS 232 port Up to 115 2k baud hardware and software handshaking support 24VDC 1 25A 2 1 x 5 5 mm DC pow...

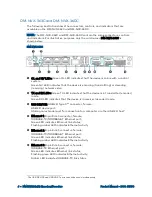
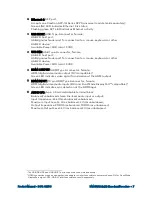
Страница 10: ...is in transmitter encoder mode Green RX LED indicates that the device is in receiver decoder mode USB DEVICE USB 2 0 Type C connector female USB 2 0 device port USB signal extender port for connection to a computer or other USB 2 0 host1 Ethernet 1 8 pin RJ 45 connector female 100BASE TX 1000BASE T Ethernet port Green LED indicates Ethernet link status Flashing amber LED indicates Ethernet activit...

Страница 11: ... digital video audio output DVI compatible 2 Green LED indicates video signal transmission at the HDMI output HDMI INPUT 19 pin HDMI Type A connector female HDMI digital video audio inputs DVI and Dual Mode DisplayPort compatible 2 Green LED indicates sync detection at the HDMI input AUDIO I O 5 pin 3 5 mm detachable terminal block Balanced unbalanced stereo line level audio input or output Input ...

Страница 12: ...c point to point connectivity Stream statistics Image preview Multicast TTL Time to Live Differentiated Services Code Point DSCP Adaptive bit rate DM NAX audio over IP AES67 Dante and AES67 audio embedding and de embedding 7 1 surround sound audio Analog audio input or output Breakaway audio Automatic routing of video inputs Subscriptions Daisy chain EDID Extended Display Identification Data Autom...

Страница 13: ...s only and do not apply to DM NVX surface mountable endpoints A DM NVX card occupies a card slot in a DMF CI 8 chassis Information about the chassis can be viewed using the web interface or SIMPL Windows Using the Web Interface To view DMF CI 8 chassis information click the Status tab and then click Chassis The Chassis section displays the following information Serial number of the chassis Number ...

Страница 14: ...mber in which the card is installed in the chassis DM NVX Director Virtual Switching Appliance If a DM NVX device is managed by a DM NVX Director virtual switching appliance information about the appliance can be viewed using the web interface To view DM NVX Director appliance information click the Status tab and then click DM NVX Director The DM NVX Director section displays the following informa...

Страница 15: ...llowing sections NOTES When DM NVX 36x C devices are used with DM NVX E30 C DM NVX E760 C and DM NVX 35x C encoders the DM NVX 36x C devices must be in Receiver mode When DM NVX 36x C devices are used with DM NVX D30 C DM NVX D80 IOAV and DM NVX 35x C decoders the DM NVX 36x C devices must be in Transmitter mode For a DM NVX 36x surface mountable endpoint the SETUP button can be used to change the...

Страница 16: ...e Reboot Prompt For additional information refer to the online help of the web interface Using SIMPL Windows Using the top level programming slot for the DM NVX 36x C device set the DeviceMode analog input join to the desired mode Receiver or Transmitter The default setting is Receiver Changing modes requires that the device be rebooted Trigger the Reboot digital input join to reboot the device Fo...

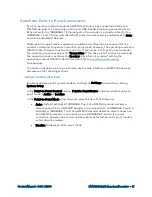
Страница 17: ...ing does not apply to the Mode setting in the Stream section under the Settings tab To configure device mode locking 1 Click the Settings tab and then click System Setup 2 In the Device Mode Lock section do either of the following Allow the operating mode to be changed by setting the Control Lock toggle switch in the Off left position default setting Prevent the operating mode from being changed b...

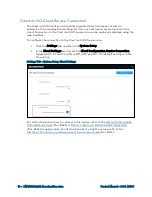
Страница 18: ...e Crestron XiO Cloud service 1 Click the Settings tab and then click System Setup 2 In the Cloud Settings section set the Cloud Configuration Service Connection toggle switch in the On right or Off left position The default setting is in the On position Settings Tab System Setup Cloud Settings For instructions about how to connect to the service refer to the DM NVX 363 and DM NVX 360 Quick Start D...

Страница 19: ...ng mode must be set to Receiver For information about setting the operating mode of DM NVX 36x C devices refer to Encoding and Decoding Functionality To enable or disable point to point mode use the web interface or SIMPL Windows as discussed in the following sections Using the Web Interface Enable or disable point to point mode by clicking the Settings tab and then clicking System Setup In the Po...

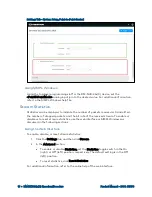
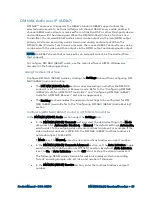
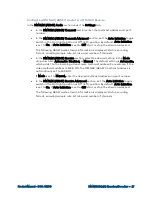
Страница 20: ...ted the number of dropped packets and the bit rate of the received stream To enable or disable or to reset stream statistics use the web interface or SIMPL Windows as discussed in the following sections Using the Web Interface To enable disable or reset stream statistics 1 Click the Settings tab and then click Stream 2 In the Advanced section To enable or disable Statistics set the Statistics togg...

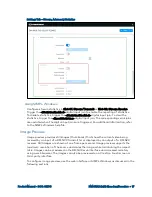
Страница 21: ...triggered For additional information refer to the SIMPL Windows help file Image Preview Image preview provides still images thumbnails that show the current video being received by an input of a DM NVX transmitter or displayed by an output of a DM NVX receiver Still images are shown at one frame per second Image preview supports the maximum resolution of the source and scales the image while maint...

Страница 22: ... vertical resolution is the height of the image in pixels px extension is the file format of the image The default file extension is jpeg For example using the default base file name which is preview and a JPEG image with a vertical resolution of 240 pixels the file name of the image preview is preview_240px jpeg Local Preview Path indicates the preview location to which image preview files are sa...

Страница 23: ...n refer to the SIMPL Windows help file Multicast TTL Time to Live NOTE Multicast TTL configuration applies to a DM NVX 36x C device that is operating as a transmitter Multicast TTL provides the ability to limit or extend the hop limit of a DM NVX stream that traverses routers In IPv4 multicasting routers have a TTL threshold assigned to each interface Only multicast packets with a TTL greater than...

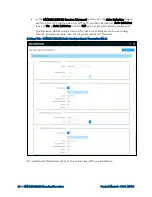
Страница 24: ... position b Stop the stream by clicking Stop c Enable Custom TTL by setting the Custom TTL toggle switch in the On right position d In the TTL text box enter the desired TTL value 1 to 255 The default setting is 5 e Enable Auto Initiation by setting the Auto Initiation toggle switch in the On right position The stream automatically restarts NOTE Disabling Custom TTL returns the TTL value to the de...

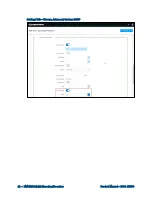
Страница 25: ...ket header the DSCP defines a value from 0 to 63 that maps to a certain traffic classification Based on IT department policies DSCP values are used within a network to determine the treatment of packets in router queues the routes of traffic flows and per hop behavior By default DSCP is set to 32 NOTE Change the DSCP default setting of 32 only if required by IT department policies To configure DSC...

Страница 26: ...22 DM NVX 36x C Encoders Decoders Product Manual DOC 8879C Settings Tab Stream Advanced Custom DSCP ...

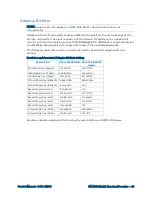
Страница 27: ...and the associated adaptive bit rate setting Resolution and Associated Adaptive Bit Rate Setting RESOLUTION PIXELS PER SECOND ADAPTIVE BIT RATE Mbps 720x480 60 Hz 480p60 20 736 000 302 777778 1280x720 50 Hz 720p50 46 080 000 326 543210 1280x720 60 Hz 720p60 55 296 000 335 185185 1920x1080 50 Hz 1080p50 103 680 000 380 555556 1920x1080 60 Hz 1080p60 124 416 000 400 3840x2160 24 Hz 4k24 199 065 600 ...

Страница 28: ...te set the toggle switch in the Off left position default setting Settings Tab Stream Advanced Adaptive Bit Rate NOTE When adaptive bit rate functionality is enabled a bit rate cannot be set in the Bitrate drop down list Using SIMPL Windows Enable or disable adaptive bit rate functionality in Slot 01 Stream Transmit Trigger the AdaptiveBitrateModeEnable digital input join to enable adaptive bit ra...

Страница 29: ...e DM NVX endpoint is in Transmitter or Receiver mode Refer to the Configuring DM NAX AES67 Audio for a DM NVX Transmitter and Configuring DM NAX AES67 Audio for a DM NVX Receiver sections as appropriate The Routing section enables the appropriate settings to be configured for DM NAX AES67 audio Refer to the Configuring DM NAX AES67 Audio Routing section Configuring DM NAX AES67 Audio for a DM NVX ...

Страница 30: ...ion By default Auto Initiation is set to On If Auto Initiation is set to Off start or stop the stream as desired The following AES67 audio stream information is displayed status encoding format encoding sample rate bit rate and number of channels Settings Tab DM NAX AES67 Audio Configuration in Transmitter Mode For additional information refer to the online help of the web interface ...

Страница 31: ... number of channels In the DM NAX AES67 Receive section select the desired setting in the Mode drop down list Automatic Disabled or Manual The default setting is Automatic which adds 1 to the incoming video stream multicast address For example if the video multicast address is 239 8 0 0 the DM NAX AES67 multicast address is automatically set to 239 8 0 1 If Mode is set to Manual enter the desired ...

Страница 32: ...28 DM NVX 36x C Encoders Decoders Product Manual DOC 8879C Settings Tab DM NAX AES67 Audio Configuration in Receiver Mode ...

Страница 33: ...rt or Extract c Set DM NAX AES 67 Transmit Audio Source to the desired audio source for the DM NAX AES67 audio output Settings Tab Routing DM NAX AES67 Routing Using SIMPL Windows Using the top level programming slot for the DM NVX 36x C device Set the AudioSource analog input join to DM NAX AES67 audio as the audio source for the network video stream or HDMI output Set the DM NAX AES67 AudioSourc...

Страница 34: ...X 363 C functions as a receiver the Dante or AES67 received audio stream can be combined with the video and then output via the HDMI output and analog audio output NOTE An AES67 stream that is received by a DM NVX endpoint cannot be transmitted from that endpoint Prerequisites for Dante or AES67 audio networking consist of the following 1 Audio routing between Dante or AES67 devices requires Audin...

Страница 35: ...s of the Dante module for example 80924b The name matches the default name in the Dante Controller NOTES If the Dante Aes 67Name text box entry is changed in the web interface the new name is automatically added in the Dante Controller but the previous name is not removed Changing the Dante Aes 67Name text box entry may disconnect the audio until the route is reestablished in the Dante Controller ...

Страница 36: ...use the web interface Using the top level programming slot for the DM NVX device set the AudioSource analog input join to Dante AES 67 Audio Input if Dante or AES67 audio is to be inserted into a network video stream or the HDMI output Set the DanteAudioSource analog input join to Dante AES 67 Audio Input if Dante or AES67 audio is to be the audio source for the Dante or AES67 output For additiona...

Страница 37: ... and multichannel signals simultaneously over the network allowing either signal to be selected at any receiver on the network To configure 7 1 surround sound audio set the desired EDID refer to EDID on page 42 Analog Audio Input or Output Analog audio can be configured as either an input or an output As an input on a DM NVX 36x C device that functions as a transmitter analog audio can be configur...

Страница 38: ...e Settings tab and then configuring routing and output settings 1 In the Routing section Set Analog Audio Mode to Insert or Extract Settings Tab Routing Analog Audio Mode Configuration Applicable only when Audio Mode is set to Insert Set Audio Source to Analog Audio Settings Tab Routing Analog Audio Source Configuration ...

Страница 39: ...input join to the desired volume For additional information refer to the SIMPL Windows help file Breakaway Audio A DM NVX 36x C decoder can select and combine separate video and audio signals from two different inputs even two different encoders In receiver mode a DM NVX 36x C device can combine separate video and audio signals from two different DM NVX 36x C transmitters Combining audio from one ...

Страница 40: ...ettings Tab Routing Breakaway Audio Configuration Using SIMPL Windows Using the top level programming slot for the DM NVX device set the AudioSource analog input join to one of the following Input 1 Analog Audio Primary Stream Audio Secondary Stream Audio DM NAX Dante AES 67 Audio Input DM NVX 363 C only For additional information refer to the SIMPL Windows help file ...

Страница 41: ...ttings tab and then click Routing 2 In the Input Routing section enable automatic input routing by setting the Automatic Input Routing toggle switch in the On right position default setting To disable automatic input routing set the switch in the Off left position Settings Tab Routing Automatic Input Routing DM NVX 363 C Screen Shown Using SIMPL Windows Using the top level programming slot for the...

Страница 42: ...configure subscriptions use the web interface or SIMPL Windows as discussed in the following sections Using the Web Interface To configure subscriptions 1 Click the Settings tab 2 Click Subscriptions and then do either of the following In the Subscribed Streams section manually add each transmitter that is to be subscribed to the receiver or load one or more existing subscription lists xml The def...

Страница 43: ...ttings Tab Subscriptions 3 Under the Settings tab click Routing In the Stream Routing section select the desired transmitter to be routed to the receiver Settings Tab Routing Stream Routing For additional information refer to the online help of the web interface ...

Страница 44: ...All DM NVX devices in the daisy chain must use the same stream NOTES A daisy chain configuration is not supported if Port Selection functionality is enabled Refer to Network Port Selection on page 66 for additional information A daisy chain configuration can be used for a video wall refer to Video Wall Processing on page 47 and also for individual displays that are to show the same video image The...

Страница 45: ...Click the Settings tab and then click Stream 2 In the Advanced section a For each receiver in the daisy chain disable Auto Initiation and then stop the stream NOTE Do not proceed to step 2b until Auto Initiation is disabled and the stream is stopped on all receivers in the chain b For each receiver in the daisy chain i Set a new stream location ii Start the stream For additional information refer ...

Страница 46: ... the default EDID is desired use the web interface to select the EDID To view a list of default or user EDID files search for an EDID file or add or delete user EDID files go to the Action menu in the upper right corner of the web interface and select EDID Management Action Menu EDID Management To select an EDID for the input 1 Click the Settings tab and then click Inputs 2 In the Inputs table cli...

Страница 47: ...Product Manual DOC 8879C DM NVX 36x C Encoders Decoders 43 Settings Tab Inputs EDID Configuration ...

Страница 48: ... Infrared will send the power on or power off command as specified in the Power Off No Sync Detected and Power On Sync Detected sections discussed in step 8 below If None is selected no command will be sent 5 Applicable only when the DM NVX device is in Receiver mode Set Output Timeout to enable the display device to turn off after a predetermined period of time in which no signal is detected Sele...

Страница 49: ...t To test the command click the Test button If RS232 is selected in step 4 enter the RS232 command in the Power Off No Sync Detected and Power On Sync Detected sections and then select the desired terminator and format To test the command click the Test button If Infrared is selected in step 4 click IR Ports under the Settings tab and then click the Load IR File button for port 1 or port 2 Browse ...

Страница 50: ...46 DM NVX 36x C Encoders Decoders Product Manual DOC 8879C Settings Tab Outputs Automatic Display Power Shown with DM NVX Device in Receiver Mode and CEC Interface Command Selected ...

Страница 51: ...k the Settings tab and then click Outputs 2 In the Outputs table click the Edit button 3 In the Layout section a In the Horizontal Bezel Compensation text box enter a value ranging from 0 to 500 pixels b In the Vertical Bezel Compensation text box enter a value ranging from 0 to 500 pixels c Select the Video Wall radio button d In the Width combo box select the desired number of rows of displays e...

Страница 52: ...48 DM NVX 36x C Encoders Decoders Product Manual DOC 8879C Settings Tab Outputs Video Wall Configuration ...

Страница 53: ...content does not fit properly on a display adjustments to underscan may be desired Adjusting underscan reduces the image size by the specified percentage so that the entire video frame is displayed To adjust underscan use the web interface or SIMPL Windows as discussed in the following sections Using the Web Interface To configure underscan 1 Click the Settings tab and then click Outputs 2 In the ...

Страница 54: ...t Manual DOC 8879C Settings Tab Outputs Underscan Configuration Using SIMPL Windows Adjust underscan in Slot 06 HDMI Out Set the Underscan analog input join to the desired value For additional information refer to the SIMPL Windows help file ...

Страница 55: ...utput resolution use the web interface or SIMPL Windows as discussed in the following sections Using the Web Interface To configure the output resolution 1 Click the Settings tab and then click Outputs 2 In the Outputs table click the Edit button 3 In the HDMI Output Setting section select the desired resolution in the Resolution drop down list For additional information refer to the online help o...

Страница 56: ...879C Settings Tab Outputs HDMI Output Resolution Configuration Using SIMPL Windows Configure the output resolution in Slot 06 HDMI Out Set the Resolution analog input join to the desired value For additional information refer to the SIMPL Windows help file ...

Страница 57: ...and then click Outputs 2 In the Outputs table click the Edit button 3 In the HDMI Output Setting section Configure maximum color depth in the Max Color Depth drop down list by selecting the desired setting NOTE If HDR video is desired at the output set Max Color Depth to 10 bit mode Configure color space mode in the Color Space Mode drop down list by selecting the desired setting NOTE If HDR video...

Страница 58: ...54 DM NVX 36x C Encoders Decoders Product Manual DOC 8879C Settings Tab Outputs HDMI Output Maximum Color Depth and Color Space Mode ...

Страница 59: ...ackground image for on screen display whenever active video content is not being displayed NOTE Supported image file types are jpeg jpg and png The supported maximum resolution of an image is 3840x2160 pixels Up to 20 image files can be uploaded for a total storage capacity of up to 100 MB To configure a background image use the web interface or SIMPL Windows as discussed in the following sections...

Страница 60: ...ar in the Image Files drop down list or if the desired image does not appear in the list click Manage Images The Manage Images dialog box opens Upload an image file as follows a Click Add The File Upload dialog box opens b Click Browse navigate to the desired image file select the image file and then click Open c In the File Upload dialog box click Load When the progress bar indicates that the upl...

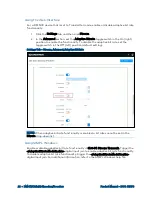
Страница 61: ...mage is uploaded and appears in the Preview window b If you wish to have the image refreshed based on a specified number of minutes select the Refresh checkbox and then select the desired refresh rate in minutes in the Refresh Rate list box The refresh rate ranges from 1 to 65 535 minutes The default setting is 60 minutes To disable the background image set the Background Image toggle switch in th...

Страница 62: ...58 DM NVX 36x C Encoders Decoders Product Manual DOC 8879C Settings Tab Outputs Background Image ...

Страница 63: ...oduct Manual DOC 8879C DM NVX 36x C Encoders Decoders 59 Settings Tab Outputs Background Image Retrieval from Local Device Adding an Image Settings Tab Outputs Background Image Retrieval from Local Device ...

Страница 64: ... Image Detection Still image detection enables a DM NVX endpoint to detect a still image and pass the information to a control system Still image detection occurs when a sync is detected at the HDMI input encoder only or at the HDMI input or stream that is routed to the HDMI output decoder only and 5 seconds have elapsed in which no motion occurred within the image NOTE Detection of still images i...

Страница 65: ... peripheral devices are supported including whiteboards touch screens game controllers web cameras mobile devices headsets and flash drives Crestron does not guarantee that all USB products are compatible with DM NVX devices For USB 2 0 Layer 2 transport one local DEVICE port connection supports up to seven remote HOST port connections simultaneously When multiple remote connections are required a...

Страница 66: ...USB device can be used regardless of the number of remote connections Layer 3 Enables Layer 3 transport of USB 2 0 data across VLANs This mode is compatible with DM NVX 36x C devices only Only one remote connection is supported For Layer 2 transport the Local Device ID field displays the MAC address of the DM NVX device that is being configured For Layer 3 transport the Local Device ID field displ...

Страница 67: ...s clicked for each device When devices are paired the Pairing Status indicates Paired To remove pairing between DM NVX devices do either of the following If Automatic USB Pairing is disabled click the UnPair button for each device that is paired If Automatic USB Pairing is enabled do either of the following For Layer 2 remove the current entry or enter 00 00 00 00 00 00 in each Remote Device ID te...

Страница 68: ...responding MAC address of each device For Layer 3 transport the UsbLocalDeviceIpAddress_F serial output join reports the corresponding IP address of each device 4 Do either of the following For Layer 2 transport a Copy the MAC address UsbLocalDeviceId of the LEX device into the UsbRemoteDeviceId serial input join on the REX device On the REX device the UsbRemoteDeviceId_F serial output join report...

Страница 69: ...e LEX device On the LEX device the UsbRemoteDeviceIpAddress_F serial output join reports the IP address of the REX device to which the LEX device is to be paired 5 Do either of the following Trigger the Pair digital input join on all DM NVX devices LEX and REX Trigger the AutomaticUSBPairingEnabled digital input join on all DM NVX devices LEX and REX To remove pairing between DM NVX devices do eit...

Страница 70: ...cific external Ethernet ports and external Ethernet ports can then be assigned to the various traffic types AES67 or Dante audio can be separated from the primary video and control network resulting in a dedicated audio network CAUTION When network port selection is set to Off default setting multiple Ethernet ports cannot be connected to the same Ethernet switch Doing so will cause a network loop...

Страница 71: ...4 are available for use Dante applicable to DM NVX 363 and DM NVX 363C default setting is port 3 Ethernet ports 1 2 3 and 4 are available for use USB default setting is port 1 Ethernet ports 1 2 3 and 4 are available for use 4 Click Save Changes to apply the new settings Settings Tab Port Selection DM NVX 363 Page Shown ...

Страница 72: ...reaming is functional and can also be used as a tool for the adjustment calibration and alignment of displays projectors and video walls A DM NVX encoder can send the test pattern to any routed DM NVX decoder The test pattern generator can be configured using the web interface or SIMPL Windows Using the Web Interface Configure the test pattern generator by clicking the Settings tab and then clicki...

Страница 73: ...ern Generator section do the following 1 In the Test Pattern drop down list select the desired test pattern Available options are listed in the following table TEST PATTERN OPTION TEST PATTERN Off default setting Disables the test pattern generator SMPTE ColorBars Black White ...

Страница 74: ...70 DM NVX 36x C Encoders Decoders Product Manual DOC 8879C Vertical Lines Grid Color Bars Gray Gradient ...

Страница 75: ...g 3840x2160p60 RGB 8 bit 3840x2160p60 Y420 8 bit 3840x2160p30 RGB 8 bit 1920x1080p60 RGB 8 bit 720p60 RGB 8 bit Using SIMPL Windows Configure the test pattern generator in Slot 12 Test Pattern Generator Set the TestPatternGenerator analog input join to the desired test pattern Set the TestPatternResolution analog input join to the desired value For additional information refer to the SIMPL Windows...

Страница 76: ...sfer Protocol Secure Configure user and group authentication management and IEEE 802 1X authentication using the web interface Authentication Management Authentication management can be configured for users and groups including Active Directory credential management groups Predefined access levels can also be assigned To configure authentication management in the web interface click the Security t...

Страница 77: ...o enhance the security of wireless and wired LANs The standard defines how to provide authentication for devices trying to connect to other devices on the LAN To manage trusted certificate authorities go to the Action menu in the upper right corner of the web interface and select Manage Certificates Action Menu Manage Certificates ...

Страница 78: ...Decoders Product Manual DOC 8879C To configure IEEE 802 1X authentication in the web interface click the 802 1X Configuration tab For detailed information refer to the online help of the web interface 802 1X Authentication Tab ...

Страница 79: ...is disabled c In the Custom URL Path text box enter the path to the manifest file in the following FTP or SFTP URL format ftp username password host port path filename or sftp username password host port path filename where username is the username on the FTP or SFTP server password is the password for the username host is the fully qualified domain name or IP address of the FTP or SFTP server por...

Страница 80: ...coders Decoders Product Manual DOC 8879C Clicking Update Now causes the firmware to be updated at the current time however the schedule that is set in step 2d above remains in effect Settings Tab System Setup Auto Update ...

Страница 81: ...hange to take effect The network switch port that connects to a DM NVX device must be enabled with IGMPv2 or IGMPv3 snooping to prevent the switch from flooding the multicast destination address traffic to all other connected ports The multicast destination address that is configured for the DM NVX device must be within the range of qualified addresses An upstream device such as a layer 3 router o...

Страница 82: ...snooping switches may collapse IP multicast group memberships into a single Ethernet multicast membership group In addition to building and maintaining lists of multicast group memberships the snooping switch must also maintain a list of multicast routers When multicast packets are forwarded the packets should be forwarded not only on ports that have expressed joins using IGMP but also on ports to...

Страница 83: ... 79 If the network switch supports IGMP fast leave enable the configuration at the port global or VLAN level If the network switch supports PIM snooping enable the configuration to prevent flooding IP multicast traffic toward multicast router mrouter ports ...

Страница 84: ...e that the HDCP settings of all DigitalMedia devices in the signal path support the HDCP level of the source The display does not support the HDCP level of the source Ensure that the display supports the HDCP level of the source An incorrect video source is selected Switch the video source to the correct input The video is intermittent The HDMI or Ethernet cable connections are faulty Verify that ...

Страница 85: ...s not being displayed Neither IGMPv2 nor IGMPv3 is enabled in the IGMP snooping configuration Ensure that IGMPv2 or IGMPv3 is enabled on the network switch Video is flickering or video is not displayed when multiple DM NVX devices connect to a network switch Neither IGMPv2 nor IGMPv3 snooping is enabled in the network switch for the associated port or VLAN Enable IGMPv2 or IGMPv3 snooping in the c...

Страница 86: ...ion menu located in the upper right corner of the web interface click Restore From the Tools menu in the Crestron Toolbox software select Text Console and issue the restore command Power cycle the device 11 times After the eleventh power cycle wait until the device boots and then press the SETUP button for 5 seconds The device is operational when the PWR LED is a steady green ...

Страница 87: ...scovery Tool can be used The DM NVX device is discovered and is listed in the device list on the left side of the screen The associated host name IP address and firmware version are also displayed 3 In the Device Discovery Tool list double click the name of the DM NVX device DM NVX 360 DM NVX 363 DM NVX 360C or DM NVX 363C The Authentication dialog box opens 4 Do the following a Enter a user name ...

Страница 88: ... Login Page 6 Enter the user name and password The default user name and password are both admin NOTE The user name and password are case sensitive 7 Click Sign In The web interface of the DM NVX device opens For additional information refer to the online help of the web interface ...

Страница 89: ...Product Manual DOC 8879C DM NVX 36x C Encoders Decoders 85 This page is intentionally left blank ...

Страница 90: ...Crestron Electronics Inc Product Manual DOC 8879C 15 Volvo Drive Rockleigh NJ 07647 Tel 888 CRESTRON 7 9 21 Fax 201 767 7576 Specifications subject to www crestron com change without notice ...

Отзывы: