5925 Heisley Road • Mentor, OH 44060-1833
Holding Cabinet
FL-2361
Rev. 4 (10/13)
Page 5 of 12
INSTALLATION INSTRUCTIONS
FOR ELECTRIC OPERATION:
Specifications: 120 Volts, 1500 Watts, 60 Hz., 1 Ph.
12.5 Amps, 15 Amp. Service (NEMA 5-15P)
Plug the power cord into the proper wall outlet and
push switch to “ELECTRIC” .
Preheat cabinet for 30 minutes .
FOR PROPANE GAS OPERATION:
Specifications: (Propane) 8,700 BTU
Connect a propane tank (per Propane Installation
Instructions)
Push the switch to “GAS” . Preheat cabinet for 45
minutes .
NOTES:
New tanks may not light on the first couple
tries . See “Re-light Burner” instructions .
1 lb. propane tank will provide approximately 6 hours
of heat at 160°F.
FOR NATURAL GAS OPERATION:
Specifications: 8,700 BTU at W.C.
Notes about using gas:
1 . GAS RESET LIGHT:
a) Red light on control panel will come on and
an alarm will sound if the flame is not present
when it should be .
b) Propane tank may be empty or a draft has blown
out the burner flames.
c)
To re-light the burner
: Push switch to “Off”
and then back to “Gas” quickly .
d) Wait for up to 10 seconds and then check sight
glass below the door to see the burner flames.
Repeat as necessary .
Call Service
if alarm goes off repeatedly without ignition .
DO NOT ATTEMPT
TO LIGHT BY
HAND.
This cabinet has an automatic ignition system.
2 .
The battery (needed for the gas valve and the
temperature control) keeps charging as long as the
cord is plugged into the outlet (or when accessory
solar panel is added) . Check the battery indicator on
the control panel .
NOTE:
The battery will provide power for approximately
16 hours (without solar) before needing a charge;
depending on the age and condition of the battery .
WARNING
GENERAL INSTALLATION:
1 .
Remove all paper and packing materials from the
inside of the cabinet and install angles into posts .
2 .
Remove protective paper and vinyl material from
the outside of the cabinet .
3 .
Place the cabinet in a well-ventilated area on level
floor or ground.
4 .
DO NOT block the flue vent located at the upper
rear of the cabinet .
5 . Lock the two front casters before starting up or
plugging in the cabinet .
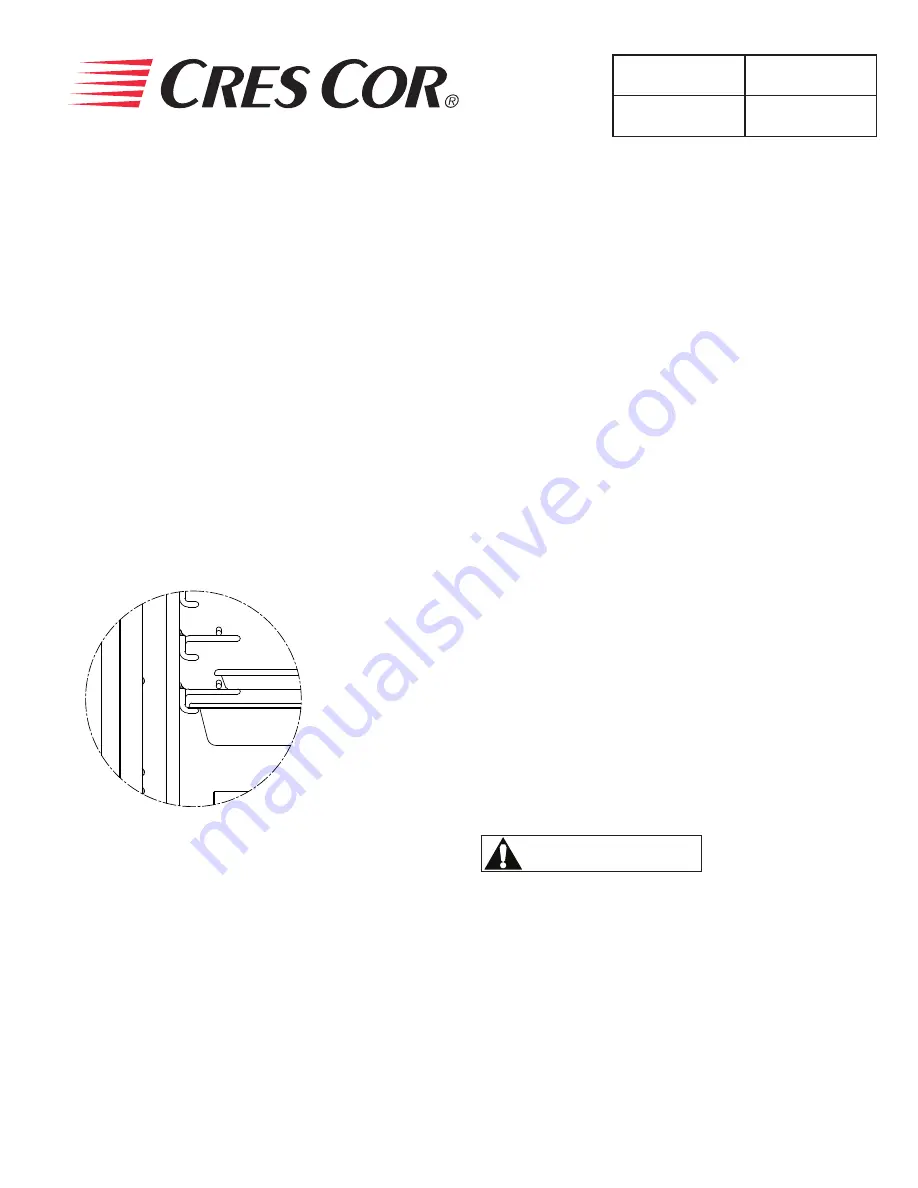
HOW TO INSTALL ANGLES:
1 . Insert end tabs of the angles into the post slots
and push down .
2 . Note the location shown in the diagram of the
18” x 26” pan slide and the 12” x 20” pan slide
A
DETAIL A
18” X 26” BUN PAN
12” X 20”
STEAM TABLE PAN


