18
Configuring and Loading the Proofing Media
3.
If you want to add spot colors, use the separators specifically marked
for spot colors.
4.
Arrange the media appropriately as described in
the Proofing Tray (first generation)
5.
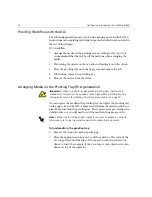
When done, place the proofing tray on the upper tray of the DLC.
Arranging Media on the Proofing Tray (second generation)
For the newer proofing tray (second generation), there is a simpler method
of arrangement. In the first generation trays you must put a separator
inbetween each color (see
Arranging Media on the Proofing Tray (first
on page 16 for details). This is not necessary in the second
generation trays.
To load media in the proofing tray:
1.
Place the donors on the bottom of the proofing tray. It is
recommended that the colors be arranged in the the CMYK order, as
shown on the sticker on the side of the proofing tray, as shown below.
Figure 9: Recommended media order sticker
2.
Place a the separator on top of the donors.
3.
Place a receiver on top of the separator. The receiver is smaller than
the separator and must be centered. Use the black tape outline on the
separator to center the receiver.
4.
Place another batch of donors on top of the receiver (CMYK order as
described earlier).
5.
Repeat steps 2 - 4. You can place up to seven sets of donors on the
proofing tray.
6.
When done, place the proofing tray on the upper tray of the DLC.
Содержание Lotem 800 II Series
Страница 1: ...www creo com User Guide English Lotem 800 II Family with Spectrum 399Z3R873B...
Страница 2: ......
Страница 3: ...Lotem 800 II Family with Spectrum User Guide...
Страница 4: ......
Страница 8: ......
Страница 9: ...Using This Manual Who Should Use This Manual viii...
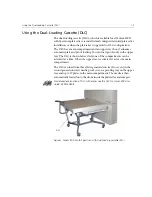
Страница 31: ...Using the Dual Loading Cassette DLC 21 Figure 12 DLC upper tray inserted into platesetter...
Страница 42: ......

