background image

screen.


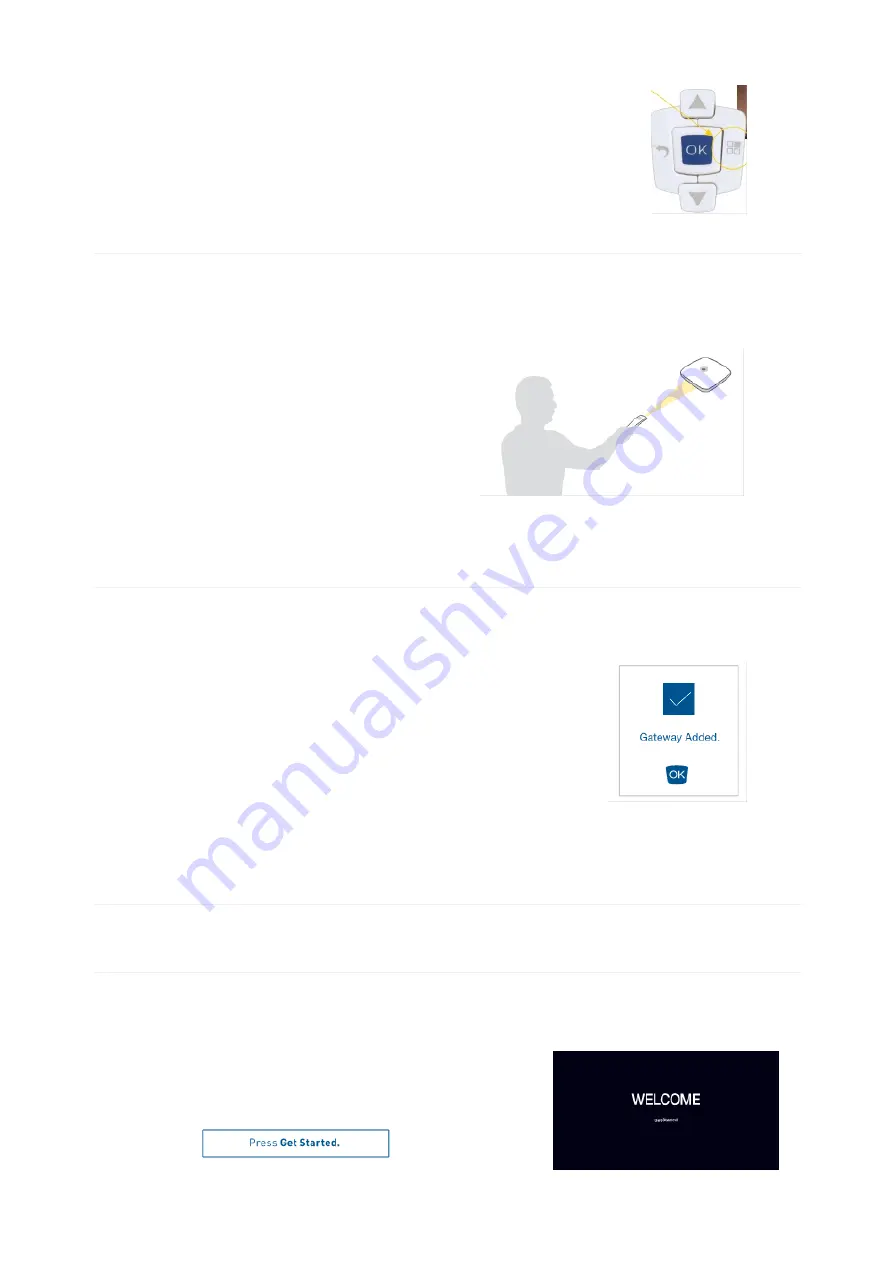
   Point the Configuration Tool at the SmartCast

Wireless Gateway until the flashing blue LED becomes
a steady green.

      The Configuration Tool will shine a green flashlight
beam in the direction it is pointed to aid in targeting the
SWG-WiFi. 

(This may take up to 10 seconds.)


   At this point, the Configuration Tool display will

indicate that the SWG has been added to the network.

      Press the OK

OK button.

      The SmartCast

® Wireless Gateway with WiFi has

now been added to the network.


STEP 3: SET UP THE SMARTCAST  TOUCHSCREEN

11

    The Touchscreen display should read:


®

Содержание Cadiant

Страница 1: ...he fixtures PREPARATIONS Should you have existing SmartCast fixtures please ensure that you have installed the latest software update before proceeding 1 At this point the following devices should be...

Страница 2: ...allation you will need to capture that information from the back of the device before continuing Note if this label is not present on the SmartCast Wireless Gateway use the information on the Manufact...

Страница 3: ...orks the display will read Use the Configuration tool direction arrows to highlight Set Up New and click OK Even if new networks are found we recommend using the Set Up New feature 3 The display will...

Страница 4: ...onal Dimmers will control the luminaires they re grouped with Luminaires will share motion information and daylight harvesting The SmartCast Wireless Gateway and SmartCast Touchscreen will not be full...

Страница 5: ...2 On the Advanced menu use the arrow keys to select Add Gateway then press the OK button 3 The display will ask you to select the device to add Use the arrow keys to select Gateway with WiFi and press...

Страница 6: ...beam in the direction it is pointed to aid in targeting the SWG WiFi This may take up to 10 seconds 6 At this point the Configuration Tool display will indicate that the SWG has been added to the netw...

Страница 7: ...matching SSID per the label on the back of the SmartCast Wireless Gateway with WiFi recorded in previous steps and tap the corresponding SSID in the list In this example we are using SmartCast_SWG_a4c...

Страница 8: ...creen display will ask you to choose you time zone Select the desired time zone The selection will then appear above the Continue button If the selection is correct press Continue 7 Next the SmartCast...

Страница 9: ...ound on the label on the backside of the SWG Once the password has been typed press Done on the keypad Then press Submit 9 You will then be asked to choose a 6 digit admin PIN Record your admin PIN in...

Страница 10: ...es A long press on a lighting space will identify it by flashing dimming the lights associated with that group The button will change color when pressed correctly A short press highlights the lighting...

Страница 11: ...will now display the name you just entered on its default screen in this example Marketing Congratulations The Touchscreen is fully set up Press Get Started to continue to the home screen 16 The Touch...

Страница 12: ...nd verify that the lights adjust appropriately STEP 4 ACTIVATE DYNAMIC PROFILE 1 To enable a zone to operate with a dynamic profile start by pressing Get Started on the main screen 2 Next press on the...

Страница 13: ...4 Press the Dynamic Lighting tab 5 Select the desired profile and press the pencil icon edit button 6 Press the Zones tab...

Страница 14: ...ones and press Save and Activate OPTIONAL STEP 5 RENAME ZONES 1 To change the name of a zone start by pressing Get Started on the main screen 2 Next press on the Settings icon on the lower right hand...

Страница 15: ...the Zones tab 5 Press the zone that you wish to rename In this example we will tap on the Big zone to change its name Note Long press press and hold any zone tab to cause the lights in the zone to fl...

Страница 16: ...name to change this zone s name 7 Enter the new zone name using the onscreen keyboard and press Done 8 Press Save Zone Name to save the new name and see the changed name at the top of the zone display...

Страница 17: ...tab on the Zones page Return to the Settings screen 11 Press the Scenes icon in the lower left of the display to exit the Settings screen and return to the Scenes screen OPTIONAL STEP 6 CREATE A DEMO...

Страница 18: ...ain screen 2 Next press on the Settings icon on the lower right hand of the screen 3 Enter the admin PIN that you created when you set up the tablet 4 Press the Dynamic Lighting tab 5 Select the desir...

Страница 19: ...Select the demo profile and press the pencil icon edit button 8 Press the Zones tab 9 Select the zones and press Save and Activate 10 From the Home page press the eyeball icon on the lower right side...

Страница 20: ......

Отзывы: