background image

Содержание RHOMBA

Страница 1: ......

Страница 2: ...the license agreement The licensee may make one copy of the software for backup purposes The Software License Agreement is found in a separate folder on the installation CD Copyright 2003 Creative Tec...

Страница 3: ...Contents...

Страница 4: ...i Software Included i Creative Media Detector ii Creative MediaSource ii Creative MediaSource Player ii Creative MediaSource Organiser ii Minimum System Requirements iii Document Conventions iv Web I...

Страница 5: ...track information 3 4 Ripping Audio CD Tracks 3 5 4 Using Your Player Turning On Off your Player 4 1 Adjusting the Volume 4 2 Playing Audio 4 2 Playing music or recordings 4 3 Repeating a section 4 4...

Страница 6: ...er 4 13 Changing microphone sensitivity 4 14 Locking and unlocking your player 4 14 Formatting the Player 4 15 A Technical Specifications Size A 1 Weight A 1 Capacity A 1 Recording time A 1 Battery ty...

Страница 7: ...B Frequently Asked Questions and Troubleshooting AutoPlay B 1 General B 2 Usage B 3...

Страница 8: ...Safety and Other Instructions...

Страница 9: ...arphones at high volume continuously as this may damage your ears Do not shake or vibrate your player excessively as this may damage your player or cause it to malfunction Do not expose the player to...

Страница 10: ...Introduction...

Страница 11: ...s as a storage device for documents presentations and other data files The player also has a built in microphone and an FM radio Before You Begin Package Contents Creative Rhomba Earphones Installatio...

Страница 12: ...ails on Creative MediaSource refer to its online Help Creative MediaSource Player Unlike other media players Creative MediaSource Player provides exclusive features such as SmartFit specially designed...

Страница 13: ...ywords into the sophisticated music search engine Minimum System Requirements Microsoft Windows XP Windows Millennium Edition Me Windows 2000 or Windows 98 Second Edition SE Intel Pentium II 233 MHz C...

Страница 14: ...ortcuts or hints relating to a feature Note This highlights additional or important information about a feature Caution This highlights proper usage of your player Use this information to avoid situat...

Страница 15: ...updates or purchases technologies used in your player an online glossary Online Registration Enjoy a host of benefits by registering your product during installation or at www creative com register B...

Страница 16: ...1 A Tour of Your Player...

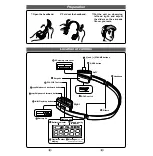
Страница 17: ...g titles player settings and status Menu scroller Earphone jack connects the earphones to your player Volume button Front View Side Views R Section repeat button Play Pause button Mode button Hold but...

Страница 18: ...in Voice or FM Radio mode press to start or stop recording MENU SCROLLER starts or stops playback goes to the previous or next track moves ahead or moves back scrolls through menu options selects menu...

Страница 19: ...M Radio mode only during playback press once to mark the beginning of a section and again to mark the end of the section section will repeat automatically MODE selects Music FM Radio or Voice mode HOL...

Страница 20: ...oll Select to indicate that you should use the Menu scroller to scroll through options and then select the option by pressing the Menu scroller Depending on the screen you are in you can have differen...

Страница 21: ...2 Getting Started...

Страница 22: ...DVD ROM drive For more details see AutoPlay on page B 1 3 Follow the instructions on the screen to complete the installation Creative MediaSource and Windows 98 SE drivers only if applicable will be...

Страница 23: ...Once the battery is fully charged disconnect your player The player remains turned on even when you disconnect the USB cable For more information on battery indicators see Power Level Indicators on pa...

Страница 24: ...e the built in battery in this player Icon What the icon means Notes your player s battery is full this battery icon shows that the battery is full your player s battery is 30 full charge the battery...

Страница 25: ...3 Transferring Tracks or Files...

Страница 26: ...yer you can either download music tracks from Internet music sites see Downloading from the Internet on page 3 2 or have them ripped from audio CDs to your computer Music files must however be encoded...

Страница 27: ...ocument s release Follow the instructions on the site and download the music files to your computer It is illegal to encode MP3 files for trade or sale unless you have the express or explicit permissi...

Страница 28: ...Player Organiser View button 2 Click the Show Hide Right Panel button 3 In the Sources window select the source device If you are transferring files from PC Music Library to a portable hard disk selec...

Страница 29: ...ick it 3 Select the Properties option 4 Click the property you want to edit to highlight it Do not double click the property 5 Click the property again and enter the new details 6 Click the OK button...

Страница 30: ...y WAV files into MP3 files MP3 encoding is considered lossy compression which means that some data is lost during compression However using the standard sampling rate and bitrates will ensure that you...

Страница 31: ...n To rip selected tracks from an audio CD 1 Insert an audio CD into your CD ROM drive 2 If you are not already in Creative MediaSource Organiser click the Player Organiser View button 3 In the Sources...

Страница 32: ...4 Using Your Player...

Страница 33: ...Menu mode that allows you to change your player settings For more information see Changing Player Settings on page 4 6 Turning On Off your Player To turn on your player Press the Play Pause button Th...

Страница 34: ...e level Press the Volume button To decrease volume level Press the Volume button Playing Audio To add audio tracks to your player see Transferring Tracks or Files on page 3 3 To enable a mode Press th...

Страница 35: ...ve back a track While playing a track turn the Menu scroller towards the right and hold to move ahead or towards the left and hold to move back within a track When you reach the beginning or end of a...

Страница 36: ...appears on the screen 3 Press the Section repeat button again to resume normal play Playing FM Radio To enable FM Radio mode see To enable a mode on page 4 2 Changing FM frequency 1 In FM Radio mode t...

Страница 37: ...FM channel as a preset select another FM channel and repeat steps 1 to 3 FM Radio recording 1 In FM Radio mode press the Record button to start recording 2 Press the Record button to stop the recordi...

Страница 38: ...rent File Number for voice recordings through the microphone Changing Player Settings Your player has a Menu mode that allows you to change your player settings while in Music or Voice mode only To se...

Страница 39: ...aliser effects CLASSIC JAZZ POP ROCK USER BASS Changes bass boost level TREBLE Changes treble boost level REPEAT ALL Repeats all tracks stored in player ONE Repeats only current track repeatedly RANDO...

Страница 40: ...LETE ALL Deletes all files in current folder DISPLAY LIGHT Adjusts backlight time of LCD CONTRAST Adjusts LCD contrast level VISUALISER WAVE Displays wave visualization LEVEL Displays bar visualizatio...

Страница 41: ...Your Player 4 9 MIC SENS LOW Selects low microphone sensitivity HIGH Selects high microphone sensitivity MEDIUM Selects medium microphone sensitivity DONE Exits menu mode Menu Submenu Sub submenu Fun...

Страница 42: ...enu scroller 2 Scroll select the Repeat menu 3 Scroll select a Repeat submenu 4 To exit press the Play Pause button See the table on page 1 2 for available options and their functions Editing play lis...

Страница 43: ...rack you want to delete An x appears on the file that you have selected Repeat this step to select more than one track 5 Press the Play Pause button The selected tracks will be deleted and you will au...

Страница 44: ...the LCD contrast The lower the number the lower the LCD contrast 5 Press the Play Pause button twice to exit To adjust the screen backlight duration 1 Press and hold the Menu scroller 2 Scroll select...

Страница 45: ...scroller 2 Scroll select the Fm Region menu 3 Scroll select the region you are in Some information on your FM region appears briefly 4 Press the Play Pause button to exit Enabling the audio track mar...

Страница 46: ...ayer Locking your Rhomba will disable all buttons on the player This feature is useful when you do not want any buttons for example Pause pressed accidentally To lock your player Slide the Hold button...

Страница 47: ...ter 2 In Windows Explorer select the drive your player is assigned to for example Removable Disk D replace D with the drive letter of your player 3 Right click and select Format The dialog box similar...

Страница 48: ...A Technical Specifications...

Страница 49: ...128 or 256 MB built in memory depending on model Recording time up to 8 hrs for 128 MB model up to 16 hrs for 256 MB model Battery type Built in Li Ion battery 3 7 V 550 mAh Battery playback time Up t...

Страница 50: ...Technical Specifications A 2 Signal to Noise Ratio up to 88 dB FM Frequency Range 76 108 0 MHz region selectable THD 0 1 Earphone Output 20 mW L 10 mW R 10 mW LCD backlight Cool Blue EL...

Страница 51: ...B Frequently Asked Questions and Troubleshooting...

Страница 52: ...s system may not be enabled To start the installation program through the My Computer shortcut menu 1 On your Windows desktop double click the My Computer icon 2 Right click the CD ROM drive icon and...

Страница 53: ...yer products Visit Creative s web site at www creative com for updates and downloads relating to all Creative s MP3 players and accessories Windows XP tells me that the software for the player is not...

Страница 54: ...or voice recordings Other types of files will be skipped Files or tracks are corrupted when transferred to the player Before removing Rhomba from your computer wait at least 10 seconds after the file...

Страница 55: ......

Отзывы: