Installing Hardware 1-7
Connecting
Related
Peripherals
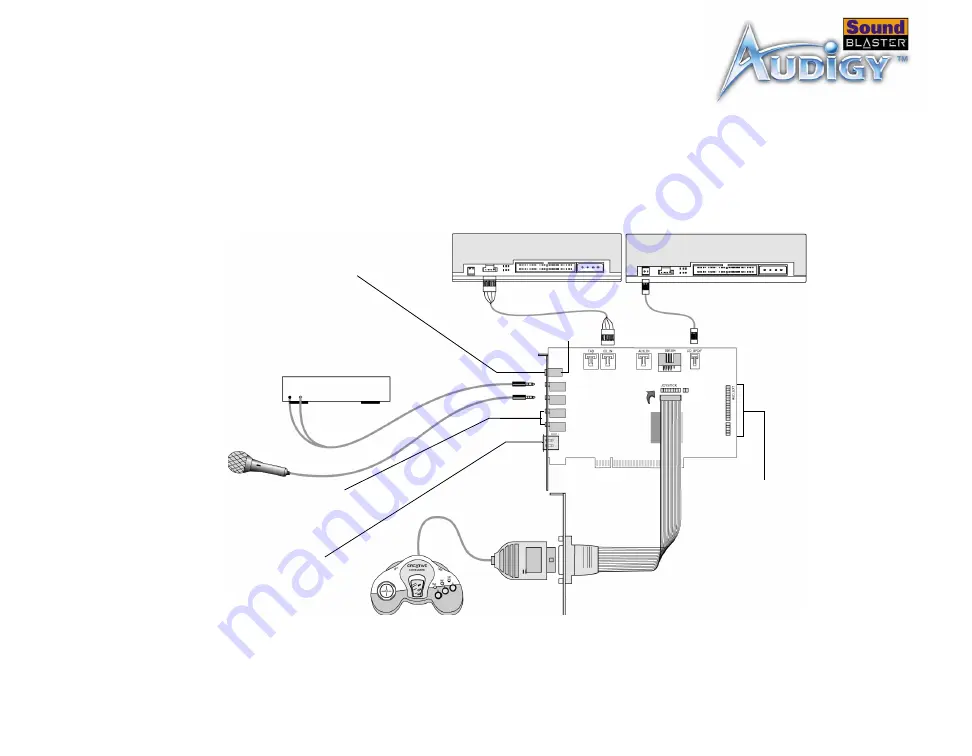
Sound Blaster Audigy will most undoubtedly give you endless hours of listening
pleasure. Figure 1-6 shows you how to connect related peripherals to your Sound
Blaster Audigy to optimize your enjoyment.
Analog Mode
(default): Connects to
Center and Subwoofer channels.
Digital Mode:
Connects to digital
speakers*, MiniDisc or DAT via minijack-to-
DIN cable.
CD-ROM/DVD-ROM drive
Rear Out
SB1394 port
Line-out
Microphone
MPC-to-MPC (4-
pin) audio cable
Line Out
Sound Blaster
Audigy card
Connects to analog
front and rear inputs
of 4-channel
speakers**
MPC-to-MPC (2-
pin) audio cable
Line In
Cassette and
CD player,
Synthesizer,
etc.
Mic In
Connects to
Audigy
Drive
(optional).
* For example, Creative
Inspire
TM
5.1 Digital
Speakers
** For example, 4-
channel Creative or
Cambridge SoundWorks
analog speaker systems
Joystick/MIDI bracket
Game pad
Analog/Digital Out jack
Figure 1-6: Connecting other devices
Connects to Creative IEEE 1394
compatible devices such as the IEEE
1394 Creative digital audio player, DV
camcorder, WebCam and digital
camera.
For instructions on how to switch
between digital and analog modes, refer
to topic “Digital Output Only” of the
Creative Surround Mixer online Help.
Содержание Creative Sound Blaster Audigy
Страница 8: ...Introduction ...
Страница 14: ...1 Installing Hardware This chapter tells you how to install the Sound Blaster Audigy hardware ...
Страница 25: ...2 Installing Software This chapter tells you how to install the Sound Blaster Audigy software ...
Страница 31: ...3Sound Blaster Audigy Applications This chapter tells you how to get the most out of your Sound Blaster Audigy ...
Страница 79: ...Index ...


