


Thanks for your purchase of our Max 3d printers.
20
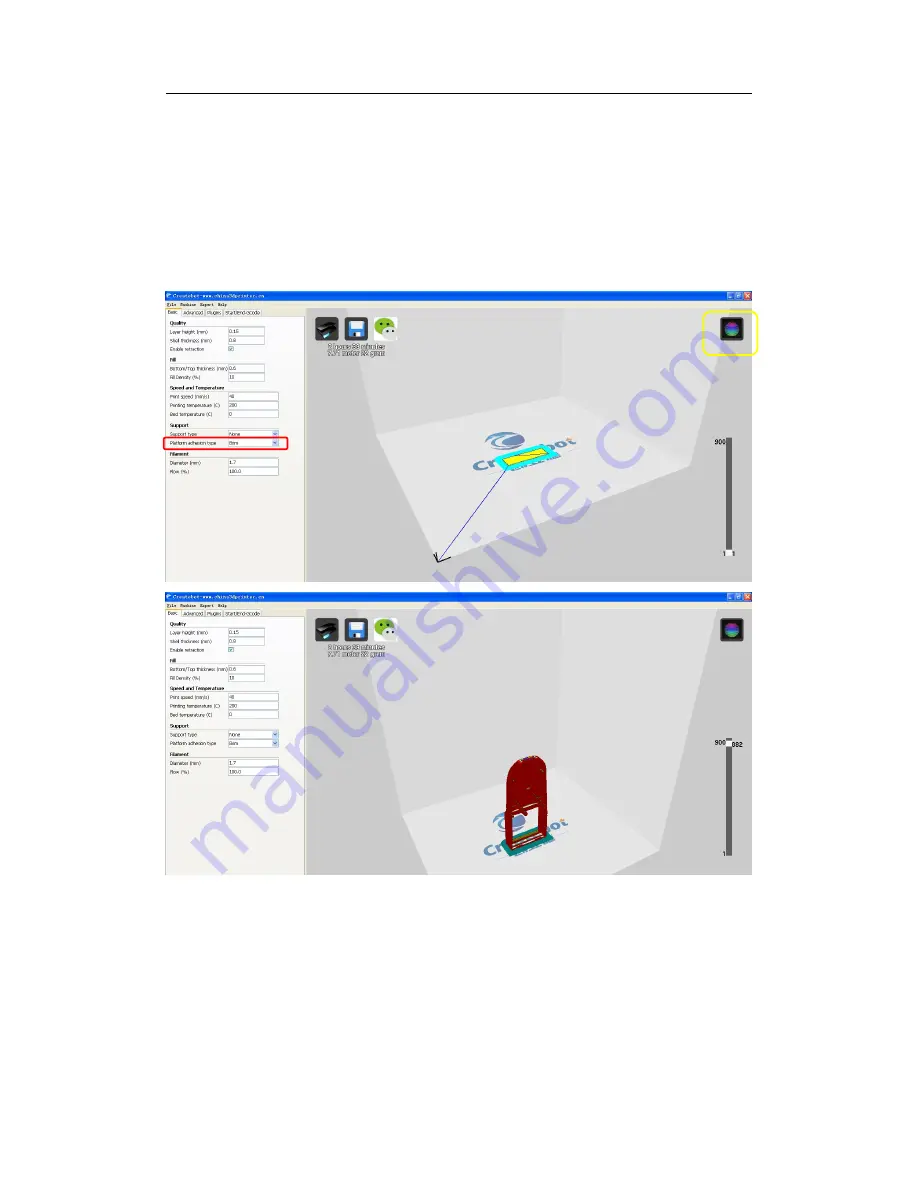
IX. Platform Adhesion
Platform adhesion: brim
1. Choose “Platform adhesion type”
→
“Brim” (in red box)
→
choose “View
mode”
→
choose “Layers” (in yellow box) to view all printing path.
(Attention: the green colored region is brim platform adhesion)
Platform adhesion: raft
1. Choose “Platform adhesion type”
→
“Raft” (in red box)
→
choose “View mode”
→
choose “Layers” (in yellow box) to view all printing path.
(Attention: model is built based on the raft platform adhesion, which makes model
firm during printing)
Содержание Max I
Страница 1: ...Thanks for your purchase of our Max 3d printers MaxI Operation Manual ...
Страница 8: ...Thanks for your purchase of our Max 3d printers 6 3 Single click Finish ...
Страница 12: ...Thanks for your purchase of our Max 3d printers 10 6 Click Lay flat button if you don not want the model tiled ...
Страница 20: ...Thanks for your purchase of our Max 3d printers 18 ...
Страница 23: ...Thanks for your purchase of our Max 3d printers 21 ...
Страница 25: ...Thanks for your purchase of our Max 3d printers 23 4 Choose File Save GCode in red box Choose Save ...
Страница 30: ...Thanks for your purchase of our Max 3d printers 28 3 Choose File Save GCode in red box Choose Save ...
Страница 33: ...Thanks for your purchase of our Max 3d printers 31 4 Choose File choose Save Gcode ...
Страница 35: ...Thanks for your purchase of our Max 3d printers 33 ...
Страница 36: ...Thanks for your purchase of our Max 3d printers 34 2 Put filament into the extruder hole ...
Страница 37: ...Thanks for your purchase of our Max 3d printers 35 ...


