


7
In the event of an overtemperature, the source of this
condition should be determined and rectifi ed immediately.
Thermal protection shall not be used as a motor overload
device. A separate motor overload device must be provided
in accordance with NEC codes.
DO NOT LET THE
PUMP CYCLE OR RUN IF AN OVERLOAD CONDITION
OCCURS!
Moisture Sensors: (Optional) -
A normally open (N/O)
detector is installed in the pump seal chamber which will
detect any moisture present. It is recommended that this
detector be connected in series to an alarm device or the
motor starter coil to alert the operator that a moisture detect
has occurred. In the event of a moisture detect, check the
individual moisture sensor probe leads for continuity, (∞
resistance = no moisture ) and the junction box/control
box for moisture content. This situations may induce a
false signal in the moisture detecting circuit. If none of
the above tests prove conclusive, the pump(s) should be
pulled and the source of the failure identifi ed and repaired.
IF A MOISTURE DETECT HAS OCCURRED SCHEDULE
MAINTENANCE AS SOON AS POSSIBLE.
Wire Size -
If additional cord is required consult a qualifi ed
electrician for proper wire size.
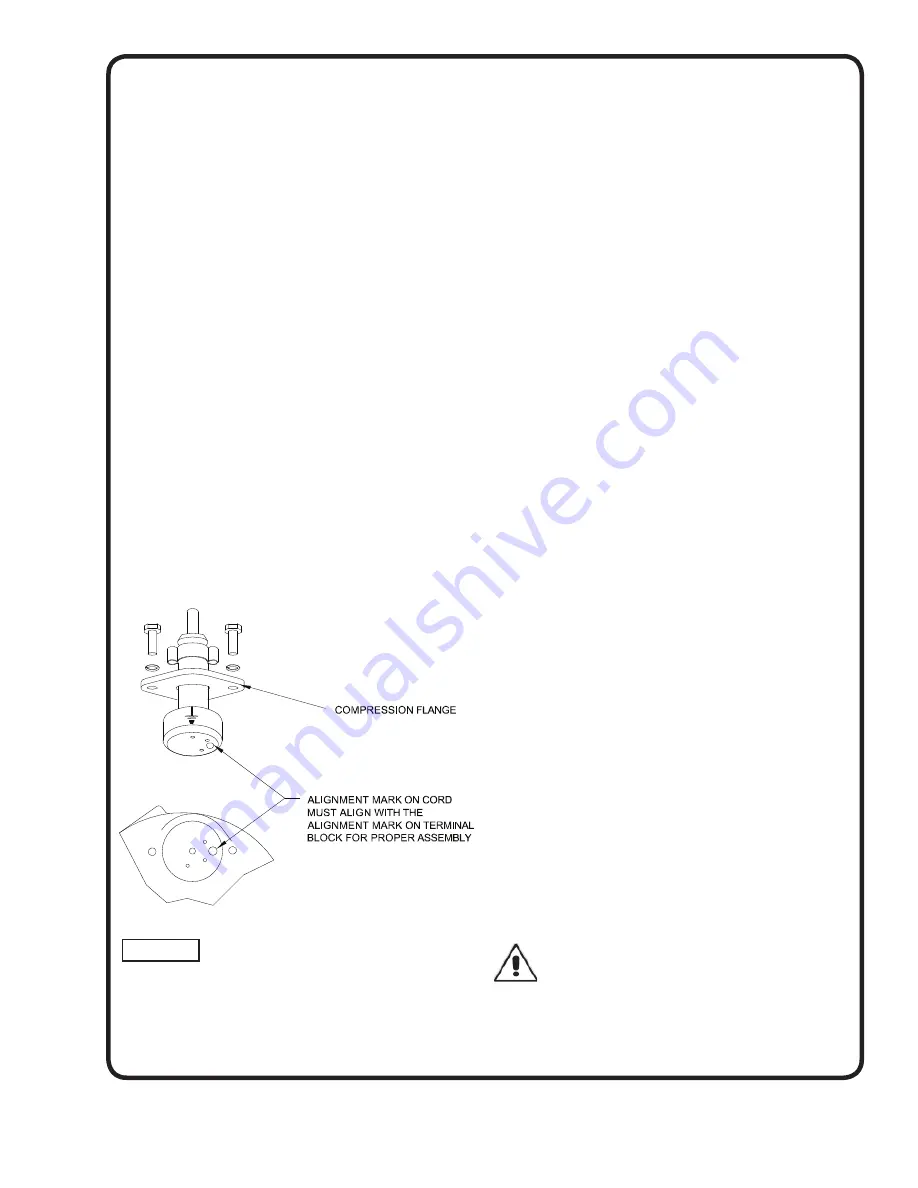
CORD CONNECTIONS:
(Except 5002L & 5022L)
Power/Control Cord-
Insert female end of cord plug into
housing bore aligning alignment mark with hole in terminal
block see Figure 2. Tighten bolts on compression fl ange
until fl ush with motor housing.
SERVICE:
Lubrication:
Anytime the pump is removed from operation, the cooling
oil in the motor housing (10) should be checked visually for
oil level and contamination.
Checking Oil:
Motor Housing -
To check oil, set unit upright. Remove
pipe plug (36) from motor housing (10). With a fl ashlight,
visually inspect the oil in the motor housing (10) to make
sure it is clean and clear, light amber in color and free from
suspended particles. Milky white oil indicates the presence
of water. Oil level should be just above the motor when
pump is in vertical position.
Testing Oil:
1.)
Place pump on it’s side, remove pipe plug (36), from
motor housing (10) and drain oil into a clean, dry
container.
2.)
Check oil for contamination using an oil tester with a
range to 30 Kilovolts breakdown.
3.)
If oil is found to be clean and uncontaminated
(measuring above 15 KV. breakdown), refi ll the motor
housing as per section “
Replacing Oil
”.
4.)
If oil is found to be dirty or contaminated (or measures
below 15 KV. breakdown), the pump must be
carefully inspected for leaks at the shaft seals (5)
(40), cord assemblies (49, 50, 15, 16) , square
rings (8), (14), (29) and pipe plugs, (36) before
refi lling with oil. To locate the leak, perform a pressure
test as per section “
Pressure Test
”. After leak is
repaired, dispose of old oil properly, and refi ll with new
oil as per section “
Replacing Oil
”.
Replacing Oil:
Motor Housing -
Drain all oil from motor housing
and dispose of properly per Local and Environmental
Standards. Set unit upright and refi ll with new cooling
oil as per Table 1 (see parts list for amount). Fill to just
above motor as an air space must remain in the top of
the motor housing to compensate for oil expansion. Apply
pipe thread compound to threads of pipe plug (36) then
assemble to motor housing (10).
Seal Chamber -
Drain all oil from seal chamber and
dispose of properlt per Local and Environmental
Standards. Set unit on its side, with plug (36) upward, and
refi ll with new oil as per Table 1 (see parts list for amount).
Apply pipe thread compound to threads of pipe plug (36)
and assemble to seal plate (6).
Warning ! - Do not over
fi
ll oil. Over
fi
lling of
motor housing with oil can create excessive and
dangerous hydraulic pressure which can destroy
the pump and create a hazard. Over
fi
lling oil
voids warranty.
FIGURE 2
Содержание SGV3032L
Страница 10: ...10 ALL EXCEPT SGV5002L SGV5022L ...
Страница 11: ...11 ...
Страница 20: ...Notes ...


