Battery installation:
1. Press the tabs on the battery door and lifting it off.
2. Install two (2) x AAA size batteries (included) int
h
attery compartment as the figur o
n
he
polarity markings inside battery compartment.
3. Replace the battery door.
BATTERY PRECAUTIONS:
Follow these precautions when using a battery in this device:
1. Use only the size and type of battery specified.
2. Be sure to follow the correct polarity when installing the batter
s indicated in the battery compartment.
A reversed battery may cause damage to the device.
3. Do not mix different types of batteries together (e.g. Alkaline and Carbon-zinc) or old batteries with fresh ones.
4. If the batteries in the device are consumed or the device is not to be used for a long period of time, remove the
batteries to prevent damage or injury from possible battery leakage.
5. Do not try to recharge the battery not intended to be recharged; it can overheat and rupture. (Follow battery
manufacturer's directions.)
6. Do not dispose of battery in fire. Battery may explodes or leak.
7. Clean the battery contacts and also those of the device prior to battery installation.
Remarks:
1. When there is an obstacle between the unit and the transmitter, the transmitter may not operat .
2. When direct sunlight, a
ncandescent lamp, fluorescent lamp or any other strong light shines on the remote
f the unit, the remote operation may be unstable.
Remote Control sensor
o
0 C
(140 F).
n 0 C (32 F) and 60 C (140 F).
y
a
a
e n
d t
he
t
right
e
b
t
BATTERY DISPOSAL WARNING
!
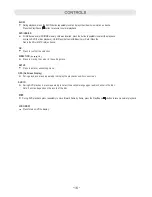
POWER
OK
LCD ON/OFF
USB/SD
TITLE
MENU
OSD
e
n i
o
sensor
To reduce the risk of fire or burns:
Do not disassemble, crush, puncture, or short
external connectors contacts.
Use only with specified charger and player.
Do not dispose of in fire or water.
Do not dispose to high temperature above 6
Keep away from children.
See operating instructions of this battery or product.
Li-ion Battery
Must Be Disposed
Of Properly
Batteries should be recycled or disposed of as per State and Local guidelines.
Store betwee
Содержание CTFT751tk
Страница 2: ......
Страница 3: ......
Страница 4: ......
Страница 5: ...connect to power turn ...
Страница 6: ......
Страница 13: ...The viewing angle of the swivel panel can adjust as below as desir 12 ed ...


