background image

Содержание EZ3 917.387380

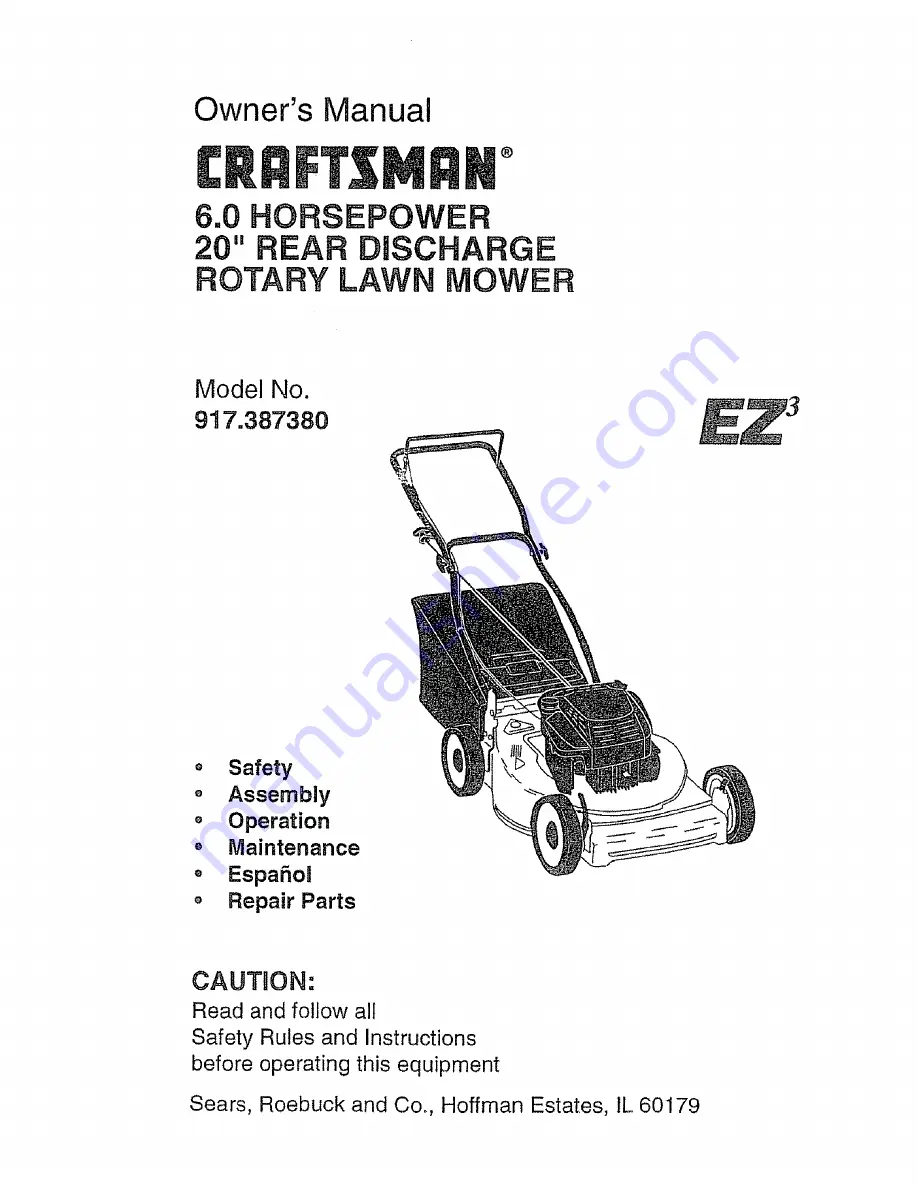
Страница 1: ...HARGE ROTARY LAWN MOWER Model No 917 387380 o Safety o Assembly o Operation Maintenance EspaSo_ Repair Parts CAUTaON Read and follow all Safety Rules and Instructions before operating this equipment Sears Roebuck and Co Hoffman Estates IL 60179 ...

Страница 2: ...d States This Warranty gives you specific legat rights and you may also have other fights which vary from state to state SEARS ROEBUCK AND CO D 817 WA HOFFMAN ESTATES ILLINOIS 60179 TRAINING o Read this operator s manual carefully Become familiar with the controls and know how to operate your mower properly Learn how to quickly stop mower Do not allow children to use your mower Never allow adults ...

Страница 3: ...k for the cause of vibration and repair as required Do not run the engine indoors_ Exhaust fumes are dangerous Never cut grass by pulling the mower towards you Mow across the face of slopes never up and down or you might lose your footing De not mow exces sively steep slopes Use caution when operating the mower on uneven terrain or when changing directions maintain good footing o Never operate you...

Страница 4: ...nimize the risk of injury Your unit is equipped with such controls Do not attempt to defeat the function of the operator presence controls under any circumstances Read these instructions and this manual in its entirety before you attempt to assemble or operate your new lawn mower Your new lawn mower has been assembled at the factory with the exception of those parts left unassembled for shipping p...

Страница 5: ...vice and Adjustment section of this manual Operator presence control bar Upper handle Lift up TO INSTALL ATTACHMENTS Your lawn mower was shipped ready to be used as a mulcher To convert to bagging or discharging o Open rear door and remove mulcher plug Store mulcher plug in a safe place You can now install catcher or optional clipping deflector o To return to mulching operation install mulcher plu...

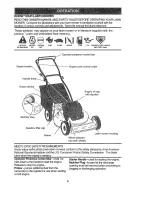
Страница 6: ...ngine oil cap with dipstick Mulcher plug Gasoline filler cap Primer Lawn mower housing Wheel adjuster on each wheel MEETS CPSC SAFETY REQUIREMENTS Sears rotary walk behind power lawn mowers conform to the safety standards of the Amedcan National Standards Institute and the U S Consumer Product Safety Commission The blade turns when the engineis running Operator Presence Control Bar must be held do...

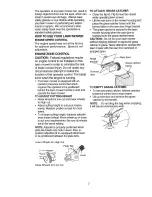
Страница 7: ...n is best for most lawns To change cutting height squeeze adjuster lever toward wheel Move wheel up or down to suit your requirements Be sure all wheels are in the same setting NOTE Adjuster is properly positioned when plate tab inserts into hole in lever Also g position adjusters if so equipped allow lever to be positioned between the plate tabs Lower Wheels for High Cut Plate Tab Raise Wheels fo...

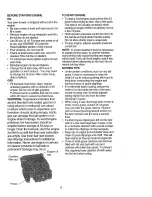
Страница 8: ...T ENGINE o To start a cold engine push primer five 5 times before trying to starL Use a firm push This step is not usually necessary when starting an engine which has already run for a few minutes o Hold operator presence control bar down to the handle and pull starter handle quickly_ Do not allow starter rope to snap back To stop engine release operator presence control bar NOTE tn cooler weather...

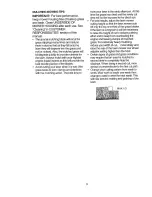
Страница 9: ...arly aftemoonoAt this time the grass has dried and the newly cut area will not be exposed to the direct sun o For best results adjust the lawn mower cutting height so that the lawn mower cuts off only the top one third of the grass blades Ifthe lawn is overgrown itwill be necessary to raise the height of cut to reduce pushing effort and to keep from overloading the engine and leaving clumps of mul...

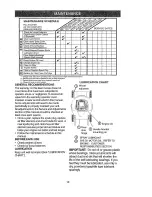
Страница 10: ... abuse or negligence To receive full t _____ value from the warranty operator must _ _ maintain mower as instnJctedin this manual _ Some adjustments wilt need to be made periodically to properly maintain your unit All adjustments in the Service and Adjustments section of this manual should be checked at leastonce each season o Once a year replace the spark plug replace air filter element and check...

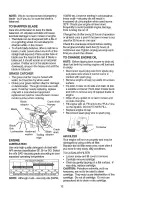
Страница 11: ... TO REPLACE BLADE objects and other hazards that may cause tire damage BLADE CARE For best results mower blade must be kept sharp Replace bent or damaged blades TO REMOVE BLADE o Disconnect spark plug wire from spark plug and place wire where it cannot come in contact with spark plug o Turn lawn mower on its side Make sure air filter and carburetor are upo o Use a wood block between blade and mowe...

Страница 12: ...n increased oil consumption when used above 32 F Check your engine oil level more frequently to avoid possible engine damage from running low on oil Change the oil after every 25 hours of operation or at least once a year if the lawn mower is not used for 25 hours in one year Check the crankcase oil level before starting the engine and after each five 5 hours of continuous use Tighten oil plug sec...

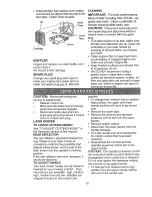
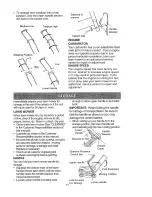
Страница 13: ...parts have completely stopped o Disconnect spark plug wire from spark plug and place where it cannot come in contact with plug LAWN MOWER TO ADJUST CUTTING HEIGHT See TO ADJUST CUTTING HEIGHT in the Operation section of this manual REAR DEFLECTOR The rear deflector attached between the rear wheels of your lawn mower is provided to minimize the possibility that objects will be thrown out the rear o...

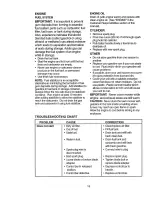
Страница 14: ... all dirt grease leaves etc_Store in a clean dry area o Clean entire lawn mower See CLEANING in the Customer Responsibilities section of this manual o Lubricate as shown in the Customer Responsibilities section of this manual o Be sure that all nuts bolts screws and pins are securely fastened Inspect moving parts for damage breakage and wear Replace if necessary o Touch up all rusted or chipped pa...

Страница 15: ...YLINDER Remove spark plug o Pour one ounce 29 ml of oil through spark plug hole intocylinder_ Pull starter handle slowly a few times to distribute oil o Replace with new spark plug OTHER o Do not store gasoline from one season to another o Replace your gasoline can ifyour can starts to rust Rust and or dirt in your gasoline will cause problem Ifpossible store your unit indoors and cover it to give...

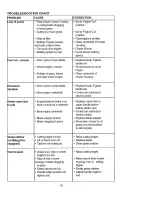
Страница 16: ...ing air o Grass is too high or wheel height is too low Rear of lawn mower housing or blade dragging in grass Grass catcher too full Handle height position not right for you CORRECTION Set to Higher Cut position o Set to Higher Cut position Clean replace air filter Clean underside of mower housing o Checkoil level Cut at slower walking speed Replace blade Tighten blade boll o Set all wheels at same...

Страница 17: ...tambi_n tenga otros derechos que varfan de estado a estadoo Sears Roebuck and Con t9 817WA Hoffman Estates IL 60179 USA Los estandrares de seguddad exigen la presencia del operator en los controles para reducira un minimo el riesgo de lesionarse S u unidad viene equipada con dichos contmles Per ningun motive trate del eliminar la funci6n de loscontroles que exigen la presencia del operador ENTRENA...

Страница 18: ...o la segadora hacia usted Siegue a trav_s de la cara de las pendientes nunca hacia arriba o hacia abajo pues puede perder el equilibdo No siegue pendientes demasiado empinadas_ Tenga cuidado cuando opere la segadora en terreno disparejo o cuando cambie de direcci6n mantenga un buen equilibrio o Nunca opere la segadora sin tas protecciones adecuadas las planchas el recogedor de c_sped y otros dispo...

Страница 19: ...da todas las partes y los articu os de ferreteria que se monten tienen que ser apretados seguramenteo Use las herramienlas correctas como sea necesario para asegurar que se aprieten adecuadamente PARA REMOVER LA SEGADORA DE LA CAJA DE CARTON Remueva las partes sueltas que se inclwen con la segadorao Corte las dos esquinas de losextremos de la caja de cart6n y tienda el panel del extremo p aRo o Re...

Страница 20: ...on la ubicaci6n de los diversos controles y ajustes Guarde este manual para referencia en el futuro Estos simbolos pueden apareser sobre su segadora o en la literatura proporcionada con el producto Aprenda y comprenda sus significados Oable de control de la velocidad del motor CordSn arrancador Manitla del mango Recogedordel c_sped Tapa del deposito de aceite del motor con varilla indicadora de ni...

Страница 21: ...s PAPA MONTAR Y ADJUNTAR EL REOOGEDOR DE ClaSPED Cierre la tapa soltabte La tapa soltable debe estar cerrada cuando se esta operando la segadora Levante la puerta trasera de ta caja de la segadora y ponga el bastidor del recogedor de c_sped en las orejas formadas en el puntal de bisagra de la puerta trasera El recogedorde c6sped esta asegurado en la caja de la segadora cuando se baja la puerta tra...

Страница 22: ...ar ta attura det corte para reducir el esfuerzo necesario para empujar la segadora y para evitar sobrecargar el motor dejando montones de recortes de c sped o Para un corte muy pesado reduzca el ancho del corte pasando parcialmente por encima del lugar anteriormente cortado y siegue lentamente Cuando use una segadora con descarga trasera an c_sped h_3medoy pesado los montones det c_sped cortado pu...

Страница 23: ...egadora y para evitar sobrecargar el motor dejando montenes de recortes de c_sped Para un acolchamiento muy pesado reduzca el ancho del corte pasando por encima del lugar anteriormente cortado y siegue lentamente Ciertos tipos de c6sped y sus condiciones pueden exigir que un Area tenga que ser acolchada por segunda vez para esconder completamente los recorteso Cuando se haga el segundo code siegue...

Страница 24: ... segun las instrucciones descritas en este manual Hay algunos ajustes que se tienen que hacer en forrna peri6dica para poder mantener su unidad adecuadamente Todos los ajustes en la secciSn de Servicioy Ajustes de este manual tienen que ser revisados por Io menos un vez por cada temporad Una vez aJar3o cambie la buj_a limpieo cambie el elemento del filtro de aire y revise si la cuchilla est desgas...

Страница 25: ...te el alambre de la bujfa y p6ngalo en donde no pueda entrar en contacto con _sta Haga descansar ta segadora en su lado_ AsegtJrese que et fittro de aire y que el carburador queden mirando hacia arriba o Use un bloque de madera entre la cuchilla y la caja de la segadora para evitar que la cuchilla gire cuando se le quite el perno o Proteja sus manos con guantes y o envuelva la cuchiila con una tel...

Страница 26: ...lidad clasificado con la clasificaci6n SF SG o SH de servicio APL Seteccione la calidad de viscosidad SAE seg0n su temperatura de operaci6n esperada r CALIDADES DE V SCOSIDAD DE SAE t I 1 i AMISO A pesar de que los aceites de multiviscosidad 5W30 10W30 etc mejoran el arranque en clima frio estos aceites de multiviscosidad van a aumentar el consumo de aceite cuando se usan en temperaturas sobre 32 ...

Страница 27: ...ado funciona mAs caliente y se acorta su duraciSn Mantenga las superlicies acabadas y las ruedas sin gasolina aceite etc o No recomendamos el uso de una manguera de jard n para limpiar la segadora a menos que el sistema el_ctrice el si enciador el filtro de aire y el carburador est6n tapados para evitar que les entre el agua El agua en el motor puede acortar la duraci6n de 6ste PRECAUCION Antes de...

Страница 28: ...e carla temporada o si la unidad no se va a usar por 30 dfas o m_ s SEGADORA Cuando se va a guardar la segadora por cierto periodo de tiempo Ifmpiela cuidadosamente remueva toda la mugre la grasa las hojas etc Gu rdela en un _ rea limpia y seca Limpie toda la segadora Vea LIMPIEZA en la secci6n de Responsabilidades del Cliente de este manual o Lubrfquela segtJn se muestra en la secci6n de Responsa...

Страница 29: ...el envase para el almacenamiento Siempre sign la proporciOn de mezcla que se encuentra en el envase del estabilizador Haga funcionar el motor por Io menos 10 minutos despu_s de agregar el estabilizador para permitir que este ttegue al carburador_ No drene la gasolina del estanque de gasolina y el carburador si se est6 usando estabilizador de combustible ACEITE DEL MOTOR Drene el aceite con el moto...

Страница 30: ...ra oDemasiado aceite en el motor CORRECCION o Limpielcambie el filtro de aire o Llene el estanque de combustible Drene el estanque y vuelva a Ilenado con combustible limpio y nuevo o Drene el estanque de combustible y el carburador y vuelva a Ilenar el estanque con gasolina nuevao Conecte el alambre a la bujfao o Cambie la bujfa Apriete el pemo de la cuchilla o cambie el adaptador de la cuchilla o...

Страница 31: ... la segadora arrastrAndose en el c6sped Recogedor de c_sped dema siado tleno Posici6n de la altura del mango no adecuada para usted Cambie la cuchilla Apriete el pemo de la cuchillao Ajuste todas las ruedas a la misma altura Limpie la parte inferior de la caja de ta segadorao Cambie ta cuchill Apdete el pemo de la cuchilla P6ngase en contacto con su centro de servicio autodzado mAs cercano Presion...

Страница 32: ...o GO co T m o_ d Z d LLI r_ 0 r_ LU 0 Z d rr I 0 Z _ I LL n 3 32 ...

Страница 33: ...k Plate 54 145106 Self Tapping Screw 10 24 x 5 8 55 850977 Hex Head Tapping Screw 1 4 20 x 1 2 56 144748 Rear Baffle 57 154870 Hinge Screw 1 4 20 x 1 1 4 58 Side Baffle Discharge Baffle 59 144747 Rear Deffector 163716 Handle Bracket Assembly Left Handle Bracket Assembly Right Screw 5 16 18 x 3 4 7 1 33723 Wheel Ad usting Bracket 7 _ 1 33623 Spacer 7 1 33500 Pop Rivet 7 1 33300 Selector Knob 7_LI 3...

Страница 34: ...BRIGGS STRATTON MODEL NUMBER12H802 2676 E1 967 621 92_j_P 258 124 Q 634 968 606 130 95 _7 137 _ 971A 529 _163 1 13 11oO_ 11oO t 34 ...

Страница 35: ...BRIGGS STRATTON MODEL NUMBER12H802 2676 E1 REQUIRES SPECIAL TOOLS TO INSTALL SEE REPAIR INSTRUCTION MANUAL 35 ...

Страница 36: ...BRIGGS STRATTON MODEL NUMBER12H802 2676 E1 _ 670A 358 GASKET SET 1 524 0 116 _ 634 617 977 CARBURETOR GASKET SET 202 104 r 127 116 134 617 634 121 CARBURETOR KIT 334 356 _188A t 670A 36 ...

Страница 37: ...BRIGGS STRATTON MODEL NUMBER12H802 2676 E1 ii rll i ii 930 55 L J I t i 456 461 332 455 1036 LABEL KIT EMISSION 37 ...

Страница 38: ...ywheel t33 398187 Piston Assembly 134 398188 Standard Size Ring Set Piston 137 Standard Size Lock Piston Pin t63 272653 Pin Piston Standard t87 298049 Size 188 398540 Rod Connecting 188A 94644 Screw Connecting Rod 202 262579 Valve Exhaust 209 263044 Valve Intake Spring Valve Screw Phillips Retainer Valve Spring Tappet Valve Gear Cam NOTE Slinger Oil Gasket Intake Elbow Screw Hex Head Housing Rewin...

Страница 39: ...ew Shoulder 971 94873 Spring Retainer 971A 94749 Cap Oil FiIler 972 495224 Seal Filter Tube 975 493640 Tube Oil Fill 977 498261 Grommet 1036 499341 Bolt Governor Lever 1095 498258 Baffle Cylinder Nut Hex 2500 12J802 2916 Clamp Hose 498821 Cover Control Strap Bracket RPM Settings Starter Rewind 94904 Screw Hex 94908 Nut Hex Screw Hex Head Fastener Crank Governor Seal Intake Elbow Bracket Carburetor...

Страница 40: ...o de reparaci6n a domicilio 1 800 676 5811 For the location of a Sears Parts and Repair Center in your area Call 24 hours a day 7 days a week 1 800 488 1222 For information on purchasing a Sears Maintenance Agreement or to inquire about an existing Agreement Call 9 am 5 pm Monday Saturday 1 800 827 6655 When requesting service or ordering parts always provide the following information oProduct Typ...

Отзывы: