3
2
KNOW YOUR WIRELESS THERMOMETER
Weather the day with confidence with your own accurate and up-to-date information – right from your own backyard.
The CRAFTSMAN Wireless Thermometer features precise, reliable temperature and humidity readings, along with the time
and date. The bold, easy to read LCD screen displays the current indoor / outdoor temperature and humidity with trend
indicator arrows and daily high / low information. The Indoor Display stands upright for tabletop use or is wall-mountable.
The Wireless Outdoor Sensor features powerful wireless technology, a weather-resistant design and an integrated hanger
for easy mounting.
2
3
4
1
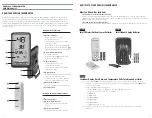
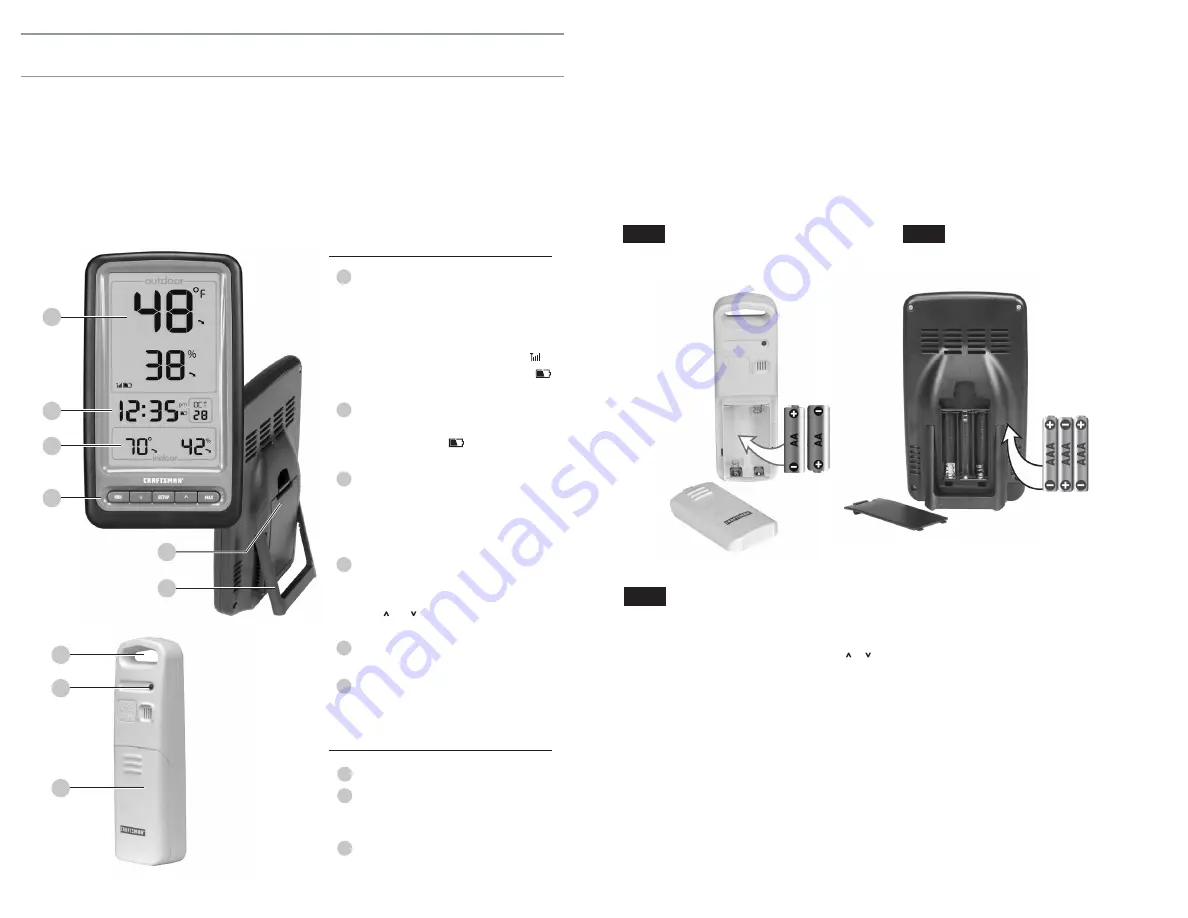
INDOOR DISPLAY FEATURES
1
Outdoor Conditions
• Current temperature (°F or °C)
• Current humidity level (%)
• Trending arrows indicate if the condition is
trending up or down
• Wireless Outdoor Sensor signal strength
• Wireless Outdoor Sensor low battery icon
indicates when batteries need to be changed
2
Indoor Display Information
• Current time and date
• Low battery indicator
indicates when
batteries need to be changed
3
Indoor Conditions
• Current temperature (°F or °C)
• Current humidity level (%)
• Trending arrows indicate if the condition is
trending up or down
4
Display Buttons
• MIN/MAX buttons: view today's low and high
temperature and humidity records
• SETUP and buttons: set time, date, and
temperature units to Fahrenheit or Celsius
5
Battery compartment
• Requires three AAA batteries (not included)
6
Tabletop stand
WIRELESS OUTDOOR SENSOR FEATURES
1
Mounting Hanger
2
Wireless Signal Indicator
• Flashes when sending data to the Indoor
Display
3
Battery Compartment
• Requires two AA batteries (not included)
2
3
1
6
5
HOW TO SET UP YOUR WIRELESS THERMOMETER
What You'll Need (Not Included)
•
Two AA batteries for the Wireless Outdoor Senso
r
Be sure to use high-quality alkaline batteries. Heavy duty or rechargeable batteries are not recommended. Only use
Lithium batteries when the outdoor temperature is below -4ºF/-20ºC for extended periods of time. In general, alkaline
batteries perform poorly in very cold weather.
•
Three AAA batteries for the Indoor Display
Be sure to use high-quality alkaline batteries. Lithium, heavy duty, and rechargeable batteries are not recommended.
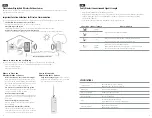
STEP 1
Insert Wireless Outdoor Sensor Batteries
STEP 3
Set Indoor Display Time, Date, and Temperature Units to Fahrenheit or Celsius
a. Press and hold the
SETUP
button. When in setup mode, the selected setting flashes on the Indoor Display.
• To adjust a setting, press and release the or button. To save a setting, press and release the
SETUP
button.
The next setting is selected.
• Settings are displayed in the following order:
• Auto DST ON/OFF. When set to ON, time will update for Daylight Saving Time.
If your location does not observe DST, set it to OFF.
• CLOCK HOUR
• CLOCK MINUTE
• CALENDAR MONTH
• CALENDAR DATE
• CALENDAR YEAR
• TEMPERATURE UNITS (ºF or ºC)
b. To exit from setting mode, do not press a button for 8 seconds. The Indoor Display returns to its normal
operating mode.
STEP 2
Insert Indoor Display Batteries
WIRELESS THERMOMETER
CMXWDCR01137

