background image

9

English

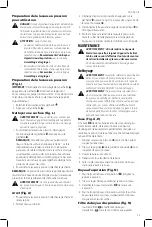
Wall Mounting

Some CRAFTSMAN chargers are designed to be wall 
mountable or to sit upright on a table or work surface.  If wall 
mounting, locate the charger within reach of an electrical 
outlet, and away from a corner or other obstructions which 
may impede air flow. Use the back of the charger as a 
template for the location of the mounting screws on the wall. 
Mount the charger securely using drywall screws (purchased 
separately) at least 1” (25.4 mm) long, with a screw head 
diameter of 0.28–0.35” (7–9 mm), screwed into wood to an 
optimal depth leaving approximately 7/32” (5.5 mm) of the 
screw exposed. Align the slots on the back of the charger 
with the exposed screws and fully engage them in the slots.

suspending charging until the battery pack has reached an 
appropriate temperature. The charger then automatically 
switches to the pack charging mode. This feature ensures 
maximum battery pack life.
A cold battery pack may charge at a slower rate than a warm 
battery pack.
The hot/cold pack delay will be indicated by the green light 
continuing to blink but with the red light continuously 
ON. Once the battery pack has reached an appropriate 
temperature, the red light will turn OFF and the charger will 
resume the charging procedure.

Electronic Protection System

Li‑Ion tools are designed with an Electronic Protection 
System that will protect the battery pack against overloading, 
overheating or deep discharge. The tool will automatically 
turn off and the battery pack will need to be recharged.

Important Charging Notes

1.  The charger and battery pack may become warm to the 

touch while charging. This is a normal condition, and 

does not indicate a problem. To facilitate the cooling of 

the battery pack after use, avoid placing the charger or 

battery pack in a warm environment such as in a metal 

shed or an uninsulated trailer.

2.  If the battery pack does not charge properly:

a.  Check operation of receptacle by plugging in a lamp 

or other appliance;

b.  Check to see if receptacle is connected to a light 

switch which turns power off when you turn out  

the lights;

c.  If charging problems persist, take the tool, battery 

pack and charger to your local service center.

3.  You may charge a partially used pack whenever you 

desire with no adverse effect on the battery pack.

Charger Cleaning Instructions


WARNING: 

Shock hazard. Disconnect the charger 

from the AC outlet before cleaning. Dirt and grease 
may be removed from the exterior of the charger using 
a cloth or soft non‑metallic brush. Do not use water or 
any cleaning solutions.

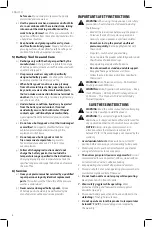
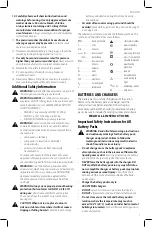
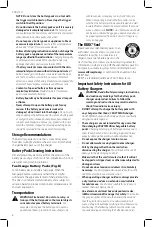
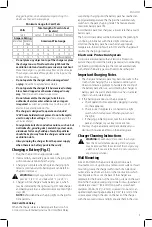
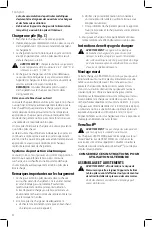
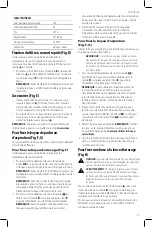
plugged together, and nameplate ampere rating. If in 

doubt, use the next heavier gauge.

Minimum gauge for Cord sets

Volts

Total length of Cord in Feet 

(meters)

120V

25 (7.6)

50 (15.2) 100 (30.5) 150 (45.7)

Ampere Rating

American Wire gauge

More Than Not More 

Than

0

6

18

16

16

14

6

10

18

16

14

12

10

12

16

16

14

12

12

16

14

12

Not Recommended

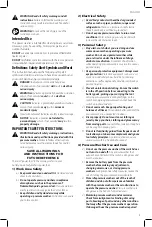
• 

Do not place any object on top of the charger or place 

the charger on a soft surface that might block the 

ventilation slots and result in excessive internal heat. 

Place the charger in a position away from any heat source. 

The charger is ventilated through slots in the top and the 
bottom of the housing.

• 

Do not operate the charger with a damaged cord 

or plug. 

Have them replaced immediately.

• 

Do not operate the charger if it has received a sharp 

blow, been dropped or otherwise damaged in any 

way.

 Take it to an authorized service center.

• 

Do not disassemble the charger; take it to an 

authorized service center when service or repair 

is required.

 Incorrect reassembly may result in a risk of 

electric shock, electrocution or fire.

• 

The charger is designed to operate on standard 

120V household electrical power. Do not attempt to 

use it on any other voltage.

 This does not apply to the 

vehicular charger.

• 

Foreign materials of a conductive nature, such as, but 

not limited to, grinding dust, metal chips, steel wool, 

aluminum foil or any buildup of metallic particles 

should be kept away from the charger cavities and 

ventilation slots.


• 

Always unplug the charger from the power supply 

when there is no battery pack in the cavity.

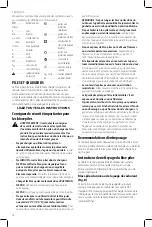
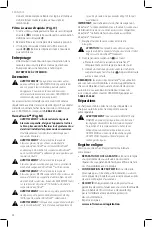
Charging a Battery (Fig. C)

1.  Plug the charger into an appropriate outlet. 
2.  Insert and fully seat battery pack. Green  charging light 

will continuously blink while charging.

3.  Charging is complete when the green charging light 

remains continuously ON. Battery pack can be left in 
charger or removed. 


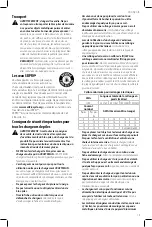
WARNING:

 Only charge batteries in air temperature 

over 40 ° F (4.5 ° C)  and below 105 ° F (+40.5 ° C).

4.  Charger will not charge a faulty battery pack, which 

may be indicated by the light staying OFF. Take charger 

and battery pack to an authorized service center if light 

stays OFF. 

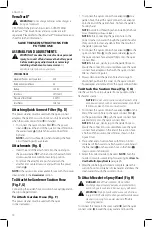
nOTE: 

Refer to label near charging light on charger for 

blink patterns.

hot/Cold Pack Delay

When the charger detects a battery pack that is too hot 
or too cold, it automatically starts a Hot/Cold Pack Delay, 

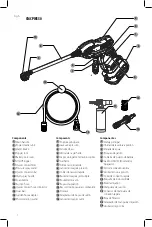
Содержание CMCPW350

Страница 1: ...CONTACTUS POURTOUTEQUESTIONOUTOUTCOMMENTAIRE NOUSCONTACTER SITIENEDUDASOCOMENTARIOS CONTÁCTENOS 1 888 331 4569 WWW CRAFTSMAN COM CMCPW350 INSTRUCTIONMANUAL GUIDED UTILISATION MANUALDEINSTRUCTIONES V20 Power Cleaner Laveuse à pression V20 Lavadora a Presión V20 ...

Страница 2: ...English original instructions 5 Français traduction de la notice d instructions originale 15 Español traducido de las instrucciones originales 26 ...

Страница 3: ...rrosage à pression 9 Collier de raccord rapide 10 Buse d arrosage à jet multiple 11 Bouteille de savon 12 Boyau d aspiration 13 Raccord du boyau à raccord rapide 14 Flotteur 15 Adaptateur de boyau de jardin 16 Lance d arrosage courte Componentes 1 Manija principal 2 Unidad de lavadora a presión 3 Entrada de agua 4 Bloqueo de gatillo 5 Cubierta de puerto de batería 6 Gatillo ON OFF Encendido Apagad...

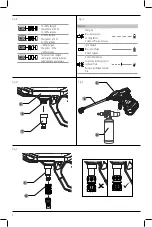
Страница 4: ...50 charged Chargé de 50 50 cargada Pack needs to be charged Le bloc piles doit être rechargé La batería tiene que cargarse Indicators Charging Bloc piles en Cours de Chargement Unidad en Proceso de Carga Fully Charged Bloc piles Chargé Unidad Cargada Hot Cold Pack Delay Suspension de Charge Contre le Chaud Froid Restraso por Unidad Caliente Fría ...

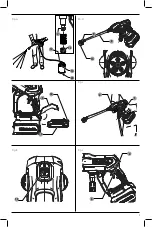
Страница 5: ...3 Fig H Fig G Fig I Fig J Fig K Fig L 18 17 19 4 6 12 9 10 2 1 20 14 7 13 8 5 ...

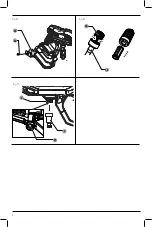
Страница 6: ...4 Fig N Fig O 12 20 3 7 21 Fig M 22 23 ...

Страница 7: ...asher or these instructions to operate the pressure washer Pressure washers are dangerous in the hands of untrained users d Maintain pressure washers and accessories Check for misalignment or binding of moving parts breakage of parts and any other condition that may affect the pressure washer s operation If damaged have the pressure washer repaired IMPORTANT SAFETY INSTRUCTIONS WARNING Read all sa...

Страница 8: ... store this product in temperatures below 40 F 4 C Freeze damage is not covered by the warranty before use Many accidents are caused by poorly maintained pressure washer e Use the pressure washer accessories and tool bits etc in accordance with these instructions taking into account the working conditions and the work to be performed Use of the pressure washer for operations different from those i...

Страница 9: ...nformation WARNING Never modify the power tool or any part of it Damage or personal injury could result WARNING ALWAYS use safety glasses Everyday eyeglasses are NOT safety glasses Also use face or dust mask if operation is dusty ALWAYS WEAR CERTIFIED SAFETY EQUIPMENT ANSI Z87 1 eye protection CAN CSA Z94 3 ANSI S12 6 S3 19 hearing protection NIOSH OSHA MSHA respiratory protection WARNING Some dus...

Страница 10: ...in checked baggage on airplanes and must be properly protected from short circuits if they are in carry on baggage NOTE Do not store the battery packs in a tool with the trigger switch locked on Never tape the trigger switch in the ON position Do not incinerate the battery pack even if it is severely damaged or is completely worn out The battery pack can explode in a fire Toxic fumes and materials...

Страница 11: ... Disconnect the charger from the AC outlet before cleaning Dirt and grease may be removed from the exterior of the charger using a cloth or soft non metallic brush Do not use water or any cleaning solutions plugged together and nameplate ampere rating If in doubt use the next heavier gauge Minimum Gauge for Cord Sets Volts Total Length of Cord in Feet meters 120V 25 7 6 50 15 2 100 30 5 150 45 7 A...

Страница 12: ...d draw the clean water through the system to rinse Attachments Fig E Insert the end of the attachment into the opening on the power cleaner 2 Push in and turn the attachment clockwise until its secured into working position To remove the attachment push in and turn the attachment counterclockwise and pull from the power cleaner 2 NOTE Other accessories are available for use with this power cleaner...

Страница 13: ...ange spray patterns with the power cleaner powered on Refer tothe followingcharttochoosethecorrect nozzle for the job to beperformed Nozzle Uses Surfaces Powerful pinpoint for spot cleaning of hard unpainted surfaces or for high reach areas Unpainted metal or concrete DO NOT use on wood Intense cleaning of unpainted hard surfaces Grills driveways concrete or brick walkways unpainted brick or stucc...

Страница 14: ...essories An accidental start up can cause injury Shutdown Fig A 1 To stop the power cleaner release the trigger and remove the battery 2 Turn off water at the faucet 3 Discharge residual pressure by squeezing the trigger 6 until no more water comes out of the spray wand 8 4 Disconnect the garden hose from the water intake 3 and drain hose 5 Remove garden hose from power cleaner by pulling back the...

Страница 15: ...Track accessories for use with your tool are available at extra cost from your local dealer or authorized service center If you need assistance in locating any accessory please contact CRAFTSMAN call 1 888 331 4569 VersaTrack Fig M WARNING To reduce the risk of serious personal injury turn unit off and remove the battery pack before making any adjustments or removing installing attachments or acce...

Страница 16: ...ate of purchase with a receipt for a full refund no questions asked LATIN AMERICA This warranty does not apply to products sold in Latin America For products sold in Latin America see country specific warranty information contained in the packaging call the local company or see website for warranty information FREE WARNING LABEL REPLACEMENT If your warning labels become illegible or are missing ca...

Страница 17: ...ser votre connaissance acquise suite l utilisation fréquente des outils vous permettre de baisser la garde et ignorer les principes de sécurité de l outil Un acte irréfléchi peut causer une blessure grave en une fraction de seconde CONSIGNES DE SÉCURITÉ IMPORTANTES AVERTISSEMENT lisez tous les avertissements de sécurité toutes les instructions les illustrations et les caractéristiques fournis avec...

Страница 18: ...4 Utilisation et entretien de la laveuse à pression a Ne pas utiliser la laveuse à pression si la gâchette ne fonctionne pas normalement Toute laveuse à pression qui ne peut être contrôlée avec la gâchette est dangereuse et doit être réparée b Retirez le bloc piles de la laveuse à pression avant d effectuer tout ajustement changer les accessoires ou ranger la laveuse à pression Ces mesures de sécu...

Страница 19: ...s combustibles AVERTISSEMENT l unité a été conçue pour des applications spécifiques Elle ne doit pas être modifiée et ou utilisée pour toute autre application que celles pour lesquelles elle a été conçue REMARQUE entreposez toujours votre laveuse à pression dans un endroit où la température ne tombera pas sous 40 F 4 C Les dommages dus au gel ne sont pas couverts par la garantie 1 Évitez le démarr...

Страница 20: ...t Lorsque vous appuyez et maintenez les voyants DEL indiqueront le niveau approximatif de charge restante Cela n indique pas la fonctionnalité de l outil et peut varier selon les accessoires utilisés la température et l utilisation de l utilisateur final LISEZ TOUTES LES INSTRUCTIONS Consignes de sécurité importantes pour les blocs piles AVERTISSEMENT lisez toutes les consignes de sécurité les ins...

Страница 21: ...geur véhiculaire Les matières étrangères conductrices telles mais sans s y limiter les poussières de meulage les copeaux métalliques la laine d acier le papier d aluminium Consignes de sécurité importantes pour tous les chargeurs de piles AVERTISSEMENT lisez toutes les consignes de sécurité les instructions et les symboles d avertissements du bloc piles du chargeur et du produit Ne pas suivre les ...

Страница 22: ...ures du chargeur et des fentes de ventilation Débranchez toujours le chargeur de l alimentation lorsqu il n y a aucun bloc piles à l intérieur Charger une pile Fig C 1 Branchez le chargeur dans une prise appropriée 2 Insérez et appuyez complètement le bloc piles Le voyant de chargement vert clignotera constamment pendant le chargement 3 Le chargement est terminé lorsque le voyant vert reste allumé...

Страница 23: ...r le réglage de faible pression pour arroser Consultez le paragraphe Comment utiliser la buse à jet multiple 4 Une fois la tâche terminée placez le boyau d aspiration dans un contenant d eau propre et tirez l eau dans le système pour le rincer Pour fixer le boyau de jardin ou d aspiration Fig F G Le raccordement du boyau de jardin ou d aspiration dépend de la tâche à effectuer Pour fixer le boyau ...

Страница 24: ...oser le bloc piles 17 2 Appuyez sur le bouton de libération des piles 18 sur le bloc pile 17 et sortez ce dernier 17 de l outil 3 Insérez le bloc piles dans le chargeur tel que décrit dans la section du chargeur du présent guide Installer et retirer le bloc pile Fig I REMARQUE Pour une meilleure performance assurez vous que le bloc piles est complètement chargé Pour installer les bloc piles 1 Leve...

Страница 25: ... jardin de la laveuse à pression en tirant le collier de l adaptateur de raccord rapide du boyau vers l arrière et retirez le du filtre à raccord rapide Arrêt Fig A 1 Pour arrêter la laveuse à pression relâchez la gâchette et retirez la pile 2 Fermez l eau au robinet Nettoyer une surface Fig L AVERTISSEMENT risque de blessures causées par le jet Toujours engager le verrouillage de la gâchette lors...

Страница 26: ...TSMAN appelez au 1 888 331 4569 VersaTrackMC Fig M AVERTISSEMENT afin de réduire le risque de blessure corporelle éteignez l appareil et retirez le bloc piles avant d effectuer tout ajustement ou de retirer installer des pièces ou des accessoires Un déclenchement accidentel du démarrage peut causer des blessures AVERTISSEMENT afin de réduire le risque de blessures graves ne pas utiliser un crochet...

Страница 27: ...les états ou les provinces CONTRAT D ENTRETIEN GRATUIT DE DEUX ANS SUR LES BLOC PILES CRAFTSMAN CMCB201 CMCB2011 CMCB2015 CONTRAT D ENTRETIEN GRATUIT DE TROIS ANS SUR LES BLOC PILES CRAFTSMAN CMCB202 CMCB204 CMCB205 CMCB206 REMARQUE la garantie de se produit sera annulée si le bloc piles a été altéré de quelque façon que ce soit CRAFTSMAN ne peut être tenu responsable de tout dommage corporel caus...

Страница 28: ...herramienta Una acción descuidada puede causar lesiones severas en una fracción de segundo 4 Uso y Cuidado de Lavadora a presión a No use la lavadora a presión si el interruptor no enciende y apaga Cualquier lavadora a presión que no pueda ser controlada con el interruptor es peligrosa y debe ser reparada INSTRUCCIONES DE SEGURIDAD IMPORTANTES ADVERTENCIA Lea todas las advertencias de seguridad in...

Страница 29: ...s a presión Dichas medidas preventivas de seguridad reducen el riesgo de arrancar la lavadora a presión accidentalmente c Guarde las lavadoras a presión inactivas fuera del alcance de los niños y no permita que personas no familiarizadas con la lavadora a presión o estas instrucciones operen la lavadora a presión Las lavadoras a presión son peligrosas en las manos de usuarios sin capacitación d Dé...

Страница 30: ... cabello largo podrían quedar atrapados en las partes móviles AVISO Siempre guarde su lavadora a presión en una ubicación en la que la temperatura no descienda debajo de 40 F 4 C El daño por congelamiento no está cubierto por la garantía 1 Evite arranques accidentales Mueva el interruptor de encendido en la unidad a la posición OFF apagado antes de conectar o desconectar el paquete de batería 2 El...

Страница 31: ...ión en base a los componentes del producto la temperatura y la aplicación del usuario final Transporte ADVERTENCIA Riesgo de Incendio No guarde transporte o lleve el paquete de batería de forma LEA TODAS LAS INSTRUCCIONES Instrucciones de Seguridad Importantes para Todos los Paquetes de Batería ADVERTENCIA Lea todas las advertencias de seguridad instrucciones y marcas de precaución para el paquete...

Страница 32: ...terías en la cavidad Instrucciones de Seguridad Importantes para Todos los Cargadores de Batería ADVERTENCIA Lea todas las advertencias de seguridad instrucciones y marcas de precaución para el paquete de la batería el cargador y el producto La falla en seguir las advertencias e instrucciones puede resultar en descarga eléctrica incendio y o lesiones serias NO intente cargar el paquete de batería ...

Страница 33: ... carga verde parpadeará continuamente mientras carga 3 La carga es completa cuando la luz verde permanece encendida continuamente El paquete de batería se puede dejar en el cargador o retirarse ADVERTENCIA Cargue las baterías únicamente a una temperatura del aire superior a 4 5 C 40 F y por debajo de 40 5 C 105 F 4 El cargador no cargará un paquete de batería defectuoso lo que puede indicarse por ...

Страница 34: ...cío múltiple 4 Una vez completado el trabajo coloque la manguera de succión en un recipiente con agua limpia y extraiga el agua limpia a través del sistema para enjuagar Conexión de Manguera de Jardín o Succión Fig F G Conectar la manguera de jardín o manguera de succión dependerá del trabajo a realizar Conexión de Manguera de Jardín Fig F Esta lavadora a presión se debe usar con los adaptadores d...

Страница 35: ...ción de cargador de este manual Instalación y Desinstalación de Paquete de Batería Fig I NOTA Para mejores resultados asegúrese que su paquete de batería esté completamente cargado Para Instalar los Paquetes de Batería 1 Levante y sostenga la cubierta de puerto de batería 5 para exponer el puerto de batería 2 Alinee el paquete de baterías con los rieles dentro del alojamiento de la batería y deslí...

Страница 36: ...nes o accesorios Una activación de arranque accidental puede causar lesiones Paro Fig A 1 Para detener la lavadora a presión libere el gatillo y retire la batería 2 Cierre el agua en el grifo 3 Descargue la presión residual apretando el gatillo 6 hasta que ya no salga agua de la varilla de rocío 8 4 Desconecte la manguera de jardín de la toma de agua 3 y la manguera de drenaje 5 Retire la manguera...

Страница 37: ...ualquier ajuste o retirar instalar conexiones o accesorios Una activación de arranque accidental puede causar lesiones ADVERTENCIA Para reducir el riesgo de lesiones personales graves no use un gancho para colgar VersaTrack o Trackwall de VersaTrack dañados Un gancho para colgar VersaTrack o Trackwall de VersaTrack dañados no soportarán el peso de la herramienta ADVERTENCIA Para reducir el riesgo ...

Страница 38: ... esta garantía deberá presentar su herramienta y esta póliza sellada por el establecimiento comercial donde se adquirió el producto de no contar con ésta bastará la factura de compra Excepciones Esta garantía no será válida en los siguientes casos Cuando el producto se hubiese utilizado en condiciones distintas a las normales Cuando el producto no hubiese sido operado de acuerdo con el instructivo...

Страница 39: ...r a ninguna pregunta AMÉRICA LATINA Esta garantía no se aplica a los productos que se venden en América Latina Para los productos que se venden en América Latina debe consultar la información de la garantía específica del país que viene en el empaque llamar a la compañía local o visitar el sitio Web a fin de obtener esa información REEMPLAZO GRATUITO DE LAS ETIQUETAS DE ADVERTENCIAS Si sus etiquet...

Страница 40: ...aximum initial battery voltage measured without a workload is 20 volts Nominal voltage is 18 La tension initiale maximum du bloc piles mesurée à vide est de 20 volts La tension nominale est de 18 El máximo voltaje inicial de la batería medido sin carga de trabajo es 20 voltios El voltaje nominal es de 18 WARNING Use of any other battery packs may create a risk of injury and fire AVERTISSEMENT util...

Отзывы: