background image

Содержание 917.29249

Страница 1: ... Parts This product has a low emlsslon engine which operates dlfferently from prevlously built englnea Before you start the englne read and understand thls Owner s Manual CAUTION Read and follow all Safety Rules and Instructions before operating this equipment Sears Roebuck and Co Hoffman Estates II 60179 Visit our Craftsman website www sears corn craftsman ...

Страница 2: ...duct is in use in the united states This Warrantygivesyou specificlegal rights and you may alsohave otherrightswhich vary fromstateto state SEARS ROEBUCK AND CO D 817WA HOFFMAN ESTATES IL 60179 IMPORTANT This cuttingmachineis capable of amputatinghands andfeet and throwingobjects Failureto observethe following safetyinstructions couldresultin serious injury or death TRAINING Read the Owner s Manua...

Страница 3: ... children and pets away Do not overload the machine capacity by attempting to till too deep at too fast a rate Never operate the machine at high speeds on slippery surfaces Look behind and use care when backing Never allow bystanders near the unit Use only attachments and accessories approved by the manufacturer of the tiller Never operate the tiller without good visibility or light Be careful whe...

Страница 4: ...bserve the safety rules Follow a regular schedule in maintain ing caring for and using your tiller Follow the instructions under the _Customer Responsibilities and Storage sections of this Owner s Manual _WARNING This unit is equipped with an internal combustion engine and should not be used on or near any unimproved forest covered brush covered or grass covered land unless the engine s exhaust sy...

Страница 5: ...es are listed 1 Utility knife 1 Screwdriver 1 Pair of pliers 2 112 wrenches OPERATOR S POSITION When right or left hand is mentioned in this manual it means when you are in the operating position standing behind tiller handles Left Front Operator s Position Right CONTENTS OF HARDWARE PACK 1 Clevis Pin 1 Washer 9 32 x 1 2 x 14 Gauge 1 Manual 1 Plastic Cable Clip 2 Hex Bolts 5 16 18 x 1 1 4 1 Revers...

Страница 6: ... REVERSE ROD H Tine Control and eMou Tine Control _ _ oa a y _ _ _ _ Handle Column Carriage L _Cotter Pin Bolts _ _ J _ _t Nasher _ Upper Revarsa Rod Reverse _ _ _ _Clevis Pin _ _ Bushing Lower Reverse Rod Flange Locknuts Secure upper reverse rod to lower reverse rod using clevis pin washer and cotter pin INSTALL DEPTH STAKE ASSEMBLY 1 Loosen nut A 2 Insert stake support between engine bracket hal...

Страница 7: ...EVE_q_E CAUTION B_INE F_E FA _I SLOW C _KE FU_L OIL FITOP O OR WARNING ON OFF Depth Stake _ Recoil Starter Handle j Trs ne Oontro _ Choke Control Throttle Control _ _ Tins Shield Tines Sears tillersconformto the safetystandardsof the AmericanNationalStandardsInstitute FORWARD TINE CONTROL Engages tines in forward direction REVERSE TINE CONTROL Engages tines in reverse direction CHOKE CONTROL Used ...

Страница 8: ...h stake by removing the hairpin clip and clevis pin Change depth stake to desired position Replace the clevis pin and hairpin clip For normal tilling set depth stake at the second or third hole from the top WHEELS Adjust wheels by removing the hairpin clip and clevis pin Change wheel position Replace the hairpin clip and clevis pin For normal tilling set wheels at the second or third hole from the...

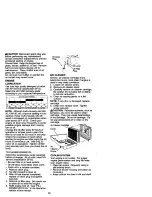
Страница 9: ...of this manual for additional information Never use engine or carburetor cleaner prod ucts in the fuel tank or permanent damage may occur A CAUTION Fill to within 1 2 inch of top of fuel tank to prevent spills and to allow for fuel expansion If gasoline is acciden taLLy spi_ed move machine away from area of spill Avoid creating any source of ignition until gasoline vapors have disappeared Do not o...

Страница 10: ...oil Depending on the climate rainfall and wind it may be advisable to till the soil at the end of the growing season to further condition the soil Soil conditions are important for proper tilling Tines will not readily penetrate dry hard soil which may contribute to excessive bounce and difficult handling of your tiller Hard soil should be moistened before tilling however extremely wet soil will b...

Страница 11: ...e from the warranty the operator must maintain tiller as instructed in this manual Some adjustments will need to be made periodically to properly maintain your tiller Er All adjustments in the Service and Adjustments section of this manual should be checked at least once each season Once a year you should replace the spark plug clean or replace air filter _ _ _ and check tines end belts for wear A...

Страница 12: ... temperature range expected before oil change All oil must meet API service classification SF SJ Be sure tiller is on level surface Oil will drain more freely when warm Catch oil in a suitable container 1 Remove drain plug 2 Tip tiller forward to drain oil 3 After oil has drained completely replace oil drain plug and tighten securely 4 Remove oil filler plug Be careful not to allow dirt to enter t...

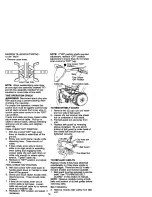
Страница 13: ...ine will shorten the useful life of your tiller Clean engine wheels finish etc of all foreign matter Keep finished surfaces and wheels free of all gasoline oi etc Protect painted surfaces with automo tive type wax _I CAUTION Disconnect spark plug wire from spark plug and place wire where it cannot come into contact with plug TILLER TO ADJUST HANDLE HEIGHT Factory assembly has provided lowest handl...

Страница 14: ...own to handle push down on handle to raise tines off the ground 6 Slowly pull recoil starter handle while observing tines Tines should rotate forward 7 If tines do not rotate inner wire of control cable is too loose Loosen cable clip and pull cable up to remove slack and retighten clip 8 Recheck in ON position and adjust if necessary NOTE If ON position check required adjustment recheck OFF positi...

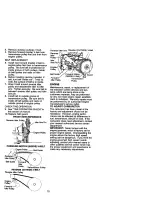
Страница 15: ...E OUTSIDE V BELT Reverse IdlerPulley Engin_ Po ey 0 Forward_ j _ Idler Pulley Reverse Idler Arm Reverse OUTSIDE V Belt Reverse Idler Idler Pulley Idler Pulley Belt Guard Bolt Transmission Pulley ENGINE Maintenance repair or replacement of the emission control devices and sys tems which are being done at the customers expense may be performed by any non road engine repair establish ment or individu...

Страница 16: ...uel tank 2 Start the engine and let it run until the fuel lines and carburetor are empty Never use engine or carburetor cleaner products in the fuel tank or permanent damage may occur Use fresh fuel next season NOTE Fuel stabilizer is an acceptable alternative in minimizing the formation of fuel gum deposits during storage Add stabilizer to gasoline in fuel tank or storage container Always follow ...

Страница 17: ... Clean or replace aircleaner cartridge 5 Drain fuel tank and carbure tor and refill tank with fresh gasoline 6 Remove fuel tank and clean 7 Make sure spark plug wire is seated pmperiy on plug 8 Replace spark plug or adjust gap 9 Make necessary adjust ments 10 Replace air filter 1 Place throttle control in FAST position 2 Clean or replace air cleaner cartridge 3 Replace spark plug or adjust gap 4 D...

Страница 18: ...g Tines Skip overground Hard to Shift into gear Tiller shuts off when drive control bar engaged 1 Tins control is not engaged 2 V belt not correctly adjusted 3 V belt is off pulley s t Tilling too deep 2 Throttle controlnot properlyadjusted 3 Carburetorout of adjustment t Shear pin s broken 1 Gears not timmed I Shift lever set in between counter rotating till posi tion and forward rotating till po...

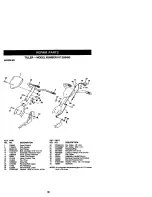
Страница 19: ...e Control Lever Control Tine Pin Pivot Ring Clip Reverse Rod Upper Pin Retaining Reverse Rod Lower Washer 13 32 x 13 16 x 10 Ga KEY PART NO NO DESCRIPTION 26 STD561210 Pin Cotter I 8 x 3 4 27 STD560907 pin Colter 3 32 x 112 29 12000059 Retaining Ring 35 72010620 Bolt 5 16 18 X 2 I 2 36 7397 T_00 Locknut Range 5 16 18 UNC 37 165197 Clip Cable 38 152094 Assembly Handle Column 39 137640 Bu6Nng Revers...

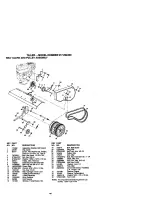
Страница 20: ... 72140406 Bolt Carriage 1 4 20 x 3 4 14 1330_5 VoBell Fonvard Motion 15 2614J V Belt Reverse 16 12000 _5 Ring Retainer 17 2649M Key Square 18 151236 Sheave Transmission fiat KEY PART NO NO DESCRIPTION 19 165914 Bolt Belt Guard 20 12_O0036 Ring KIIp 21 STD541237 Nut Hex Jam 3 6 16 22 161806 Pulley Idler 23 175377 Arm Idler 24 S_12 Bolt Hex Head 3 8 16 x 1 1 4 25 t 06968X Shalt Idler Arm 26 _ Nut He...

Страница 21: ...3 4 Nut Hex 5 16 18 Washer Lock 5 16 Locknut whvasher 5 8 16 Clip Helrpln Support Depth Stake R H Stake Depth Pth Clevis Bolt Fin Hex 3 8 16 x 1 3 4 Support Depth Stake L H KEY PART NO NO DESCRIPTION 15 5388J Spdng Stake 16 121117X Bolt Shoulder 17 9188R VWleel 18 STD551 _7 Washer 13i32x13 16x11Ga 19 91g0R Bracket Wheel 20 STD541437 Locknut Crown 3 8 16 21 74760516 Bolt Hex Head 5 1 6 18 x 1 22 1_...

Страница 22: ...17 292490 TINE ASSEMBLY 2 KEY PART NO NO DESCRIPTION I 156934 Tine Outer R H 2 STD_24006 Retalner Spllng 3 1569 32 Tlne Inner R H KEY PART NO NO 4 15_ 31 5 156933 6 4929H DESCRIPTION Tine inner L H T_ne Outer L H pin Clevis ...

Страница 23: ... 32 x 13 16 x 11 Locknut wNtasher 3 8 16 Shleld _ne Bracket Engine R H _racket Engine L H Bolt Hex Head 5 16 18 x 2 _4 Tmr_mlsslon Spacer Split Nut Hex Keps 3 16 18 UNC KEY PART NO NO DESCRIPTION 16 19091412 Washer 9 32 x 7 8 x 12 Gauge 17 19092016 Washer 9F32 x 1 1 4 x 16 Ga 18 STt_o51125 Washer Lock 1 4 19 74610412 Bolt Hex 1 4 28 x 3 4 Grade 5 20 Engfne See Breakdown Bdggs Model No 1t 0402 0206...

Страница 24: ... Ser 2 176941 Decal Belt Grd 3 166131 Decal Logo 4 137653 Decal CauUon gne Coat rol 5 120431X Decal Hand Placemen 6 176783 Decal Engine OperaUoa 7 171078 Decal Rewind Intek 8 120075X Decal Warning Rotating Tines 9 182215 Decal Tkle Shield 10 167156 Decal B S Intek 176859 ManuaJl Owner s EngiSpan ...

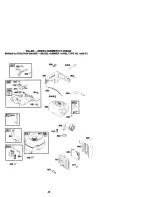
Страница 25: ...BER 917 292490 BRIGGS STRATTON ENGINE MODEL NUMBER 110402 TYPE NO 0206 E1 51 993 307 24 _ 22_ _ 21_ _ o kREQUIRESSPECIALTOOLS TO IN_TALL SEEREPAIR 742_ INSTRUCTIONMANUAL _ _ _ _ _ _ _ 11058 OWNER S MANUAL _ _ 32A _ 44 ...

Страница 26: ...GINE MODEL NUMBER 110402 TYPE NO 0206 E1 365 i _ 633r_ lO4 _ I 975_ _ 137 I_ 276 I _ _td j I 977 CARBURETOR GASKET SET 276 _ 51 _ _ ___ 633A _ 633 _ 121 CARBURETOR OVERHAUL KIT IlM 127 _ 633r_j 633Ar_ _ 358 ENGINE GASKET SET 20 _ _ _ 993 I _i _ 1211 _ ...

Страница 27: ...TILLER MODEL NUMBER 917 292490 BRIGGS STRATTON ENGINE MODEL NUMBER 110402 TYPE NO 0206 E1 _J 562 _ 505 _ 2221 427 _ _i_ _ e2 _ 334 836A_ r 883 163 968 i 161 _i_ _ _ _ ill 46 ...

Страница 28: ...TILLER MODEL NUMBER 917 292490 BRIGGS STRAI rON ENGINE MODEL NUMBER 110402 TYPE NO 0206 E1 _ _ _ _ 592 __ 6o_ _ 1211 _ 459_ _ J1036 EMISSIONS LABEL 23 934_ 48 1095 VALVE GASKET SET A7 ...

Страница 29: ... Length 60 281434 Gdp Stader Rope 65 690837 Screw Rewind Starter 95 691636 Screw Throttle Valve 97 690024 Shaft Threttle 98 398185 Kit Idle Speed KEY PART NO NO DESCRIPTION 104 691242 _1 Pin Float Hinge 108 692567 Valve Choke 109 690023 Shaft Choke 117 694975 Jet Main Standard 121 695157 Kit Carburetor Overhaul 122 693749 O Spacer Carburetor 125 696065 Carburetor 127 691739 G Plug Welch 130 691181...

Страница 30: ...93 691892 Gasket Cylinder Head Plate 562 691112 Bolt Governor Control Lever 1005 692592 Fan Flywheel 592 690800 Nut Rewind Starter 1019 694851 Kit Label 597 691696 Screw Pawl Fdctlen Plate 1022 691890 Gasket Rocker Cover 601 95162 Clamp Hoee 1023 499924 Cover Rocker 608 497680 Starter Rewind 1026 693517 Rod Push 613 691665 Screw Muffler 1029 691230 Arm Rocker 615 692576 Retainer Governor Shaft 103...

Страница 31: ...50 ...

Страница 32: ......

Страница 33: ...d owner s manuals that you need to do it yourself call Sears PartsDirectSM 1 800 366 PART 8a m 11 p n CST 1 800 366 7278 7 daysa week www sears com partsdirect To purchase or inquire about a Sears Service Agreement 1 800 827 6688 7 a m 5p m CST Mon Sat Para pedirserviciode reparack_na domicilio y para ordenar piezas con entregaa domicilio 1 888 SU HOGAR s 1 888 784 6427 Au Canada pour service en f...

Отзывы: