background image

Содержание 390.2521

Страница 1: ...uctions Before FirstUse of This Product Save This Manual For Future Reference I RI IFTSMI IN PROFESSIONAL 1 2 HP SHALLOW WELL WATER SYSTEM Safety Instructions Installation Electrical Maintenance Repair Parts Sears Roebuck and Co Hoffman Estates IL 60179 U S A PRINTED IN USA Form No F642 04075 8 3 o4 ...

Страница 2: ...efully read and follow all safety instructions in this nmnual or on pump _k This is the safety alert s3m tbol XX hen you see ttus symbol on your pump or m this manual took for one of tbe following stgna words and be alert to the potential for persona mlury_ warns about hazards that will cause senous persona mjury death or malor property damage ff ignored A WARNING_warns about bazards that will or ...

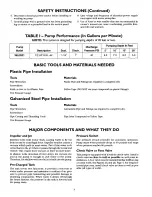
Страница 3: ...pound or Teflon Tape MAJOR COMPONENTS AND WHAT THEY DO Impeller and Jet Impeller turns with motor shaft causing water to fly out from its rim by centrifugal force Impeller rotation creates a vacuum which pulls in more water Part of the water is di verted back to the jet where it passes through the nozzle and venturi This creates more vacuum to draw in more water In shallow wells less than 20 feet ...

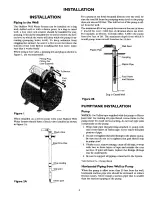
Страница 4: ...uld therefore be 15 feet Plastic Pipe Figure 2B Well Seal and Strainer 11 1293 Dug or Cased Well Figure I When installed on a driven point well your Shallow Well Water System should have a check valve installed as shown in Figure 2A _eck Valve t Steel Drive Pipe D __dve coupling Well point Figure 2A _ Driven point PUMP TANK INSTALLATION Pump NOTICE Use Teflon tape supplied with the pump or Plasto ...

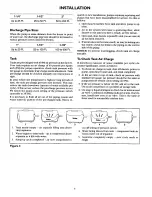
Страница 5: ...a sputtering flow allow faucets to run until you have a steady air free stream 3 Open and close faucets repeatedly until you are sure all air has been removed 4 If stream does not become steady air may be leaking into the system check for leaks in the piping on the suction side of the pump NOTICE To prevent waterlogging check tank air charge annually To Check Tank Air Charge If drawdown amount of ...

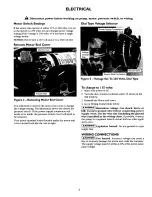
Страница 6: ...tor end cover should look like the one at right Dial Type Voltage Selector Power Supply Connections Ground Wire Connection Figure 5 Voltage Set To 230 Volts Dial Type To change to I 15 volts 1 Make sure power is off 2 Turn the dial counter clockwise until 115 shows in the dial window 3 Reinstall the Motor end cover 4 Go to Wiring Connections below AWARNING_ Hazardous voltage Can shock burn or kill...

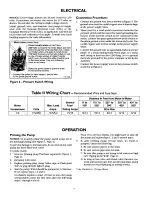
Страница 7: ...e to a grounded lead in a service panel to a metal underground water pipe to a metal well casing at least ten feet 3M long or to a ground electrode provided by the power company or the hydro authority 4 Connect the power supply wires to the pressure switch as shown in Figure 6 Motor Horsepower 1 2 Table II Wiring Chart Recommended Wire and Fuse Sizes Volts 115 230 Max Load Amps 10 5 5 2 Branch Fus...

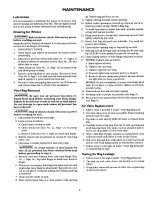
Страница 8: ... Clean and dry inside of tank 8 place replacement bag on a clean surface with opening up Flatten bag and force air out 9 Tightly roll bag towards center opening 10 Before center opening is covered up force air out of re maining portion of bag Finish rolling bag 11 To make bag easier to insert into tank sprinkle outside of bag with talcum powder 12 Being careful not to break valve stand tank on end...

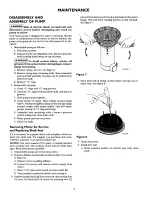
Страница 9: ...eating of O ring and clamp E Assemble base mounting bolts Connect pressure switch tubing and close drain cock F Prime pump and tttm on power G Check for leaks Removing Motor for Service and Replacing Shaft Seal If it is necessary to separate motor and seal plate always re place the shaft seal We suggest you purchase this item U109 6A and have it on hand for future use NOTICE The seal consists of t...

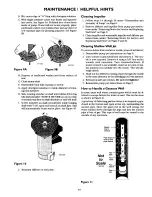
Страница 10: ...ser per instructions under Removing Motor for Service and Replacing Shaft Seal on Pages 9 and 10 Cleaning Shallow Well Jet To remove debris from venturi or nozzle proceed as follows 1 Disassemble pump per instructions on Page 9 2 Turn venturi counterclockwise and remove it The noz zle is now exposed Remove it using a 5 8 hex socket wrench with extension Turn counterclockwise If socket wrench is no...

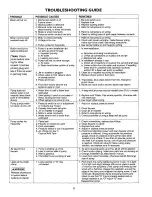
Страница 11: ...Well is gaseous 4 Intermittent over pumping of well Leaks at the metal 1 Loose clamps or O ring clamp not sealed I_ WARNING_ Release arl pressure in system before working on clamp a Re prime according to instructions b Check all connections on suction line and jet c Replace foot valve 2 In installation already in use a Check all connections on suction line jet and shaft sea b Lower suction line in...

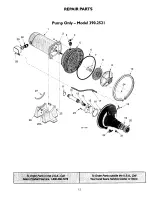
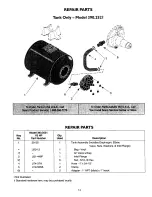
Страница 12: ...REPAIR PARTS 29 3O 1 Pump Only Model 390 2521 2 3 4 5 28 26 _25 11 16 17 23 587 1193 8 9 22 24 19 21 10 2O 12 ...

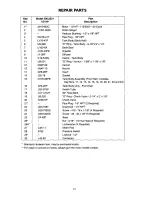
Страница 13: ... Tank Body Back Half O Ring Tank Body 9 1 2 x 9 x 1 4 Shaft Seal Impeller Diffuser Clamp Tank Body O Ring Venturi 1 3 8 x 1 1 8 x 1 8 Venturi Nozzle Insert Gasket Tank Body Assembly Front Half Includes Key No s 11 12 13 14 15 16 19 20 21 23 and 24 Tank Body Only Front Half Switch Tube 90 Hose Barb O Ring Check Valve 2 1 4 x 2 x 1 8 Check Valve Pipe Plug 1 8 NPT 2 Required Draincock 1 4 NPT Screw 1...

Страница 14: ...2 3t 4 5 6 i U20 13 U31 446P U74 37H U19 55SS 1 1 1 6 1 2 2 Description Tank Assembly Includes Diaphragm Elbow Valve Nuts Washers Inlet Flange Bag Vinyl Air Valve w Cap Inlet Flange Nut 5 16 18 Hex Hose 1 x 24 1 2 Clamp Adapter 1 NPT Male x 1 Insert Not illustrated i Standard hardware item may be purchased locally 14 ...

Страница 15: ...15 ...

Страница 16: ... the repairor replacementpartsyouneed Call7 am 7 pm 7 daysa week 1 800 366 PART 1 800 386 7278 Forin homemajor brandrepairservice Call24 hoursa day 7 daysa week t 8OO 4 REPAIR 1 800 473 7247 Forthe locationof a SearsRepairServiceCenterinyourarea Call24 hours a day 7 daysaweek 1 800 488 1222 Forinformationonpurchasinga Sears MaintenanceAgreementorto inquire aboutan existingAgreement call 9am 5 prn ...

Отзывы: