background image

Содержание 351.225950

Страница 1: ...8 Belt 9 Disc SANDER GRINDER WITH Model No 351 225950 STAND CAUTION Read and follow all Safety Rules and Operating Instructions before First Use of this Product Sears Roebuck and Co Hoffman Estates IL 60179 U S A 2087 00 Draft 06 30 98 ...

Страница 2: ...correct gauge Keep visitors at a safe distance from work area Keep children out of workplace Make workshop childproof Use padlocks master switches or remove switch keys to prevent any unintentional use of power tools TOOL SHOULD BE MAINTAINED Always unplug tool prior to inspection Consult manual for specific maintaining and adjusting procedures Keep tool lubricated and clean for safest operation R...

Страница 3: ...g or adjusting your belt and disc sander grinder you will need the following tools 10 and 17mm Wrench 2 5 3 4 5 6 and 8mm Hex wrenches Combination Square Phillips screwdriver ASSEMBLE DISC TABLE Refer to figure 9 page 10 Attach disc guard to end shield Key No 23 using three washer head screws Key No 27 Remove tape from key and armature Key Nos 21 and 20 Slide aluminum disc with abrasive Key Nos 29...

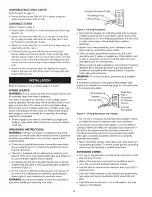
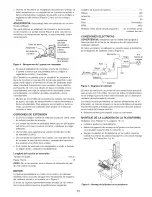
Страница 4: ...vent of a malfunction or breakdown grounding pro vides a path of least resistance for electrical shock WARNING Do not permit fingers to touch the terminals of plug when installing or removing from outlet Properly Grounded Outlet __ _i Grounding Prong 3 Prong Plug __ __ Figure 3 3 Prong Receptacle Plug must be plugged into matching outlet that is properly installed and grounded in accordance with a...

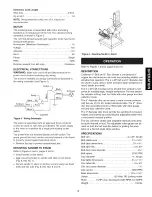
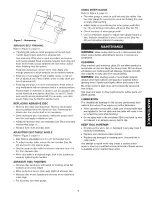
Страница 5: ...ad bolts and hex nuts Fig 8 Key Nos 8 and 9 Figure 6 Mounting Sander to Stand Refer to Figures 7 and 9 pages 6 and 10 DESCRIPTION Craftsman 6 Belt and 9 Disc Sander is constructed of rugged die cast aluminum and cast iron providing stability and vibration free operation The 6 x 48 belt and 9 diameter disc are used to sand deburr bevel and grind large workpieces of wood plastic and metal The 6 x 48...

Страница 6: ...ble to ensure that the splice in the belt will not come apart Slide new belt over the drive and idler drums center belt on drums Push tension lever towards drive drum to tension belt Rotate belt by hand to check tracking Belt should ride cen tered on drive and idler drums Adjust thumb nut Key No 75 as needed to center belt on drums Tighten hex nut Key No 39 If adjustment of thumb nut does not prov...

Страница 7: ...cross down side right of abrasive disc Abrasive disc moves fastest and removes more material at outer edge For accuracy use miter gauge USING MITER GAUGE Refer to Figure 9 page 10 The miter gauge is used on both belt and disc tables Use the miter gauge for securing the work and holding the prop er angle while sanding Adjust angle by repositioning the miter gauge scale Key No 78 and locking it into...

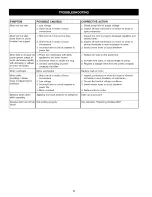
Страница 8: ...lls resulting in blown fuses or tripped circuit breakers 1 Short circuit in motor or loose connections 2 Low voltage 3 Incorrect fuses or circuit breakers in power line 4 Motor overload 1 Inspect line cord or plug for damaged insulation and shorted wires 2 Inspect all lead connections on motor for loose or shorted terminals or worn insulation on wires 3 Install correct fuses or circuit breakers 1 ...

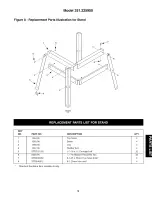
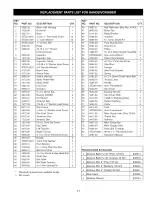
Страница 9: ... 6 7 8 PART NO 1264 00 1265 00 1266 00 1267 00 STD533105 8428 00 STD835050 STD840812 DESCRIPTION Top frame Brace Leg Rubber foot 5 1_ 18x W Carraige bolt 5 1_ 18Washer Head Hex Nut 8 1 25 x 50mm Hex head bolts 8 1 25mm Hex nuts Standard hardware item available locally QTY 4 4 4 32 32 4 4 9 ...

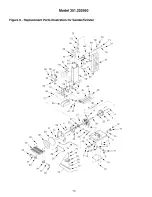
Страница 10: ...Model 351 225950 Figure 9 Replacement Parts Illustration for Sander Grinder 37 33 37 36 51 23 74 5 3 1 i 14 12 12 16 10 ...

Страница 11: ... 1 Work Stop 1 Belt Table 1 Belt Table Trunnion 1 4 x 10mm Spring Pin 2 Standard hardware item available locally A Not shown KEY NO PART NO 46 8387 01 47 8658 00 48 8114 00 49 8388 00 50 8389 00 51 8390 00 52 8391 00 53 8392 00 54 1822 00 55 STD852008 56 8393 00 57 0316 00 58 8394 00 59 8395 00 60 8396 02 61 8397 02 62 6182 00 63 8398 00 64 8399 00 65 STD851006 66 8400 00 67 0520 00 68 8401 00 69 ...

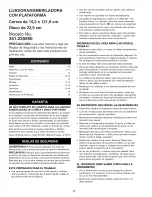
Страница 12: ...toxicado o cuando est6 tomando medicamentos que causan somnolencia PREPARACION DEL AREA PARA EJECUTAR EL TRABAJO Mantenga el _trea limpia Las _ reas de trabajo desordenadas atraen accidentes No use herramientas mec_ nicas en ambientes peligrosos No use herramientas mec_tnicas en lugares hQmedos o mojados No exponga las herramientas mec_ nicas a la Iluvia El Area de trabajo debe estar iluminada ade...

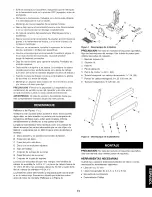
Страница 13: ...vio Si ha ocurrido algQn daSo se debe entablar un reclamo con la compaSia de transportes Verifique que la orden est6 completa Informe inmediatamente al distribuidor si hay partes que faltan La lijadora esmeriladora viene montada como una unidad Se deben encontrar las partes adicionales que se van a fijar a la lijadora y asegurarse que no falte ninguna antes de efectuar el montaje A Disco abrasivo ...

Страница 14: ...ercas hexagonales Adjunte los dos soportes restantes alineando los agujeros cuadrados en las patas yen los soportes Inserte los pernos de coche y asegQrelos con las tuercas hexagonales Refierase alas Figuras 3 4 5 6 y 8 p_ ginas 14 15 y 9 FUENTE DE ENERGIA ADVERTENCIA No conecte la lijadora esmeriladora a la fuente de energia sino hasta despues de que se hayan com pletado todos los pasos del monta...

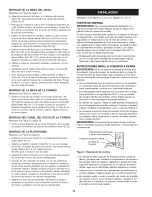
Страница 15: ... conexi6n a tierra de tres puntas y recept_ culos tripolares que acepten el enchufe de la unidad Si el cord6n de extensidn est desgastado cortado o da_ado en alguna forma cb mbielo inmediatamente Longitud del cord6n de extensi6n TamaSo del cable A W G Hasta 7 62 m 18 AVlSO No se recomienda usar cordones de extensi6n de mas de 7 62 metres de large MOTOR La lijadora esmeriladora se monta con el moto...

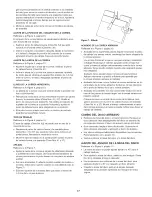
Страница 16: ...todas las protecciones est6n adjuntas correc tamente y sujetas en forma segura AsegL_rese que todas las partes movibles est6n libres y sin ninguna interferencia AsegL_rese que todos los sujetadores est6n apretados y que no se hayan soltado con la vibraci6n Con la energia desconectada pruebe la operaci6n manual mente para verificar el espacio libre y ajL_stelo si es necesario Siempre use protecci6n...

Страница 17: ...a lijadora esmeriladora de correa para muescar la parte trasera de una pieza de madera auxiliar Con una abrazadera C adjunte la pieza auxiliar de madera a la mesa ActQa como soporte cuando se est afilando vea la Figura 7 El borde superior de la madera tiene que estar a menos de 1 6 mm de la correa abrasiva Figura 7 Afilado ACABADO DE LA CORREA ABRASIVA Refierase a la Figura 9 p_ gina 10 Acabado de...

Страница 18: ...las ruedas producir_ mala alineaci6n y deslizamien to de la correa Opere la herramienta con el colector de polvo para evitar que se acumule el polvo ADVERTENClA Despues de lijar madera o material no met_ li co siempre limpie el aserrin del colector y de las protecciones antes de esmerilar el metal Las chispas pueden encender los desperdicios y producir un incendio AsegL_rese de mantener el motor l...

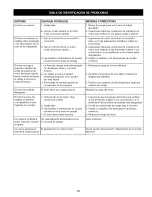
Страница 19: ...a compaSia 3 motor para verificar si hay terminales sueltos o con cortocircuito o si los aisladores en los cables estan desgastados Instale los fusibles o los interruptores de circuito correctos 1 Reduzca la carga en la linea el_ctrica 2 Aumente los tamaSos de los cables o reduzca la Iongitud del cableado 3 Solicite a la compaSia de electricidad que haga una revisi6n del voltaje El motor se calien...

Страница 20: ...vice Call 24 hours a day 7 days a week 1 800 4 REPAIR 1 800 473 7247 Para pedir servicio de reparacion a domicillo 1 800 659 7084 For the location of a Sears Parts and Repair Center in your area Call 24 hours a day 7 days a week 1 800 488 1222 mmmmmm mmmmmm When requesting service or ordering parts always provide the following information Product Type Part Number Model Number Part Description SEAR...

Отзывы: