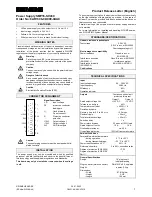
background image

7

TECHNICAL DATA 

OPERATING INSTRUCTIONS

9VFUHZGULYHU

&KDUJHUYROWDJH
5DWHGYROWDJH
%DWWHU\FDSDFLW\
5DWHGVSHHG
0D[WRUTXH
0DFKLQHZHLJKW
&KDUJLQJWLPH 
&KDUJHUSURWHFWLRQFODVV
&KDUJHURXWSXW

120 V~ 60Hz

4 V  

1.5 Ah Li-ion

180 /min 

26.5inch-lbs

0.85 lbs

3-5 hours

II/ 

5 V     500 mA 

NOTE:

 Before using the tool, read the instruction book carefully.

,QWHQGHG8VH

 The power tool is intended for driving in and loosening 

screws as well as for drilling in wood, metal and plastic.

Inspect the Screwdriver before using to ensure all the parts are running smoothly 
and there are no abnormal sounds or sparks.

:$51,1*%HIRUHXVLQJVFUHZGULYHUWRGULYHIDVWHQHUVLQWRZDOOVFKHFN

EHKLQGZDOOVIRUZLUHDQGRWKHUHOHFWULFDOVKRFNKD]DUGVRUSOXPELQJ

!

OPERATING INSTRUCTIONS cont.

8

BEFORE OPERATING THIS TOOL

CHARGE THE BATTERY

The battery charger supplied is only for the Li-ion battery installed in the tool. 
Do not use another battery charger. The Li-ion battery is protected against deep 
discharging. When the battery is empty, the tool is switched off by means of a 
protective circuit: The tool will not turn on when the trigger is engaged. When the 
Battery Pack is charged for the first time or after prolonged storage, the Battery Pack 
will accept a 100% charge only after several charge and discharge cycles.

&+$5*,1*6HH)LJ

Plug the charger plug into a suitable 
power outlet. Next, connect the 
charger to the Charging Socket on the 
screwdriver; the indicator will illuminate 
Red during charging. Let the battery 
charge for 3-5 hours. The battery is fully 
charged as soon as the indicator changes 
to Green. Then unplug the charger. 
Disconnect the Charger from the 
screwdriver. The screwdriver is ready 
to be used.

,PSRUWDQW

When charging, the charger and screwdriver may become 

warm to the touch; this is normal and does not indicate a problem.

,16(57,1*$1'5(029,1*%,76

6HH)LJ

Insert the bit into the Chuck (Fig. 4) and 
push the bit into the chuck as far as 
possible. To remove the bit, simply 
pull it out of the Chuck (Fig. 4).

127,&('RQRWXVHDELWVKRUWHU

WKDQPPDVLWZLOOEHGLIILFXOW

WRUHPRYHIURPWKHFKXFN

)LJ

)LJ

Содержание 172.417700

Страница 1: ...s and Operating Instructions in this manual before using this product Sears Brands Management Corporation Hoffman Estates IL 60179 U S A www craftsman com 2SHUDWRU V 0DQXDO WARRANTY SAFETY OPERATION 0 17 1 1 PARTS LIST ESPAÑOL 9ROW Screwdriver 0RGHO 1R ...

Страница 2: ...DZD ZKLOH RSHUDWLQJ D SRZHU WRRO Distractions can cause you to lose control ELECTRICAL SAFETY 1 3RZHU WRRO SOXJV PXVW PDWFK WKH RXWOHW 1HYHU PRGLI WKH SOXJ LQ DQ ZD R QRW XVH DQ DGDSWHU SOXJV ZLWK HDUWKHG JURXQGHG SRZHU WRROV Unmodified plugs and matching outlets will reduce risk of electric shock 2 YRLG ERG FRQWDFW ZLWK HDUWKHG RU JURXQGHG VXUIDFHV VXFK DV SLSHV UDGLDWRUV UDQJHV DQG UHIULJHUDWRUV...

Страница 3: ...re that the safety of the power tool is maintained GENERAL POWER TOOL SAFETY WARNINGS cont 4 SCREWDRIVER SAFETY WARNINGS GENERAL SAFETY WARNINGS ROG SRZHU WRRO E LQVXODWHG JULSSLQJ VXUIDFHV ZKHQ SHUIRUPLQJ DQ RSHUDWLRQ ZKHUH WKH IDVWHQHU PD FRQWDFW KLGGHQ ZLULQJ Fasteners contacting a live wire may make exposed metal parts of the power tool live and could give the operator an electric shock KDUJHU...

Страница 4: ...act If contact accidentally occurs flush with water If liquid contacts eyes additionally seek medical help Liquid ejected from the battery may cause irritation or burns 18 Have servicing performed by a qualified repair person using only identical replacement parts This will ensure that the safety of the product is maintained GENERAL SAFETY WARNINGS cont 6 7 6 0 2 6 25 285 722 7KH ODEHO RQ RXU WRRO...

Страница 5: ...ry is protected against deep discharging When the battery is empty the tool is switched off by means of a protective circuit The tool will not turn on when the trigger is engaged When the Battery Pack is charged for the first time or after prolonged storage the Battery Pack will accept a 100 charge only after several charge and discharge cycles 5 1 6HH LJ Plug the charger plug into a suitable powe...

Страница 6: ...cloth Always store your power tool in a dry place Keep the motor ventilation slots clean Keep all working controls free of dust Occasionally you may see sparks through the ventilation slots This is normal and will not damage your power tool 51 1 1HYHU FKDQJH WKH GLUHFWLRQ RI URWDWLRQ ZKHQ WKH KXFN LV URWDWLQJ ZDLW XQWLO LW KDV VWRSSHG LJ LJ FORWARD REVERSE FORWARD REVERSE 10 PARTS LIST 3DUWV 1R 3D...

Страница 7: ...12 11 NOTES PARTS LIST ...

Отзывы: