Customize Camera Settings
Now that the camera is paired, customize the name of your device on the
Edit New Camera
screen.
1. Tap the Camera Name field to configure the name of the camera and press
Done
.
2. Select the desired image quality (recommend ‘High’) and motion sensitivity (recommend ‘Med’) levels.
3. Press
Next
to continue. You can now disconnect everything from the Y Cable and set it aside.
To learn how to set up Rules and find other helpful information, visit us
online at
cox.com/diyhomelife
For Homelife technical support, call
1-877-404-2568
HD Camera
Indoor Installation Instructions
Congratulations, the installation and setup process is now complete!
4
Relocate Camera
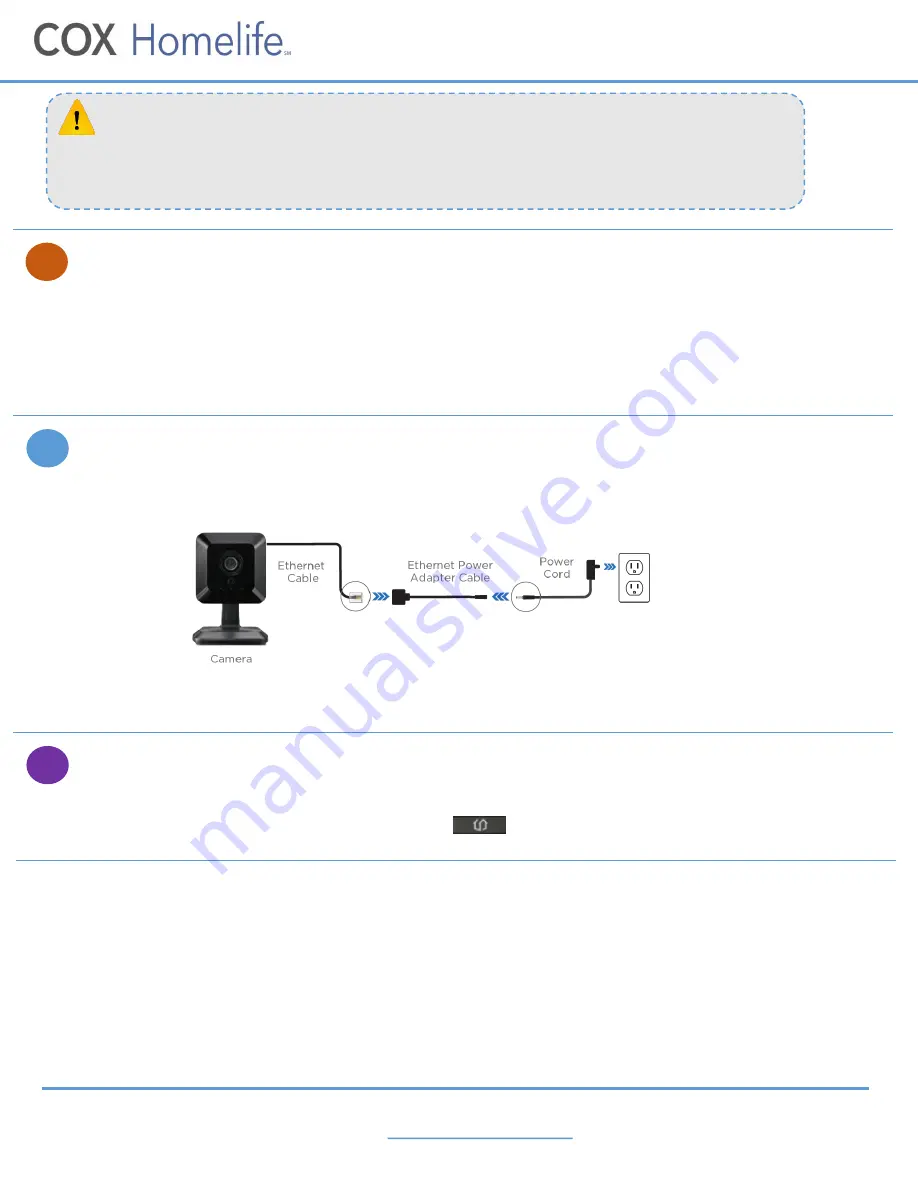
1. Now, take the Camera's Ethernet Cable and the Power Cord and connect them to the Ethernet Power Adapter
Cable as shown in the diagram below.
2. Relocate the camera to your desired location and plug it in. Wait at least a minute for the camera to fully restore
connectivity, as indicated by the two green lights.
5
If you see a red
X
and Abort button, press the
Back
button on the bottom of the screen. Press and
hold the small round black button on the back of the camera for 30 seconds to reset it. When 2
green lights appear, press
Next
on the Touchscreen to continue.
TROUBLESHOOTING TIP
Verify Camera Connectivity
1. Return to the Touchscreen and press the
Verify Camera
button to test the Wi-Fi connection to the camera. Press
Next
and
Next
again. Press the Touchscreen’s Home button to return to the home screen.
6
You can now view live video and record 15 second video clips via your Touchscreen, mobile app or
online Subscriber Portal.
To record video 24/7 and keep recordings for 10 days, click or call to learn more about our
Continuous Video Recording
service.


