We see temperature and temperature differences!!!
7
CG320 & CG640 Manual
5.
How to install
①
Open packaging and check all components are included (refer to page 4)
②
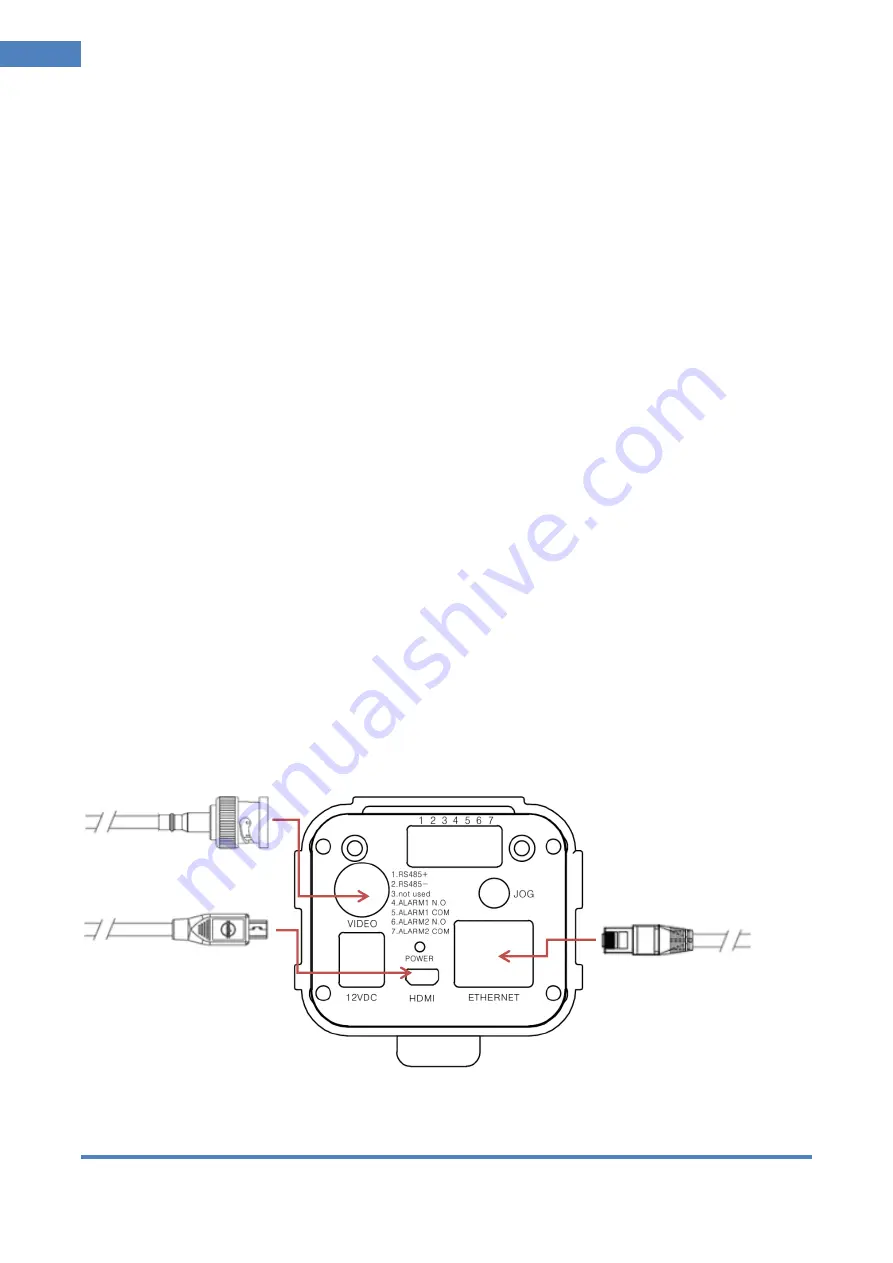
Connect video cable(Analogue video cable or HDMI cable) and RJ45 Ethernet cable
to camera.
For Giga Ethernet, use Ethernet cable as per CAT6 standard included in the package.
Connect video cable (Analogue video cable or HDMI cable) and RJ45 Ethernet cable
to camera. For Giga Ethernet, use Ethernet cable as per CAT6 standard included in the package.
How to connect to monitor
Use any one of analogue video cable (BNC) or micro HDMI cable to connect camera to monitor.
HDMI image is a little better in image quality compared to CVBS video from BNC port.
How to connect Ethernet cable
(1) connect RJ45 Ethernet cable included in the package to RJ45 port on the rear of the camera.
Initial IP address setting: It is set at DHCP mode before delivery.
(2) Connect camera to PC directly or connect camera to IP router, and then IP address shall be
assigned automatically.
(3) In case DHCP server is not avail
able, set DHCP at “OFF” in OSD menu and set IP address
manually.
Setting of DHCP and other submenu like IP ADDRESS, NETMASK, GATEWAY can be done using
jog switch on the rear of the camera (refer to page 28)
(4) For searching IP address and connection to the IP on PC, please refer to thermal imaging
analyzer or camera controller on CD included in the package.
③
Remove lens cap on lens
④
Connect power to camera using power cable and AC110-220V to DC 12V adaptor included in
※
Micro HDMI cable
※
BNC cable
※
Ethernet cable


