background image

DISCOVER RECIPES AND MORE AT 

DÉCOUVREZ DES RECETTES ET PLUS SUR

COUNTRYSMOKERS.COM

MADE IN CHINA  |  FABRIQUÉ EN CHINE 

IMPORTANT

DO NOT RETURN PRODUCT TO STORE

For all questions, comments, or inquiries, please contact Dansons our Customer Care 

department.

USA: (480) 923-9631 
CANADA (TOLL FREE): 1-877-942-2246

[email protected]

IMPORTANT

NE RETOURNEZ PAS LE PRODUIT AU MAGASIN

Pour toutes questions, commentaires ou demandes de renseignements, veuillez communiquer 

avec le service à la clientèle de Dansons.


ÉTATS-UNIS: (480) 923-9631
CANADA (SANS FRAIS) : 1-877-942-2246

[email protected]

602220628UMV

©

 2022 DANSONS

WARNING

: This product can expose you to chemicals including 

formaldehyde, which is known to the State of California to cause cancer, 

and carbon monoxide, which is known to the State of California to cause 

birth defects or other reproductive harm. For more information go to   

WWW.P65WARNINGS.CA.GOV

AVERTISSEMENT : 

Ce produit peut vous exposer à des agents 

chimiques, y com-pris formaldéhyde, identifiés par l’État de Californie 

comme pouvant causer le cancer, et le monoxyde de carbone, reconnu 

par l’État de Californie comme pouvant causer des malformations con-

génitales ou autres effets nocifs sur la reproduction. Pour de plus maples 

in-formations, prière de consulter  

WWW.P65WARNINGS.CA.GOV

Содержание CS0590GS

Страница 1: ... RESTRICTIONS ET LES EXIGENCES D INSPECTION EN VIGUEUR DANS VOTRE RÉGION ASSEMBLY OPERATION ASSEMBLAGE ET FONCTIONNEMENT COUNTRYSMOKERS COM FOR OUTDOOR AND HOUSEHOLD USE ONLY NOT FOR COMMERCIAL USE FUEL AND ACCESSORIES NOT INCLUDED RÉSERVÉ À L USAGE EXTÉRIEUR ET RÉSIDENTIEL UNIQUEMENT NON DESTINÉ À UN USAGE COMMERCIAL COMBUSTIBLE ET ACCESSOIRES NON INCLUS CS0590GS PORTABLE GAS GRIDDLE IMPORTANT RE...

Страница 2: ...ermits mission or information on any installation restrictions such as any unit being installed on a combustible surface inspection requirements or even ability to use in your area 1 A minimum clearance of 1270mm 50 inches from combustible constructions to the sides of the griddle and 1270mm 50 inches from the back of the griddle to combustible constructions must be maintained Do not use this appl...

Страница 3: ...he sun etc can cause LP gas to be released since the temperature increase causes gas to expand Gas released from the cylinder is flammable and can be explosive 2 Do not use an LP gas cylinder if it has a damaged valve or shows signs of dents gouges bulges fire damage corrosion leakage excessive rust or other forms of visual external damage it may be hazardous and should be checked immediately by a...

Страница 4: ...Collapsing For Storage 14 Care Maintenance 15 Tips Techniques 16 Troubleshooting 17 Replacement Parts 18 Warranty 18 SAFETY LISTING In accordance with the procedures and specifications listed in the ANS Z21 89 2017 CSA 1 18 2017 Outdoor Cooking Specialty Gas Appliance Country Smokers cooking appliances have been independently tested and listed by CSA an accredited testing laboratory to CSA standar...

Страница 5: ...5 Left Cart Leg Front x1 6 Left Cart Leg Back x1 7 Right Cart Leg Front x1 8 Right Cart Leg Back x1 9 Cart Leg Bracket x3 10 Cart Leg Bracket Front Right x1 11 Regulator Hose Hook x1 A Screw x8 B Washer x8 C Nut x8 D Long Screw x8 E Long Screw x4 F Nut x5 G Screw x5 H Washer x4 Screwdriver x1 Wrench x1 NOTE Due to ongoing product development parts are subject to change without notice Contact Custo...

Страница 6: ...led Once all screws have been installed then tighten them securely 1 MOUNTING THE CART LEG BRACKETS Parts Required 1 x Firebox 1 3 x Cart Leg Bracket 9 1 x Cart Leg Bracket Front Right 10 8 x Screw A Installation Place a piece of cardboard on the floor to prevent scratching the unit and parts during assembly Spread out all parts Flip the Firebox so it is on its side control knobs up or upside down...

Страница 7: ...nd fully tighten all hardware Be careful not to over tighten as that could damage or strip threads 3 ATTACHING THE FIREBOX HANDLES Parts Required 2 x Firebox Handle 2 4 x Screw G 4 x Washer H Installation With the unit remaining upside down attach the Firebox Handle to the side panel of the Firebox using two screws and washers Repeat the same installation of the other Firebox Handle on the opposin...

Страница 8: ... Installation Hang the Grease Cup onto the small hook under the left side of the front panel Ensure it is level to avoid grease spills The unit is now completely assembled 4 Flip and put the BBQ into standing position as shown below Hang the oil drum 8 onto the oil drum hook as shown Secure the legs by tightening the pre installed wing nut To attach the regulator to the gas cylinder it is tightene...

Страница 9: ...alled The outdoor unit when installed must be electrically grounded in accordance with local codes or in the absence of local codes with the National Electrical Code ANSI NFPA 70 or Canadian Electrical Code CSA C22 1 1 Do not store a spare LP gas tank under or near this appliance 2 Never fill the tank beyond 80 percent full 3 If the information in 1 and 2 is not followed exactly a fire causing dea...

Страница 10: ...ors During the winter move your griddle to an area that is out of the wind and direct cold Check local bylaws regarding the proximity of your griddle in relation to your home and or other structures Put everything you need on a tray bundle up tight and get it done To help keep track of the outside temperature place an outdoor thermometer close to your cooking area Keep a log or history of what you...

Страница 11: ...the regulator value is turned to the OFF position and that the gas cylinder is tightened securely to the regulator IMPORTANT Ensure there is no open flame or smokers nearby 2 Mix a solution of one part of water with one part of dish washing liquid in a bowl The solution will make bubble as it will be concentrated 3 Use a paint brush to apply the solution onto the seal arease between the regulator ...

Страница 12: ...es and repeat lighting procedure If the above points do not work follow Manual Lighting Procedure instructions 5 After the burner has caught fire you are ready to enjoy your griddle at your desired temperature If the burner goes out during operation turn the control knobs to the OFF position Wait five minutes before attempting to relight to allow any accumulated gas to dissipate IGNITER FAILURE PR...

Страница 13: ...burner has caught fire you are ready to enjoy your griddle at your desired temperature SHUTTING OFF YOUR GRIDDLE 1 When finished cooking turn LP gas tank valve to the CLOSED position and allow the regulator knob to pop out This safety feature locks the regulator knob to ensure that the gas is no longer flowing 2 Turn control knobs to the OFF position NOTE A poof sound is normal as the last of the ...

Страница 14: ...instructions in reverse or the following summary IMPORTANT Ensure the griddle is disconnected from the gas supply turned OFF and completely cooled before collapsing for storage or travel 1 First remove and empty the Grease Cup Set aside NOTE There is no storage location directly on the collapsed unit for the Grease Cup Take care not to lose this part as it is needed for proper operation of the uni...

Страница 15: ...e factory but it is important to clean and season your griddle after each use to prevent rust extend the life of your griddle and create a non stick cooking surface The seasoning of your griddle is a continuous process that must be repeated over the life of your griddle to ensure the best cooking experience and longest life for your griddle 1 Clean the griddle after each use using a spatula or scr...

Страница 16: ... meal preparation and after handling fresh meat fish and poultry 2 COOKING PREPARATION Be prepared or Mise en Place This refers to preparing the cooking recipe fuel accessories utensils and all ingredients you require are nearby before you start cooking Also read the entire recipe start to finish before lighting the unit A BBQ floor mat is very useful Due to food handling accidents and cooking spa...

Страница 17: ...rom wind or increase flame height Low heat on HIGH Ports blocked Clear ports of any obstructions Follow Care and Maintenance instructions Gas tank empty Refill the gas tank Gas Leakage Improper Installation Turn the regulator knob to the OFF position and allow the regulator knob to pop out Remove the gas cylinder Re install and tighten Perform leak test to ensure proper seal Replace gas cylinder i...

Страница 18: ...or replacement of any part does not extend past the limited warranty beyond the one 1 year from date of purchase During the term of the warranty Dansons obligation shall be limited to furnishing a replacement for defective and or failed components As long as it is within the warranty period Dansons will not charge for repair or replacement for parts returned freight prepaid if the part s are found...

Страница 19: ...or any special indirect consequential or other damages of any nature whatsoever in excess of the original purchase of this product All warranties by manufacturer are set forth herein and no claim shall be made against manufacturer on any warranty or representation Some states do not allow the exclusion or limitation of incidental or consequential damages or limitations of implied warranties so the...

Страница 20: ...cette capacité Vous devez contacter les autorités locales compétentes afin d obtenir les permis mandats ou informations nécessaires concernant toute restriction d installation par exemple pour un gril installé sur une surface combustible les exigences en matière d inspection ou même la possibilité d utilisation dans votre région 1 Vous devez respecter un espace minimum de 1 270 mm 50 pouces entre ...

Страница 21: ...nité Ne pas essayer de faire fonctionner votre gril à l aide d autres types de gaz Ne pas essayer de convertir cette unité au GPL afin qu elle fonctionne avec du gaz naturel Le non respect de cet avertissement pourrait entraîner un risque d incendie et des dommages corporels et annulera votre garantie AVERTISSEMENTS EN MATIÈRE DE GAZ PROPANE 1 Veillez à ce que la bonbonne de gaz soit achetée chez ...

Страница 22: ...roximité de l appareil L empoisonnement au monoxyde de carbone pouvant facilement être confondu avec un rhume ou une grippe est souvent détecté trop tard La consommation d alcool de drogue et de médicaments augmente les effets de l empoisonnement au monoxyde de carbone Le monoxyde de carbone est particulièrement toxique pour les mères et leur bébé pendant la grossesse pour les nouveau nés les pers...

Страница 23: ...hariot gauche avant x1 6 Jambe du chariot gauche arrière x1 7 Jambe du chariot droite avant x1 8 Jambe du chariot droite arrière x1 9 Support pour jambe de chariot x3 10 Support pour jambe de chariot avant droite x1 11 Crochet de tuyau de régulateur x1 A Vis x8 B Rondelle x8 C Écrou x8 D Vis longue x8 E Vis longue x4 F Écrou x5 G Vis x5 H Rondelle x4 Tournevis x1 Clé x1 REMARQUE En raison du dével...

Страница 24: ...tes les vis de cette étape aient été installées 1 MONTAGE DES SUPPORTS DE JAMBES Pièces nécessaires 1 x Chambre de combustion 1 3 x Support pour jambe de chariot 9 1 x Support pour jambe de chariot avant droite 10 8 x Vis A Installation Placez un morceau de carton sur le sol pour éviter de rayer l unité et les pièces lors de l assemblage Etalez toutes les pièces Retournez le chambre de combustion ...

Страница 25: ...pièces du chariot sont assemblées revenez en arrière et serrez complètement tout le matériel Veillez à ne pas trop serrer car cela pourrait endommager ou dénuder les fils 3 FIXATION DES POIGNÉES DU CHAMBRE DE COMBUSTION Pièces nécessaires 2 x Poignée du chambre de combustion 2 4 x Vis G 4 x Rondelle H Installation Avec l unité restante à l envers fixez la poignée du chambre de combustion au pannea...

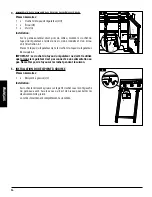
Страница 26: ...ENT À GRAISSE Pièces nécessaires 1 x Récipient à graisse 3 Installation Accrochez le récipient à graisse sur le petit crochet sous le côté gauche du panneau avant Assurez vous qu il est de niveau pour éviter les déversements de graisse L unité est maintenant complètement assemblée 4 Flip and put the BBQ into standing position as shown below Hang the oil drum 8 onto the oil drum hook as shown Secur...

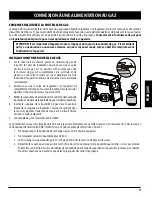
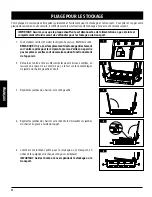
Страница 27: ...uton dans le sens des aiguilles d une montre jusqu à la position OFF 3 Retirez les capuchons de protection de l ouverture de la vanne de régulation et du haut de la bouteille de gaz Gardez les bouchons 4 Insérez la soupape de la bouteille de gaz dans l ouverture filetée de la soupape du régulateur Tournez le cylindre dans le sens des aiguilles d une montre jusqu à ce qu il soit ferme Serrez à la m...

Страница 28: ...Cela sera utile plus tard pour vous aider à déterminer ce qu il faut cuisiner et combien de temps cela prendra Ayez un plateau chauffé ou un couvercle de plat prêt à garder votre nourriture au chaud tout en faisant le voyage à l intérieur 3 CUISINER PAR TEMPS CHAUD À mesure qu il fait plus chaud à l extérieur le temps de cuisson diminue Suivez ces suggestions sur la façon de profiter de votre gril...

Страница 29: ... du régulateur soit à la position OFF et que le cylindre de gaz soit bien serré au régulateur IMPORTANT Veillez à ce qu il n y ait aucune flamme ouverte ou fumoir à proximité 2 Mélangez une solution d une mesure d eau avec une mesure de liquide à vaisselle dans un bol La solution créera des bulles car elle sera concentrée 3 Utilisez un pinceau pour appliquer la solution sur le joint entre le régul...

Страница 30: ...es tournez le bouton de commande sur ARRÊT attendez cinq minutes et répétez la procédure d allumage Si les points ci dessus ne fonctionnent pas suivez les instructions de la procédure d allumage manuel 5 Une fois que le brûleur a pris feu vous êtes prêt à profiter de votre plaque de cuisson à la température désirée Si le brûleur s éteint en cours de fonctionnement tournez les boutons de commande e...

Страница 31: ...ur a pris feu vous êtes prêt à profiter de votre plaque de cuisson à la température désirée ÉTEINDRE VOTRE PLAQUE DE CUISSON 1 Une fois la cuisson terminée tournez la vanne du réservoir de gaz de pétrole liquéfié en position fermée et laissez le bouton du régulateur sortir Ce dispositif de sécurité verrouille le bouton du régulateur pour s assurer que le gaz ne s écoule plus 2 Tourné les boutons d...

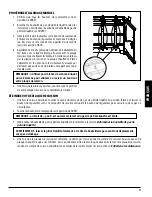
Страница 32: ...tions de montage à l envers ou le résumé suivant IMPORTANT Assurez vous que la plaque chauffante est déconnectée de l alimentation en gaz éteinte et complètement refroidie avant de s effondrer pour le stockage ou le transport 1 Tout d abord retirez et videz le récipient à graisse Mettre de côté REMARQUE Iln yapasd emplacementdestockagedirectement sur l unité repliée pour le récipient à graisse Vei...

Страница 33: ...s du brûleur pour augmenter le débit d air 2 SURFACE DU PLAQUE DE CUISSON Votreplaquedecuissonestpré assaisonnéeenusine maisilestimportantdelanettoyeretdel assaisonneraprès chaque utilisation pour éviter la rouille prolonger sa durée de vie et créer une surface de cuisson antiadhésive L assaisonnement de votre plaque de cuisson est un processus continu qui doit être répété pendant toute la durée d...

Страница 34: ...ez besoin près du gril avant de débuter la cuisson Lisez également toute la recette avant d allumer le gril Un tapis de protection pour barbecue est très utile Étant donné les risques d éclaboussures et d accidents en manipulant de la nourriture un tapis protège les terrasses patios ou plateformes en pierre contre les taches de graisse ou les renversements accidentels 3 ASTUCES ET TECHNIQUES DE CU...

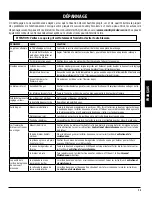
Страница 35: ... flamme Faible chaleur avec le réglage HIGH Les orifices sont obstrués Nettoyez les orifices des obstructions La bouteille de gaz est vide Remplissez la bouteille de gaz Fuite de gaz Mauvaise installation Tournez le bouton du régulateur à la position OFF Arrêt et laissez le bouton s éjecter Enlevez la bonbonne de gaz Installez à nouveau et serrez Effectuez un essai d étanchéité afin de garantir le...

Страница 36: ...e révèlent défectueuses après inspection Dansons ne sera pas tenu responsable des frais de transport du coût salarial ou des droits d exportation Sauf disposition contraire dans ces conditions de garantie la réparation ou le remplacement des pièces de la façon et pour la durée fixée ci dessous remplira le devoir de toutes les responsabilités et obligations directes et dérivées de Dansons envers vo...

Страница 37: ...e quelque nature que ce soit en surplus du prix d achat original de ce produit Toutes les garanties du fabricant sont énoncées ici et aucune réclamation ne sera effectuée contre le fabricant par le biais d une garantie ou de représentation Certaines provinces n autorisent pas l exclusion ou la limitation des dommages accidentels ou consécutifs ou les limitations des garanties implicites de sorte q...

Страница 38: ......

Страница 39: ......

Страница 40: ...877 942 2246 service countrysmokers com 602220628UMV 2022 DANSONS WARNING This product can expose you to chemicals including formaldehyde which is known to the State of California to cause cancer and carbon monoxide which is known to the State of California to cause birth defects or other reproductive harm For more information go to WWW P65WARNINGS CA GOV AVERTISSEMENT Ce produit peut vous exposer...

Отзывы: