background image

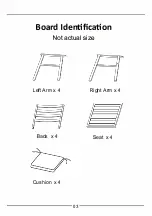
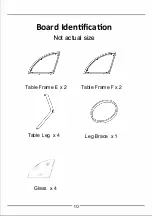
Board Identification 

Not actual size 

Table Frame E x 2 

Table Frame F x 2 

Table Leg  x 4 

Leg Brace  x 1 

-

----, 

�4'I 

I

Glass  x 4 

10 

Содержание HW64411

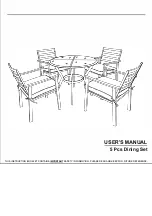
Страница 1: ...USER S MANUAL 5 Pcs Dining Set THIS INSTRUCTION BOOKLET CONTAINS IMPORTANT SAFETY INFORMATION PLEASE READ AND KEEP FOR FUTURE REFERENCE ...

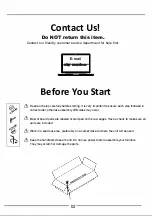
Страница 2: ...ant to ensure each step followed in correct order otherwise assembly difficulties may occur 心 Most of board parts are labeled or stamped on the raw edges Have a check to make sure all parts are included 心 Work in a spacious area preferably on a carpet close to where the unit will be used 心 Keep the handtools close at hand Do not use power tools to assemble your furniture They may scratch or damage...

Страница 3: ...Board Identification Not actual size Left Arm x4 Right Arm x4 Back x4 Seat x4 Cushion x4 03 ...

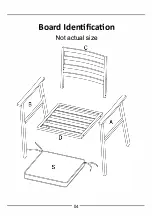
Страница 4: ...Board Identification Not actual size 04 ...

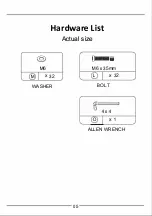
Страница 5: ... M6 Hardware List Actual size 一圈 M6x35mm X 32 0 X 32 WASHER BOLT I 4x4 I X 1 ALLEN WRENCH 05 ...

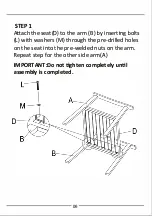
Страница 6: ...the arm B by inserting bolts L with washers M through the pre drilled holes on the seat into the pre welded nuts on the arm Repeat step for the other side arm A IMPORTANT Do not tighten completely until assembly is completed D 06 ...

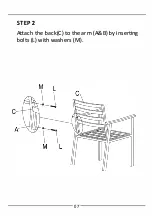
Страница 7: ...STEP 2 Attach the back C to the arm A B by inserting bolts L with washers M M c 07 ...

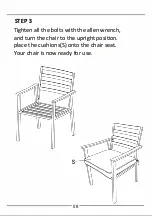
Страница 8: ...STEP 3 Tighten all the bolts with the allen wrench and turn the chair to the upright position place the cushions S onto the chair seat Your chair is now ready for use s 08 ...

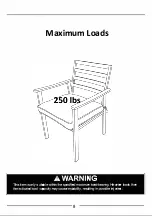
Страница 9: ...Maximum Loads I 二总i i 竺竺型产 古 _loads than I 9 ...

Страница 10: ...Board Identification Not actual size Table Frame E x 2 Table Frame F x 2 Table Leg x 4 Leg Brace x 1 I 4 I 二I Glass x 4 10 ...

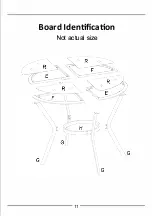
Страница 11: ...Board Identification Not actual size G G 11 ...

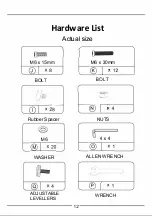
Страница 12: ...Hardware List Actual size 但 I I 0 M6x 15mm M6x30mm 丁了五 BOLT BOLT 二rl 厂 4 Rubber Spacer NUTS M6 WASHER 勺 4x4 笾 ALLEN WRENCH 丿 pa 一 3 ADJUSTABLE LEVELLERS I x 1 WRENCH 12 ...

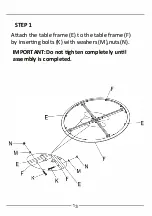
Страница 13: ...STEP 1 Attach the table frame E to the table frame F by inserting bolts K with washers M nuts N IMPORTANT Do not tighten completely until assembly is completed F N M E F E F N E 13 ...

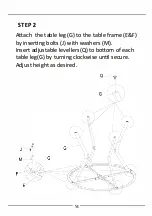
Страница 14: ...h the table leg G to the table frame E F by inserting bolts with washers M Insert adjustable levellers Q to bottom of each table leg G by turning clockwise until secure Adjust height as desired Q 一千 G 爷 固 寄 J M 14 ...

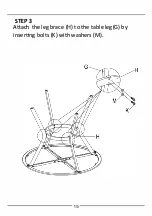
Страница 15: ...STEP 3 Attach the leg brace H to the table leg G by inserting bolts K with washers M 15 ...

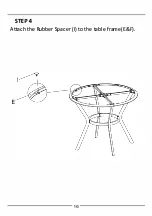
Страница 16: ...STEP4 Attach the Rubber Spacer I to the table frame E F E 16 ...

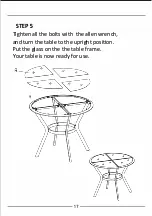
Страница 17: ...STEP 5 Tighten all the bolts with the allen wrench and turn the table to the upright position Put the glass on the the table frame Your table is now ready for use 17 ...

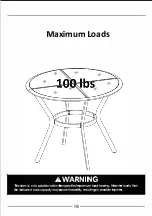
Страница 18: ...Maximum Loads I 二 二 已 t 竺 竺竺仁 古 loads thae 18 ...

Страница 19: ...ry Should Using 江 Never use 已 兰 王 一 拜气目目 n 芯今主已 古 三 any area finish a ir n __ __ 譬 三一 S _ _ _ _ __ 矗 一 已 P l _ cloth 一 自 否 C l 一 一 m u 一 一 气 and if ut 可ease use 兰琵勹户二 主它 surface 墨 护气兰弓 宁 丘气 一二已二三已 已己主 exposecl Proper care life of purchase as it ages 19 ...

Отзывы: