


Installation Manual
10
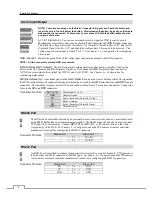
DISPLAY/SPOT Button
Pressing the
DISPLAY/SPOT
button toggles between different display formats. The available formats are: PIP, 2x2,
1+5, 1+7, 3x3 and 4x4 (2x2, 1+5, 1+7, 3x3 and 4x4 on a Spot Monitor).
Pressing and holding the button for three seconds or longer allows you to select which cameras will display on the Spot
monitor.
GROUP/SEQUENCE Button
When in the live mode, pressing the
GROUP/SEQUENCE
button changes the screen from the current camera group
to the next camera group, and the screen displays the page number. Pressing and holding the button for three seconds
or longer displays live channels sequentially.
CLIP COPY Button
Pressing the
CLIP COPY
button allows you to copy video clips.
ALARM Button
The
ALARM
button has two functions. First, it will reset the DVR’s outputs including the internal buzzer during an
alarm. Second, it will display the event log when you are in the live monitoring mode unless there is an active alarm.
This operation can be user password protected.
PANIC Button
Pressing the
PANIC
button starts panic recoding of all camera channels, and displays on the screen. Pressing the
button again will stop panic recording.
USB Port
Two USB ports on the front panel are provided to connect external hard disk or flash drives for video clip copying or
system upgrades. Position external drives close enough to the DVR so that you can make the cable connections, usually
less than 6 feet. Use the USB cable provided with the hard disk drive to connect it to the DVR.
A USB mouse (not supplied) can be connected to one of the ports. You can use the mouse to navigate through the
screens and menus much like you would on a computer.
A PostScript™ USB printer (not supplied) can be connected to one of the ports. You can print selected images resulting
from a search.
A USB to Serial converter can be connected to the USB port. Multiple text-in devices can be used with a USB to Serial
converter.
ID Button on Remote Control
If a DVR System ID is set to 0, the infrared remote control will control that DVR without any additional operations.
(Refer to the
System
–
General
setup screen in this chapter for further information on setting the System ID.) If the
system ID is 1 to 16, you must to press the
ID
button on the remote control and then press the number button (1 to 16)
in order to control that DVR. If the System ID of two or more DVRs is set to 0, those DVRs will react to the infrared
remote control at the same time.
Bookmark Button on Remote Control
When in the playback mode, pressing the
BOOKMARK
button adds the current playback point to the bookmark list or
moves to the registered bookmark point.