14
2.2 Connection
• Connecting to the RJ-45
Connect a standard RJ-45 cable to the network port of the network dome camera. Generally a
cross-over cable is used for directly connection to PC, while a direct cable is used for connection
to a hub.
• Connecting Alarms
AI(Alarm In) :
You can use external devices to signal the dome camera to react on events. Mechanical or
electrical switches can be wired to the AI (Alarm In) and G (Ground) connectors.
G(Ground) :
Connect the ground side of the alarm input and/or alarm output to the G (Ground) connector.
AO(Alarm Out) :
The dome camera can activate external devices such as buzzers or lights. Connect the device to
the AO (Alarm Out) and G (Ground) connectors.
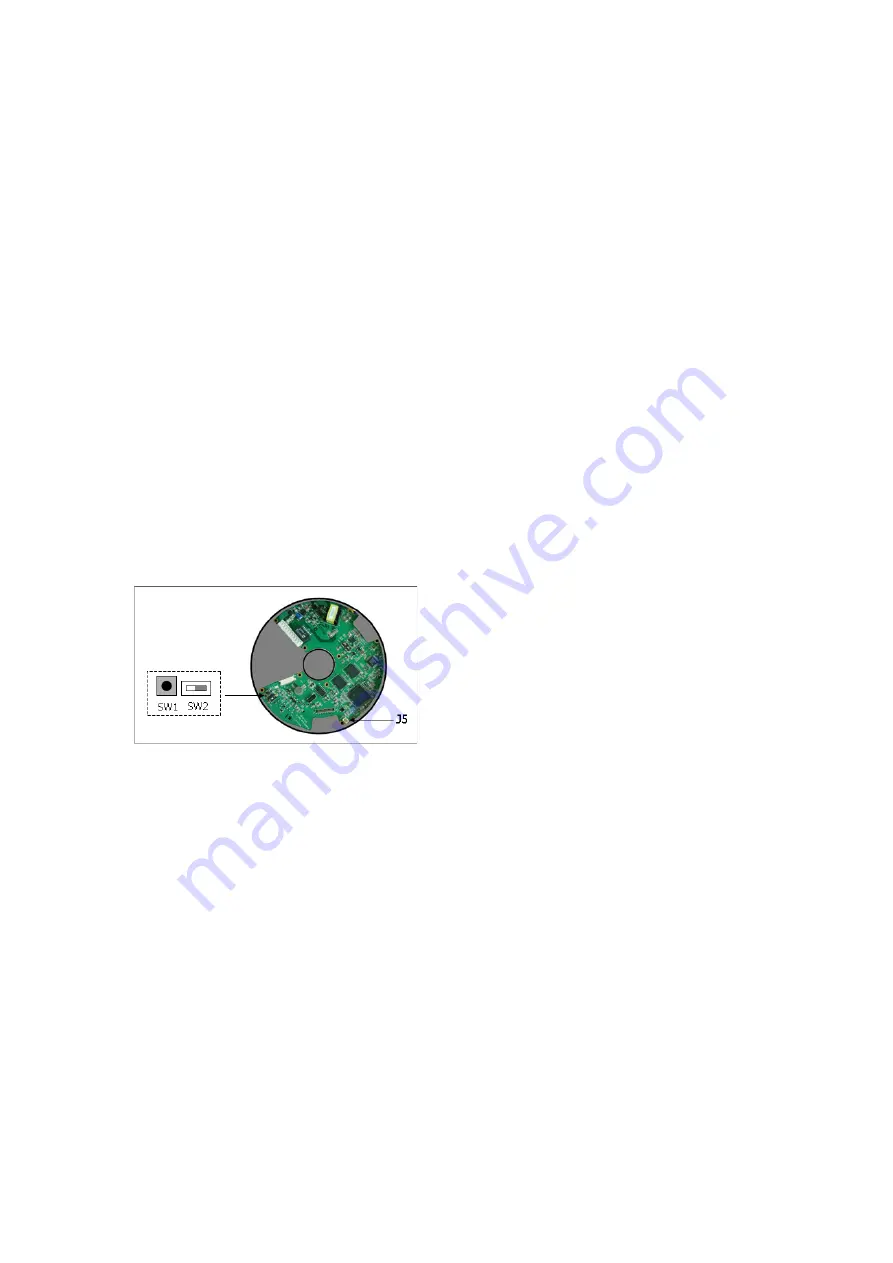
• Connecting Video Output
Video Output is used for an easy zoom and focus
control when installing lens. Set Video Switch (SW2
on the board) to On position to output the video
signal. Video Output is restricted to VGA(640x480)
resolution.
Connect your Video cable unit to J5 on the board.
Caution: After lens installation, you must set Video Switch to Off position to provide the best
performance of the Network Camera.
• Connecting the Power
Connect the power of DC12V 330mA for the network camera. Connect the po) pole to the
‘+’ position and the negative(-) pole to the ‘-‘ position.
2.3 Network Connection and IP assignment
The Network Camera supports the operation through the network. When a camera is first connected
to the network it has no IP address. So, it is necessary to allocate an IP address to the device with the
“Smart Manager” utility on the CD.
1. Connect the Network Camera / device to the network and power up.


